
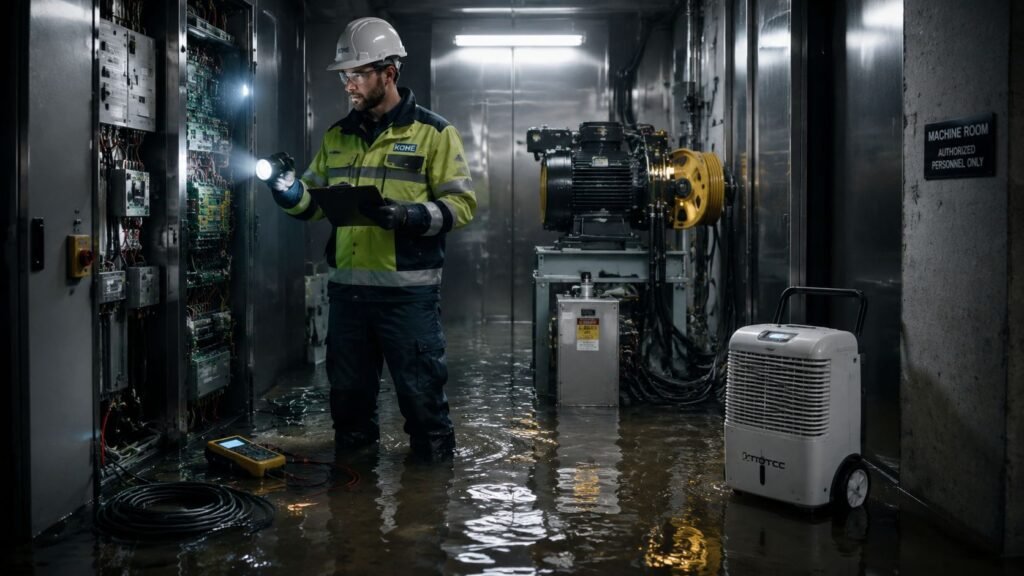
It's usually the same call. A tenant reports water near the elevator landing. A night engineer hears the sump alarm. A maintenance supervisor opens the hoistway door and sees moisture in the pit, or worse, standing water around equipment that should never be wet. At that point, the problem isn't just a disabled car. It's a safety event, a repair event, and very often an insurance event.
Elevator water damage repair goes wrong when people treat it like ordinary cleanup. It isn't. The first hours matter because every decision changes the final repair scope, the outage length, and whether the claim file supports reimbursement or invites a denial. If you manage a commercial property, a school, a municipal building, a medical office, or a multifamily property in Southern Michigan, the right response starts with control. Secure the elevator. Preserve evidence. Then inspect in a way that tells you what's salvageable.
The High Stakes of Water in Your Hoistway
A flooded pit rarely stays a pit problem.
Water reaches the lowest point in the hoistway first, but the consequences travel upward through the whole system. Hydraulic components corrode. Door equipment starts acting erratic. Control gear can fail immediately or fail later, after someone assumes the unit “dried out” and puts it back in service. Older buildings are especially vulnerable because many were built before modern waterproofing details became standard, and a lot of them still depend on aging drains, tired sealants, or no meaningful pit protection at all.
What building managers usually see first
The first visible sign is often small. A wet pit floor. A tripped fault. Intermittent door issues. A musty machine room. Then the hidden damage starts to show itself. Corrosion on terminals, contamination on moving parts, and moisture migration into electrical spaces all widen the repair list.
A documented case from Canadian Apartment Magazine found that over 60% of elevator pit water damage incidents in multi-family residential buildings were tied to inadequate foundation waterproofing or failed exterior drainage, with repair costs ranging from $15,000 to $75,000 per event. In one Toronto high-rise, a plumbing leak led to a $52,000 repair bill and an 11-day shutdown after the pit flooded and damaged hydraulic and control components.
That pattern isn't unusual. Industry reporting notes that elevator water damage claims make up approximately 8% of all commercial property water loss claims, with an average claim value of $38,500 in the United States as of 2023 according to Crane Elevator's overview of elevator water damage risk.
The cost isn't only the invoice
When an elevator is down, the building feels it immediately.
- Tenant disruption: Residents, staff, patients, and visitors lose access.
- Operational strain: Deliveries, ADA access, patient movement, and maintenance routes all get harder.
- Decision pressure: Managers feel pushed to restore service before the system has been properly assessed.
Practical rule: If water touched elevator equipment, assume the event is larger than what you can see from the landing.
If you're dealing with a pit incident right now, this practical Michigan guide to a flooded elevator pit gives useful local context on what building owners need to watch for.
Immediate Response and Safety Protocols
The first half hour is about life safety and scene control. Not troubleshooting. Not testing. Not deciding what parts need to be ordered.
Water changes the risk profile fast. CPWR analysis of Bureau of Labor Statistics data shows that 31 people are killed annually in elevator-related incidents in the United States, and half of those deaths involve workers installing, repairing, or maintaining elevators, where water damage can increase electrocution risk, as summarized in this Crane Elevator industry safety reference.
The first 30 minutes
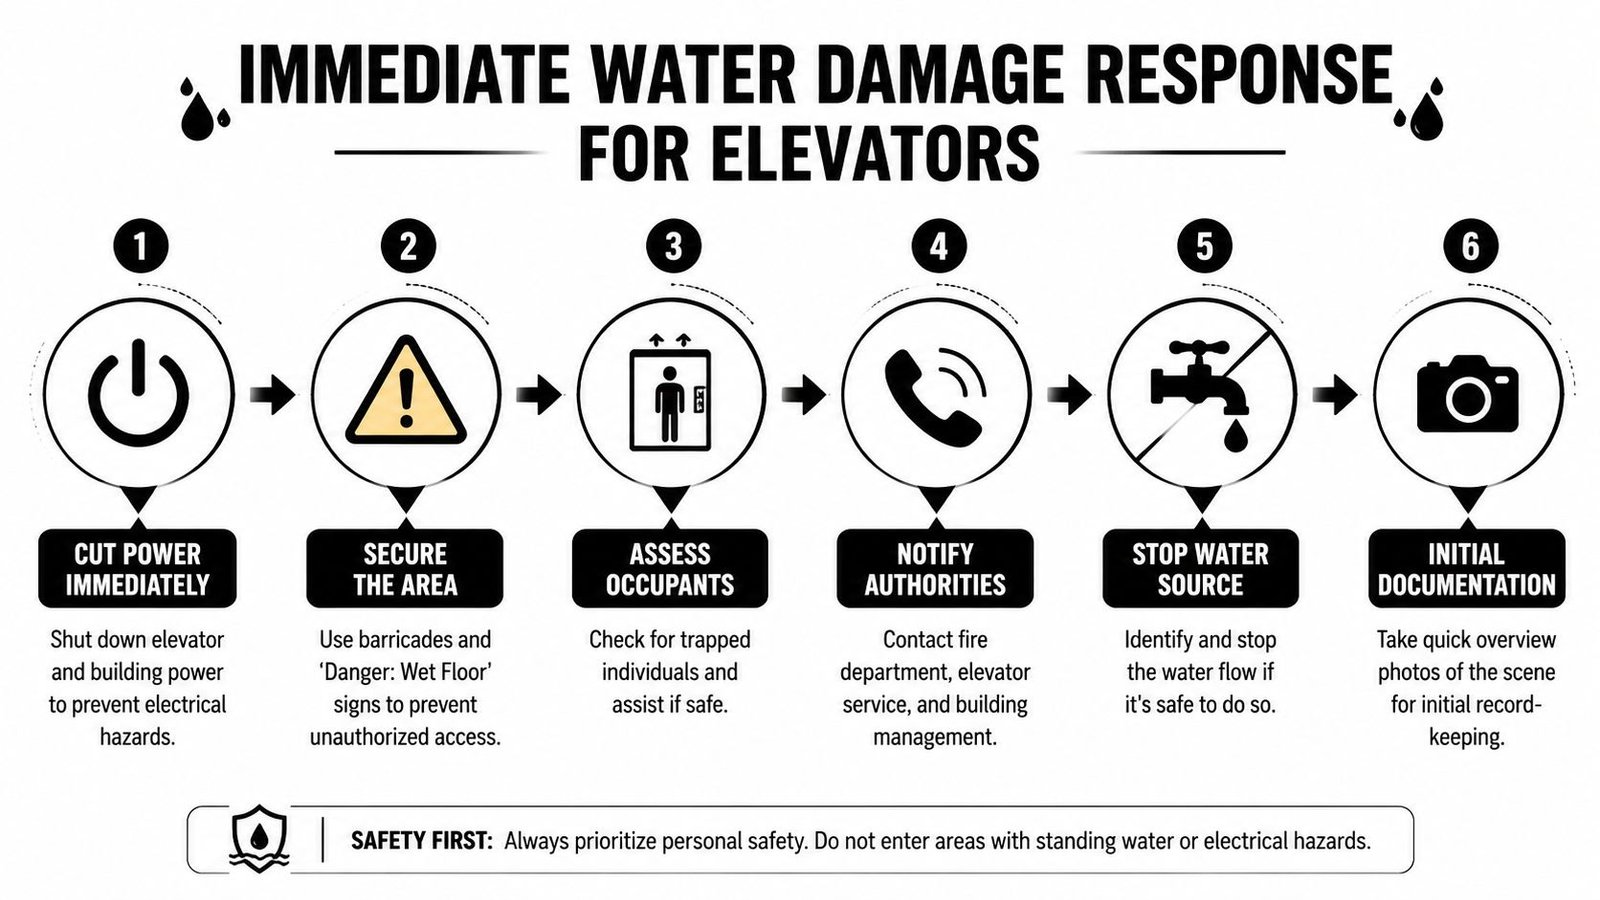
Start with control measures in this order:
Take the elevator out of service
Keep passengers away from the affected unit. If the car is occupied, use your emergency communication process and involve trained responders if needed. Don't improvise a rescue.
Disconnect power through qualified personnel
The system must be fully de-energized before anyone starts looking into the shaft, pit, controller, or machine space. This is not optional. A qualified electrician should handle disconnect and lockout procedures.
Secure every affected landing
Use barricades, cones, caution tape, and clear signage. People see one open hallway and assume the unit is usable. Don't leave room for assumptions.
Control the water source if it's safe
If the cause is a leaking domestic line, roof drain issue, condensate overflow, or nearby mechanical failure, isolate it only if doing so doesn't put staff at risk.
Notify the right parties early
Building management, elevator service, your electrician, and if necessary the fire department or emergency responders all need accurate information fast.
Create initial visual records
Take overview photos before cleanup changes the scene. Get the landing, sill, pit condition if visible, machine room access area, and any obvious leak source.
What not to do
The worst first move is often made with good intentions.
Don't turn the elevator back on “just to see if it works.” That can turn a contained moisture event into a larger electrical and mechanical failure.
Don't send in-house staff into the pit unless they're qualified, authorized, and the system is properly locked out. Don't let janitorial crews mop around the hoistway and assume they've solved the issue. Don't use portable heaters, hair dryers, or direct heat on components. Uncontrolled drying methods can damage internals and complicate both repair assessment and claim documentation.
Keep the response disciplined
A good emergency response call should be short and precise.
- State the unit location: Building, bank, and car designation.
- Describe the water condition: Dampness, active leak, or standing water.
- Confirm shutdown status: Whether the elevator has been removed from service and de-energized.
- Report occupant status: Whether anyone is trapped or was recently in the car.
- Identify likely source: Roof, plumbing, groundwater, sprinkler, condensate, or unknown.
If your team needs immediate service support, use a dedicated emergency elevator service contact rather than routing the problem through general maintenance channels.
A Systematic Inspection Checklist for Assessment
Once the area is safe and the elevator is locked out, inspection needs to move top down. That keeps the process organized and helps separate the source of water from the places where damage collected.
Start with the spaces that reveal entry points and electrical exposure. End in the pit, where damage tends to be most obvious but not always most informative.
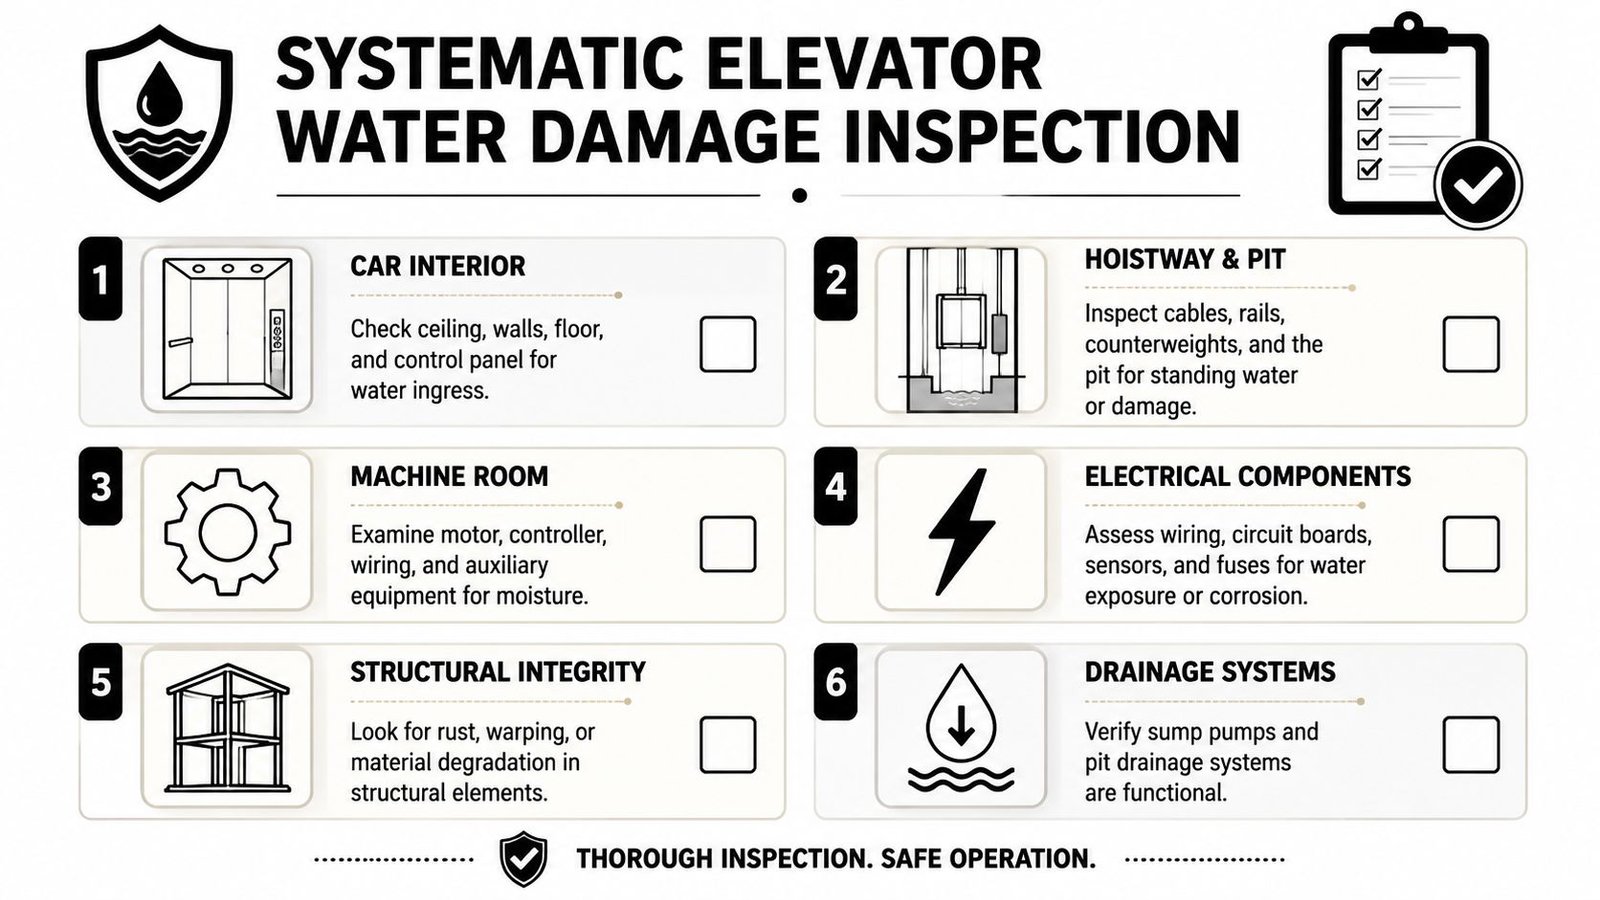
Machine room or hydraulic power unit area
For hydraulic elevators, the layout matters before you even inspect components. Best practice is that the machine room or power unit should be on the topmost floor or designed to be watertight, because placing the power unit in the shaft or on lower floors increases flood exposure, as noted in ACCT Elevator's post-flood inspection guidance.
Look for:
- Controller exposure: Open the room only if it's safe and authorized. Check for moisture marks, staining, corrosion on terminals, and signs that water vapor or direct splash reached the cabinet.
- Drive and relay condition: Water doesn't need to fully submerge electronics to damage them. Condensation and mist can be enough.
- Hydraulic power unit contamination: Inspect for water intrusion, oil contamination, and compromised seals.
- Ceiling and wall evidence: Staining above the equipment often tells you more than the floor does.
A useful field habit is to inspect above and behind the obvious damage. Water often travels along conduit, wall penetrations, and piping before it drips where someone finally notices it.
Here's a quick visual primer before continuing:
Hoistway inspection
The hoistway tells you whether the problem stayed local or spread vertically.
Check these points in sequence:
- Rails and brackets: Surface rust may be visible early. Heavier corrosion, staining patterns, or mineral tracks suggest repeated intrusion rather than a one-time event.
- Traveling cables and fixed wiring: Look for wet jackets, staining, damaged insulation, and corrosion at terminations.
- Limit switches and sensors: These smaller devices often fail after exposure even when larger equipment appears normal.
- Landing entrances: Sill areas, door tracks, and interlock zones can hold moisture longer than expected.
Water follows gravity, but it also follows pathways. Conduit runs, wall cracks, pipe sleeves, and floor penetrations often tell you where the event started.
Car interior and top of car
Passengers judge the condition by what they can see, but the visible interior is only part of the story.
Inspect the car for:
- Ceiling panels and lighting trim: Water marks can indicate overhead entry.
- Cab operating panel condition: Any moisture around buttons, displays, or indicator windows matters.
- Flooring and subfloor: Swelling, curling, soft spots, or trapped moisture can point to deeper damage.
- Top-of-car equipment: If qualified personnel are involved, inspect top-of-car wiring, inspection station components, and door operator exposure.
The car doors deserve extra attention. Water-damaged doors may drag, misalign, or hesitate. Safe operation depends on smooth travel and consistent re-leveling. If the doors don't track cleanly after exposure, that's not a cosmetic issue.
Pit inspection
The pit is usually where the event declares itself.
Use a structured pit inspection checklist so nothing gets skipped. In practice, these are the items that matter most:
| Area | What to look for | Why it matters |
|---|---|---|
| Pit floor | Standing water, mud, oil sheen, residue lines | Shows water depth and possible contamination |
| Buffers and supports | Corrosion, impact area contamination | Safety components can't be assumed usable after exposure |
| Wiring and junctions | Wet conduit, corroded fittings, damaged insulation | Latent electrical faults often start here |
| Hydraulic components | Jack condition, seals, fittings, rust | Water exposure can create hidden hydraulic failures |
| Drainage equipment | Sump operation, discharge path, blocked drains | The next water event will repeat if drainage is still compromised |
Also inspect the concrete itself. Cracks, cold joints, and poorly sealed penetrations often explain recurring pit water better than the pump does.
Grading Damage Severity and Determining Next Steps
Not every water event requires the same response. What matters is where the water went, what it touched, and whether the source has been controlled.
A simple severity matrix keeps the next decision grounded in observed conditions instead of guesswork. Use it after the first safe inspection. If more than one observation applies, act on the highest severity level.
Elevator water damage severity matrix
| Observation | Severity Level | Recommended Action |
|---|---|---|
| Light dampness near landing entrance, no evidence water reached electrical or mechanical components | Minor | Keep unit out of service until a qualified technician confirms no component exposure. Document conditions and trace the water source before reopening. |
| Small amount of water in pit, no visible contact with wiring, controller, hydraulic equipment, or safety devices | Minor to Moderate | Remove water through proper means, investigate entry point, and schedule a professional inspection before returning the unit to service. |
| Standing water in pit with residue line near wiring, buffers, or hydraulic equipment | Moderate | Maintain shutdown. Dry the area under controlled conditions, inspect for corrosion, and expect component testing or replacement. |
| Active leak into hoistway, onto doors, traveling cable areas, or electrical spaces | Moderate to Critical | Keep all affected elevators secured and de-energized. Stop the source if safe, document continuously, and bring in elevator and electrical professionals immediately. |
| Moisture or corrosion inside controller, machine room equipment, door operators, or top-of-car electrical devices | Critical | Do not energize. Plan for detailed electrical assessment, possible replacement of damaged components, and extended outage. |
| Water immersion or clear contamination of hydraulic jack area, power unit, wiring, or safety circuits | Critical | Treat as a major repair event. Preserve evidence, involve insurer early, and require a full professional scope before any restart decision. |
How to use the matrix in real life
Minor conditions still deserve discipline. If the source hasn't been found, the elevator shouldn't go back into service just because the water is gone. Dry concrete and dry metal are not proof that the event is over.
Moderate damage is where managers often lose control of the job. Someone sees that the car still looks normal, and pressure builds to reopen. That's where hidden corrosion starts writing the next invoice.
Critical conditions are straightforward. Any water exposure involving controllers, safety circuits, significant pit flooding, or hydraulic equipment means the unit stays down until qualified professionals complete a proper assessment.
Trade-offs that matter
Three decisions usually shape the outcome:
- Fast restart versus reliable restart: A rushed reopening may shorten today's outage and lengthen next month's.
- Partial cleanup versus source correction: If the leak path remains, repair work won't hold.
- Visual dryness versus confirmed condition: Dry-looking equipment can still fail from corrosion or residue.
If your inspection notes leave room for debate, treat the event as the higher severity level until someone qualified proves otherwise.
Mastering Documentation for Insurance and Repairs
Poor documentation is expensive. It also creates a second problem after the water problem.
Industry experts estimate that 60% to 70% of commercial water damage claims involving complex systems like elevators face initial denial due to inadequate evidence of cause-and-effect, according to The Elevator Consultant's guidance on dealing with elevator water damage. That number should change how you think about the first day of the incident.
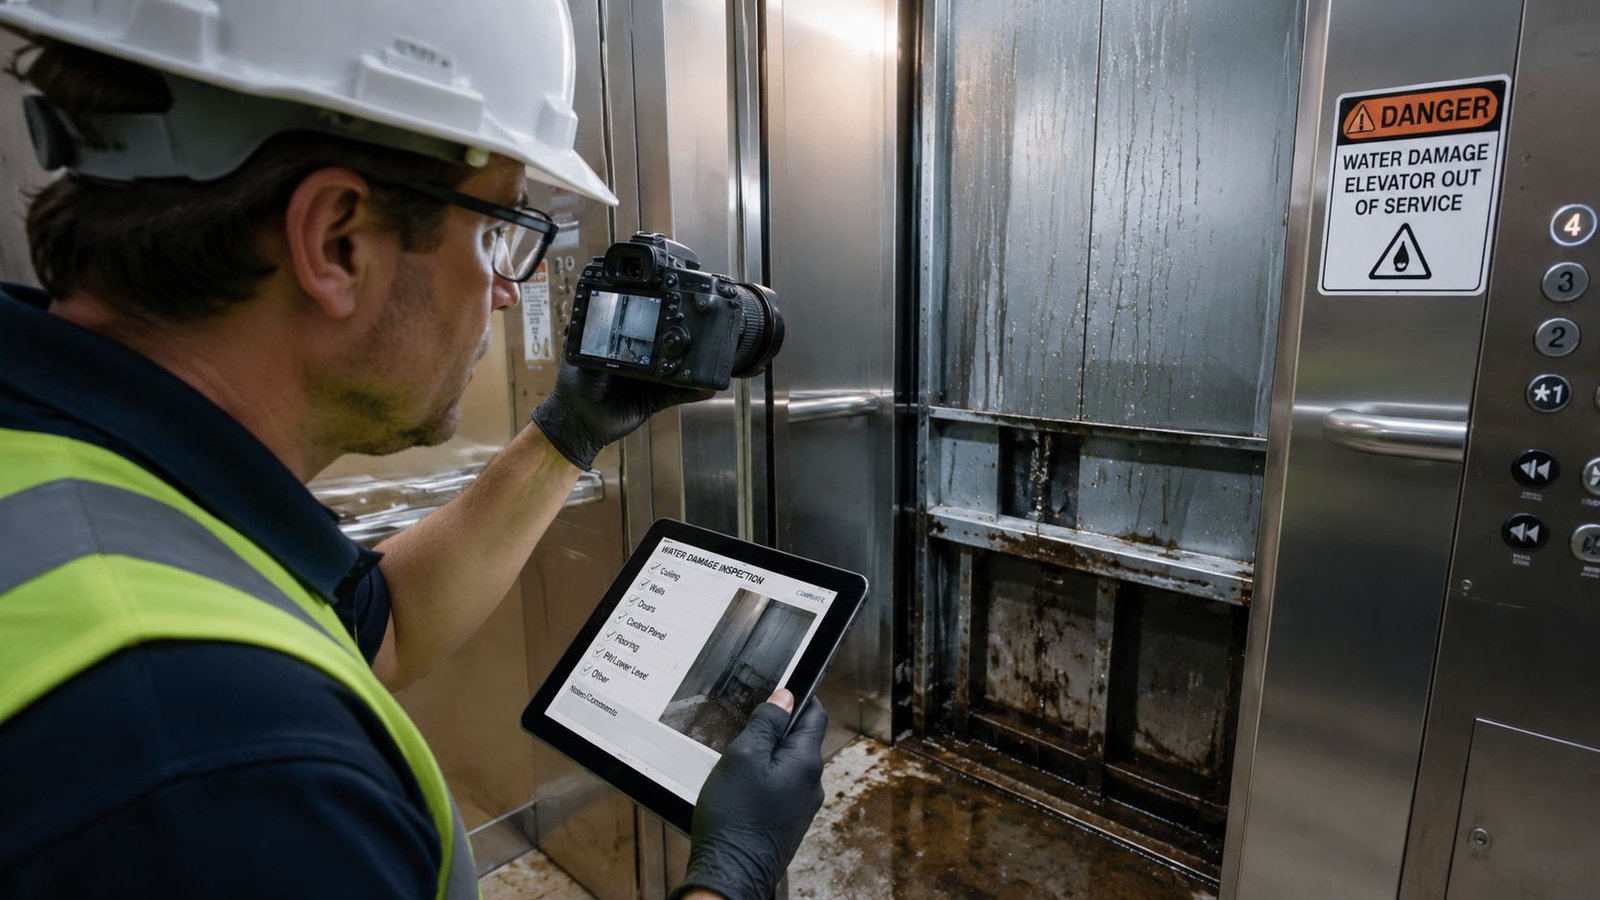
Build a forensic record before cleanup changes the scene
General water-loss documentation isn't enough for elevators. You need a record that ties the water event to the elevator condition in a way an adjuster, consultant, and repair team can all follow.
Capture these items before significant cleanup begins:
- Time-stamped overview photos: Show the landing, machine room access, hoistway entrance, pit condition if visible, and surrounding building area.
- Close-up damage images: Corrosion, residue lines, wet conduit, stained walls, compromised panels, and any damaged door equipment.
- Video of active conditions: Flowing water, dripping penetrations, audible leaks, sump activity, and water level in the pit.
- Event log: Record who found the issue, when it was discovered, when the elevator was shut down, who was notified, and what steps were taken.
- Source notes: Plumbing leak, roof intrusion, groundwater seepage, sprinkler discharge, condensate overflow, or unknown pending investigation.
What adjusters and consultants want to see
They need cause-and-effect, not a pile of disconnected images.
That means your record should answer four questions clearly:
| Question | What your file should show |
|---|---|
| Where did the water originate | Visual evidence of leak path or documented suspected source |
| What elevator components were exposed | Photos, technician notes, and location-specific observations |
| What was done immediately | Shutdown time, lockout steps, water control efforts, service calls |
| What changed after discovery | Drying actions, removal of water, worsening corrosion, added findings |
Document first, disturb second. Once water is pumped out and surfaces are wiped down, some of the strongest claim evidence is gone.
Avoid the approval mistake
One of the most costly errors is approving repair work too early, before the insurer or their representative has enough evidence to understand the scope. That can create disputes over causation, scope, or whether some damage was pre-existing.
A better sequence is simple:
- Secure and shut down the elevator.
- Photograph and video the scene thoroughly.
- Create a written incident timeline.
- Notify the carrier and relevant service parties.
- Get an independent technical assessment if the exposure is more than minor.
- Preserve damaged parts when possible until the claim path is clear.
Good documentation doesn't slow the repair. It protects the repair.
Common Mistakes and When to Call Crane Elevator
Most costly elevator water losses get worse because someone makes the wrong “common sense” move under pressure.
The most dangerous mistake is energizing the unit to check whether it still runs. A documented technical warning notes that turning an elevator back on after liquid exposure can cause short circuits and speed up corrosion, and using uncontrolled heat sources to dry components can cause permanent internal damage, as explained in FixFactor's liquid damage guidance.
Mistakes that increase damage
- Testing before assessment: If water touched equipment, don't power up to experiment. Preserve the condition for proper inspection.
- Drying with direct heat: Space heaters, hair dryers, and sun exposure aren't precision drying methods.
- Cleaning before documenting: Once residue lines and active leaks disappear, your claim file gets weaker.
- Fixing symptoms only: Pumping out the pit without finding the leak path means you'll likely see the same problem again.
- Letting multiple trades work without one record: Electricians, plumbers, and general maintenance all need one shared incident timeline.
Clear signs the job is beyond in-house handling
Call a professional elevator contractor immediately if any of these are true:
- Water reached the controller, machine room equipment, or safety circuits
- The pit held standing water near wiring, hydraulic equipment, or buffers
- The source of intrusion is still active or unknown
- Doors, leveling, or car operation were abnormal before shutdown
- There's visible corrosion, contaminated oil, or repeated water history
- Your insurer will need a defensible repair scope and damage record
The right response isn't just repairing what got wet. It's preventing latent failure, preserving claim support, and making sure the elevator returns to service safely.
If you need help with a flooded pit, water-exposed controls, shutdown guidance, or a defensible repair plan, contact Crane Elevator Company. Their team serves Lower Michigan with emergency response, repair expertise, inspections, and practical support for building owners who need to protect both safety and insurance recovery after an elevator water event.