
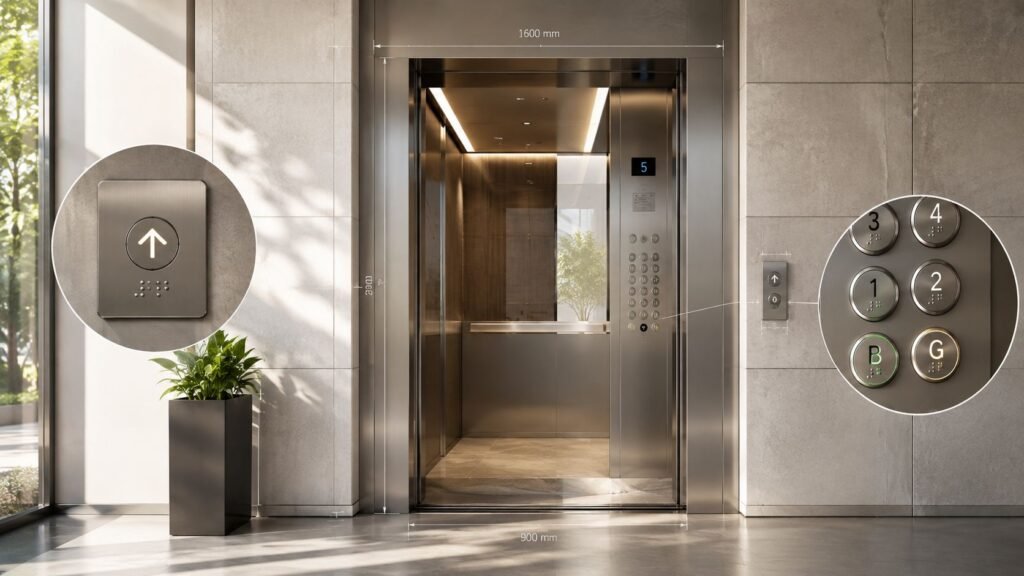
You usually don't start thinking about ADA requirements for elevators until something forces the issue. A tenant points out the call buttons are too high, an inspector flags the cab during a modernization, or a project manager realizes the building's accessible route depends on the elevator being right, not just running. In Michigan, that moment usually turns into a hard question, does this elevator satisfy the code, or are we about to spend money twice?
The answer depends on which rules apply, what kind of elevator is in the building, and whether you're dealing with new construction, an alteration, or an existing condition that's been ignored for years. The ADA's elevator rules were originally published in the 1991 ADA Standards for Accessible Design, and the 2010 ADA Standards became the operative baseline for new construction and alterations on March 15, 2012 ADA 2010 Standards. In practice, that baseline ties accessibility to elevator safety code, so owners have to think about the cab, the controls, the door package, and the jurisdictional inspection path as one project, not separate problems.
Why ADA Elevator Compliance Matters for Your Building
The most common trigger is not a lawsuit. It's a modernization quote, a failed inspection item, or a complaint from someone who can't use the building the same way everyone else does. Once the elevator is part of the accessible route, ADA compliance becomes a building function, not a nice-to-have upgrade.
Who gets pulled into the rule set
The ADA doesn't treat every building the same. New construction and alterations are the obvious triggers, but owners of commercial and public-facing buildings also have to watch how the building is used day to day. If the elevator is serving passengers, the accessibility rules follow that elevator.
There's also a threshold owners keep using as a first-pass screen. Buildings with fewer than three stories or less than 3,000 square feet per floor may be exempt in some cases under the ADA framework ADA 2010 Standards. That threshold doesn't end the conversation, but it does tell you whether you're likely dealing with an elevator obligation at all.
Practical rule: if the elevator is part of the accessible route, don't assume the building's age, prior permits, or “service” label gets you out of the rule.
The cost of ignoring it shows up later. A renovation gets delayed because the cab opening is wrong. A landlord has to rework controls after the finish package is already installed. A consultant finds that the elevator was treated like a freight unit, when passengers have been using it all along.
The safest way to think about it is simple. First decide whether the building triggers an accessible route requirement. Then decide whether the existing elevator can legally serve that route. After that, the code question becomes much easier to manage.
How the ADA Standards, A117.1, and ASME A17.1 Work Together
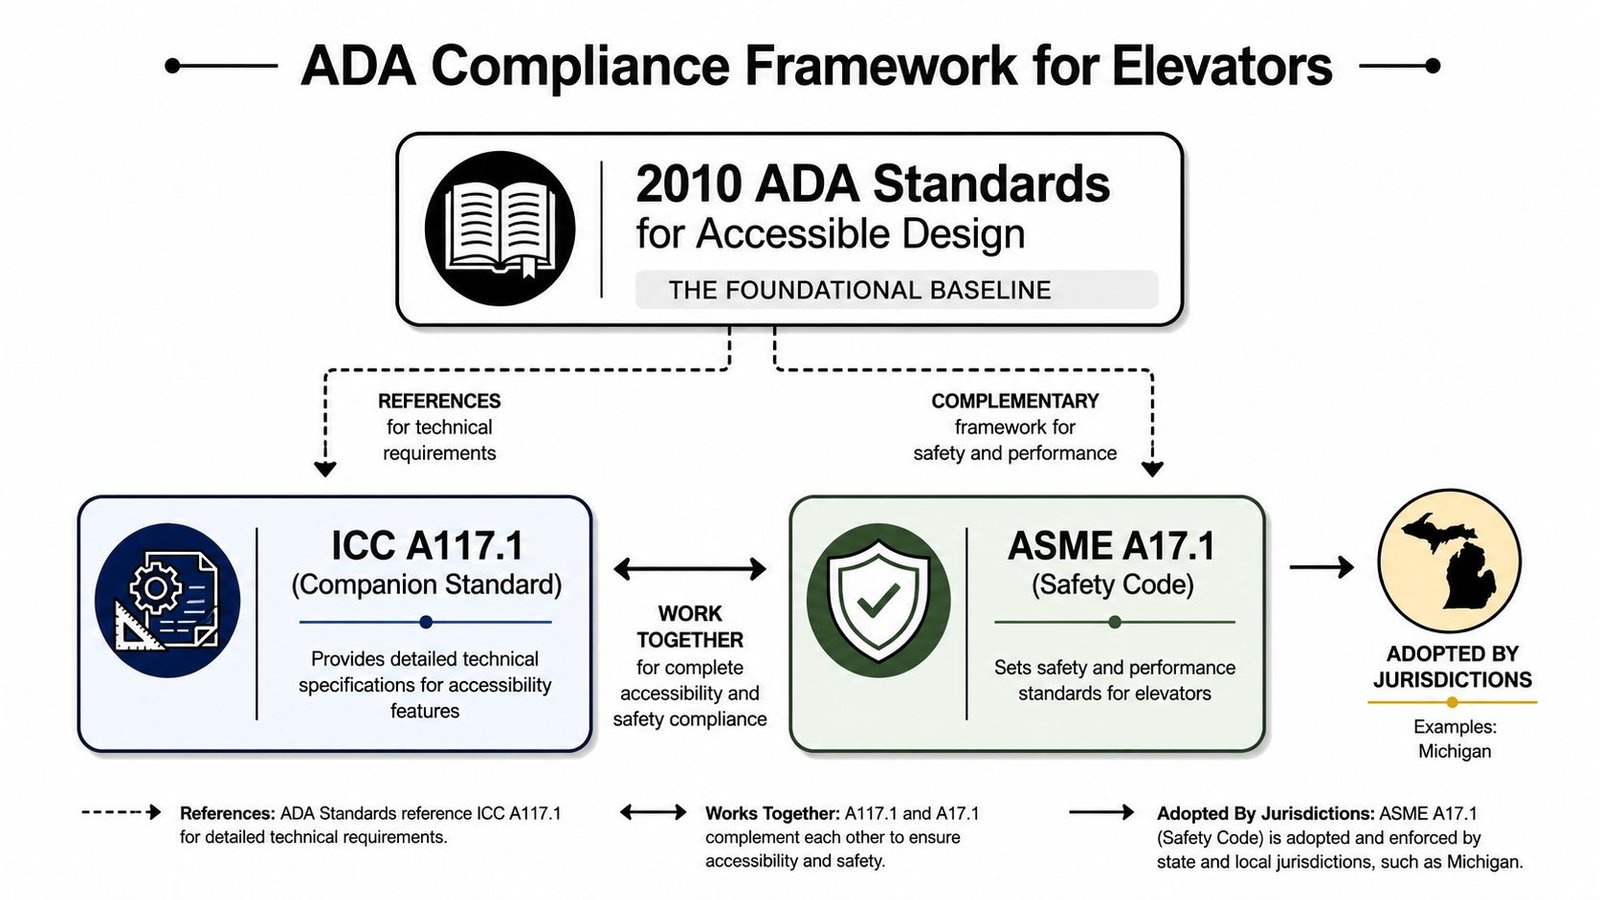
The cleanest way to understand the code stack is to picture three overlapping rings. The 2010 ADA Standards set the accessibility baseline. ICC A117.1 supplies a lot of the technical building-element detail. ASME A17.1 governs elevator safety and performance, and the ADA's elevator rules reference that safety code directly ADA 2010 Standards.
Which document answers which question
If you want to know whether the elevator must be accessible to a passenger, the ADA answers that. If you want to know how a reach range, clear floor space, or device placement should work in the building envelope, A117.1 is often where the drawing detail lives. If you want to know how the elevator itself has to be built and operated safely, ASME A17.1 controls the machine side of the job.
That's why owners get into trouble when they try to “pass ADA” by swapping a few buttons and calling it done. The accessibility piece and the safety piece overlap, but they are not the same thing. A panel can look compliant and still fail if the elevator type, safety interlock, or door system doesn't line up with the referenced elevator code.
For a concise code overview that sits in the middle of this discussion, see Crane Elevator's elevator code requirements overview. It's useful as a practical bridge between what the drawings show and what the inspector checks.
The practical takeaway
An ADA elevator project starts with accessibility, but it gets built and inspected as a code package. That means the owner, architect, elevator contractor, and inspector all have to be working from the same assumptions before the first purchase order gets issued. In Michigan, that coordination matters because the permit path and the field inspection don't care which code book caused the problem, they only care whether the installed system works together.
The mistake I see most often is owners treating ADA as a finish schedule issue. It isn't. It reaches into the safety code, the machine room, and the cab details at the same time.
The Numeric Requirements Every Elevator Must Meet
Most compliance misses happen at the numbers. A cab can be new, clean, and visually modern, yet still fail because one dimension, one mounting height, or one signal feature is off by a small amount. Those are the items inspectors and accessibility consultants check first because they're objective and easy to measure.
The dimensions that matter in the cab
The basic measurements are straightforward, but each one has a different failure mode. The door opening has to provide at least 36 inches of clear opening ADA elevator requirements overview. The car interior needs to be at least 51 inches deep and 68 inches wide ADA elevator requirements overview. The controls need to be mounted with buttons centered about 42 inches above the floor ADA elevator requirements overview.
The smaller details still matter. Call-button diameters need to be at least 0.75 inches, emergency controls can't be higher than 35 inches to the centerline, and the cab needs two-way emergency communication ADA elevator requirements overview. The standards also call for audible and visible floor announcements, braille beside or below the floor numbers, and doors that stay open for at least 3 seconds ADA elevator requirements overview.
Key ADA Elevator Dimensions at a Glance
| Element | ADA Requirement | Common Failure Point |
|---|---|---|
| Cab door clear opening | 36 inches minimum | New door package reduces usable opening after finish work |
| Car interior | 51 inches deep and 68 inches wide minimum | Wall finishes, handrails, or fixtures steal usable space |
| Control centerline | About 42 inches above the floor | Layout changes after panel replacement or modernization |
| Call-button diameter | At least 0.75 inches | Decorative buttons are too small or too flush to use easily |
| Emergency control height | No higher than 35 inches to the centerline | Alarm or phone placement sits above seated reach range |
| Door dwell time | At least 3 seconds | Door operator closes too quickly after adjustment |
| Floor announcements | Audible and visible required | One signal works, the other was never programmed |
| Braille and tactile identification | Required beside or below floor numbers | Finish changes cover or relocate markers |
Older ADA guidance used a 5-second notification time and required car-control illumination of at least 5 foot-candles, which shows how the standards evolved while keeping the core accessibility intent intact ADA elevator requirements overview.
If the cab “almost” meets the number, it usually fails in the field. The inspector measures the finished condition, not the drawing intent.
The practical lesson is that small deviations cause real rework. A handrail, mirror, panel face, or flooring build-up can push a dimension out of range without anyone noticing until the final walkthrough. That's why modernizations should be checked against the finished cab, not just the parts list.
New Construction vs Alterations and What Triggers Each Standard
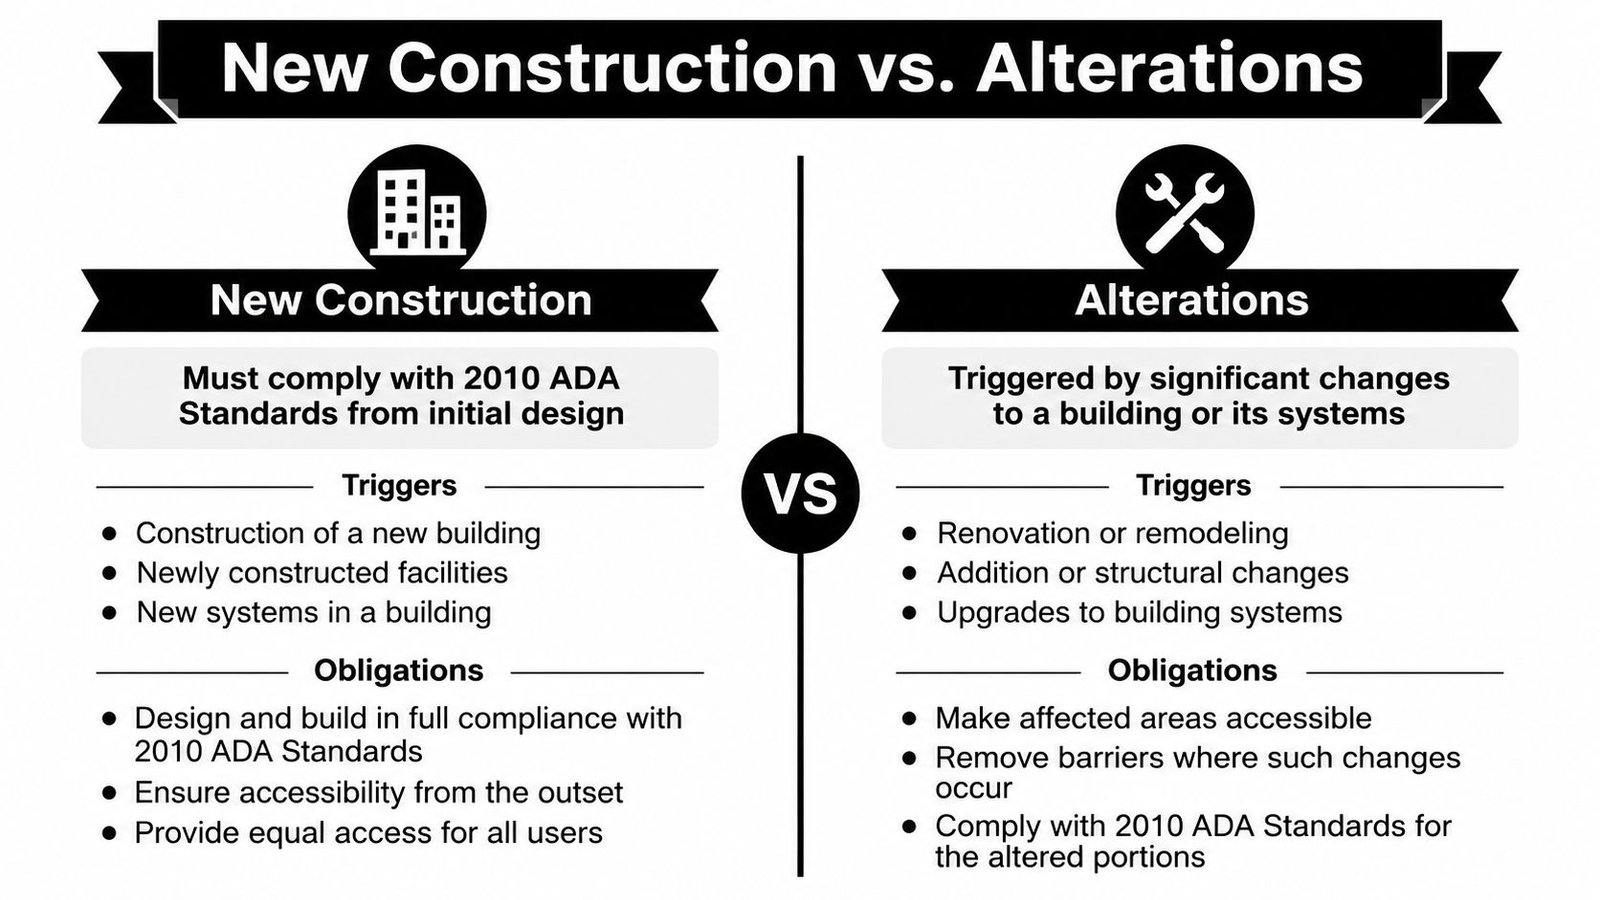
A new building is the easy case, at least on paper. The elevator gets designed into the project from day one, and the team has to meet the current accessibility baseline before occupancy. Alterations are messier because the owner is trying to improve an existing asset without rebuilding the whole shaft.
Why an alteration can change the scope fast
The ADA treats an alteration as a meaningful change to a building or its systems, not just routine maintenance. If the work goes beyond like-for-like repair and affects the elevator's accessible use, the affected portion has to be brought up to the current standard. In practice, that's where owners discover that a controller swap, cab reconfiguration, or door modernization can force a larger scope than they expected.
A common planning threshold is the 20% alteration cost trigger, which often determines whether a full cab reconfiguration becomes necessary. That's the number many teams watch when they're deciding how far an accessibility upgrade must go. It's not a casual estimate, it changes whether the job stays limited or becomes a more complete compliance project.
Here's the practical difference. If a Michigan office building replaces a worn controller and leaves the rest of the system alone, the project may stay relatively contained. If the same building guts the cab, replaces the door equipment, and reworks the signal fixtures, the accessibility review gets much broader because the altered area is now tied to the elevator's usable route.
The decision point owners need to make early
Don't let the bid package define the code scope after the fact. The scope has to be mapped before the cabinet gets ordered.
That's why a modernization plan should be built with someone who understands both the design side and the inspection side. The wrong starting assumption can turn a partial project into a stop-work situation, or a finished cab into a correction order. Owners save time when they separate routine service from true alteration work at the start.
For a visual walkthrough of the permit and comparison logic, watch this short overview.
Platform Lifts and Wheelchair Lifts When They Substitute for an Elevator
A lot of owners ask the wrong question first. They ask whether a platform lift is “ADA compliant” as if the label alone decides the answer. The core question is whether the lift is allowed to serve the required accessible route in that building.
Where a lift can work
The ADA's elevator guidance is clear that passenger elevators are the standard device for accessible routes, and that freight elevators, construction elevators, dumbwaiters, and materials or equipment hoists are not the same thing Access Board elevator guidance. The Access Board also says passenger elevators classified under ASME A17.1 are the ones that can satisfy the ADA Standards Access Board elevator guidance.
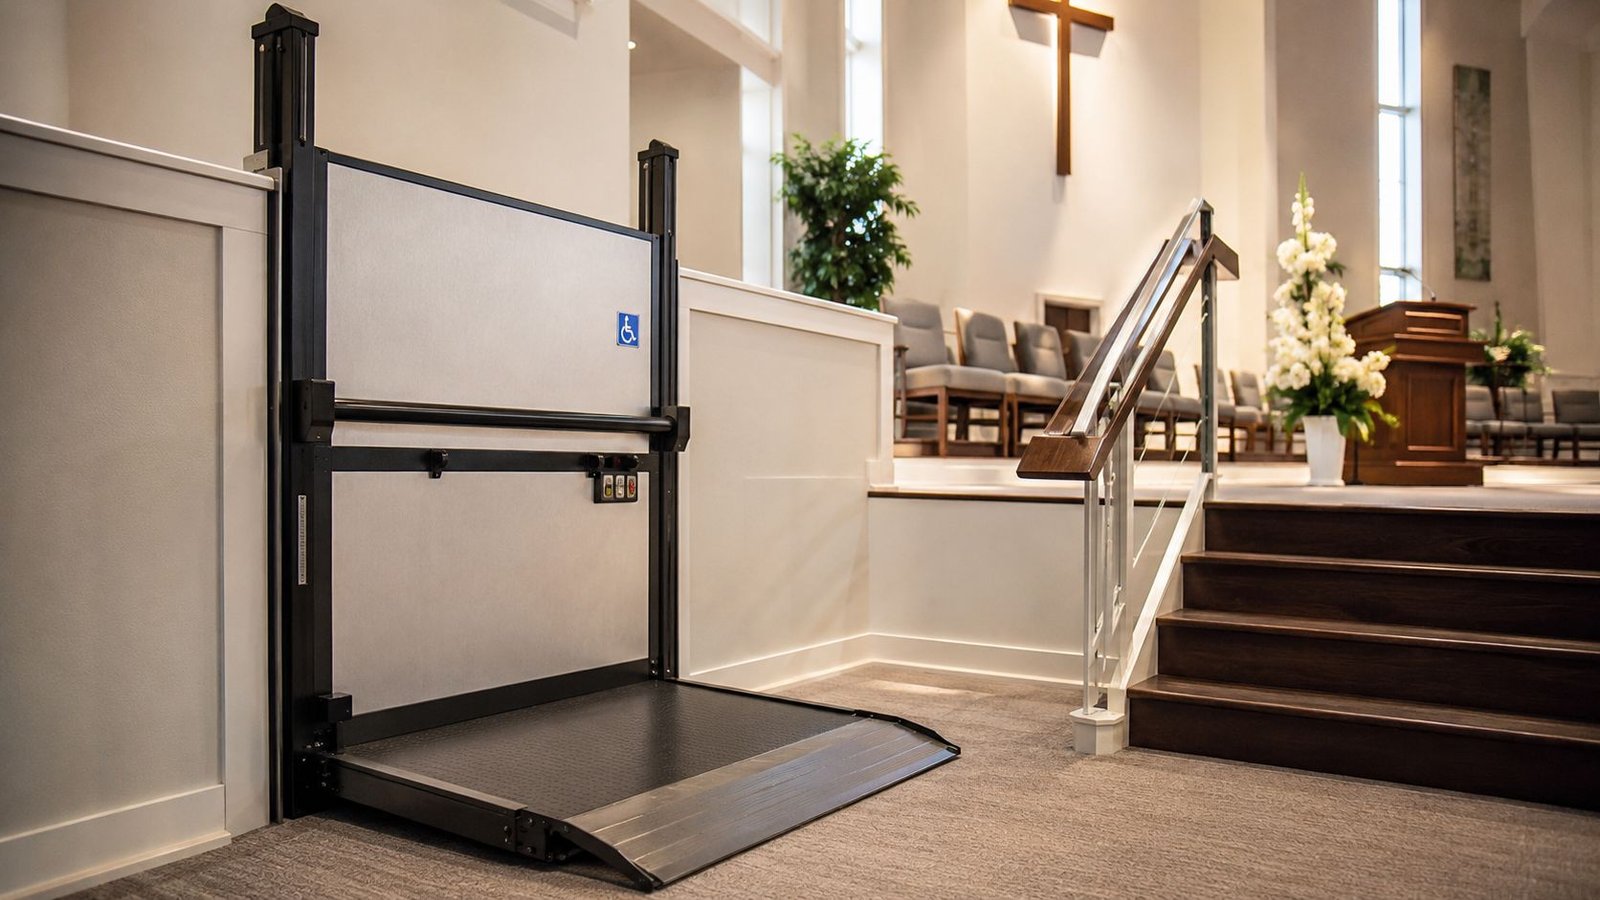
That doesn't mean a lift is never allowed. In limited settings, a platform lift or wheelchair lift can be a lawful substitute, especially where the building use and accessible route conditions fit the narrow exceptions. Worship spaces and performance areas are the types of places owners most often ask about, because the route can be different from a typical office or retail building.
For a practical installation perspective, Crane Elevator's wheelchair lift installation page is a useful reference point when you're comparing a lift option to a full elevator package.
Where owners get tripped up
A service elevator is not automatically excluded just because it carries freight. If passengers also ride it and it meets the passenger-elevator classification under the referenced code, it can still fall under the ADA Standards Access Board elevator guidance. That's the edge case that catches older buildings all the time.
The decision usually comes down to use, classification, and route necessity. If the upper floor has to be accessible to the public or tenants, a lift may not be enough. If the space falls within a limited exception, the lift can be the right answer and a lot less disruptive than a shafted elevator.
A Practical Compliance Checklist Property Owners Can Use
A quick walk-through can save a lot of embarrassment later. I tell owners to look at the elevator the way an inspector will, from the landing buttons to the cab phone, and not to stop at the parts they can see easily. If one item is off, there's a good chance a second item is off too.
Start at the lobby
Check the hall call stations first. The buttons should be at the right reach range, with braille and tactile identification, and the arrival signals should make sense to someone who can't see the car light clearly. If the station feels cramped, the layout may already be tight enough to cause a fail.
Then move to the cab doors. They need to open smoothly, hold open long enough, and close without acting like a trap. A door that slams shut too fast is more than annoying, it's a sign the timing or operator setup needs attention.
Go inside the car
Inside the cab, verify the car interior dimensions, the control panel layout, the emergency phone or two-way communication device, and the audible and visible floor indicators. The panel needs to be reachable from a seated position, and the floor information needs to be understandable both by sound and by sight. Braille placement is not cosmetic, it's part of the access path.
Use this short list during a site visit:
- Hall Call Stations: Buttons are reachable, labeled, and paired with clear arrival signals.
- Cab Doors: Doors open wide enough and stay open for the required dwell time.
- Car Interior: The usable space hasn't been reduced by finishes, rails, or fixtures.
- Controls: Buttons sit at the proper height and include tactile and braille identification.
- Emergency Communication: Help can be contacted from the cab without awkward reach.
- Floor Announcements: Audible and visible indicators both work.
- Signage: Floor numbers and braille markers are present and readable.
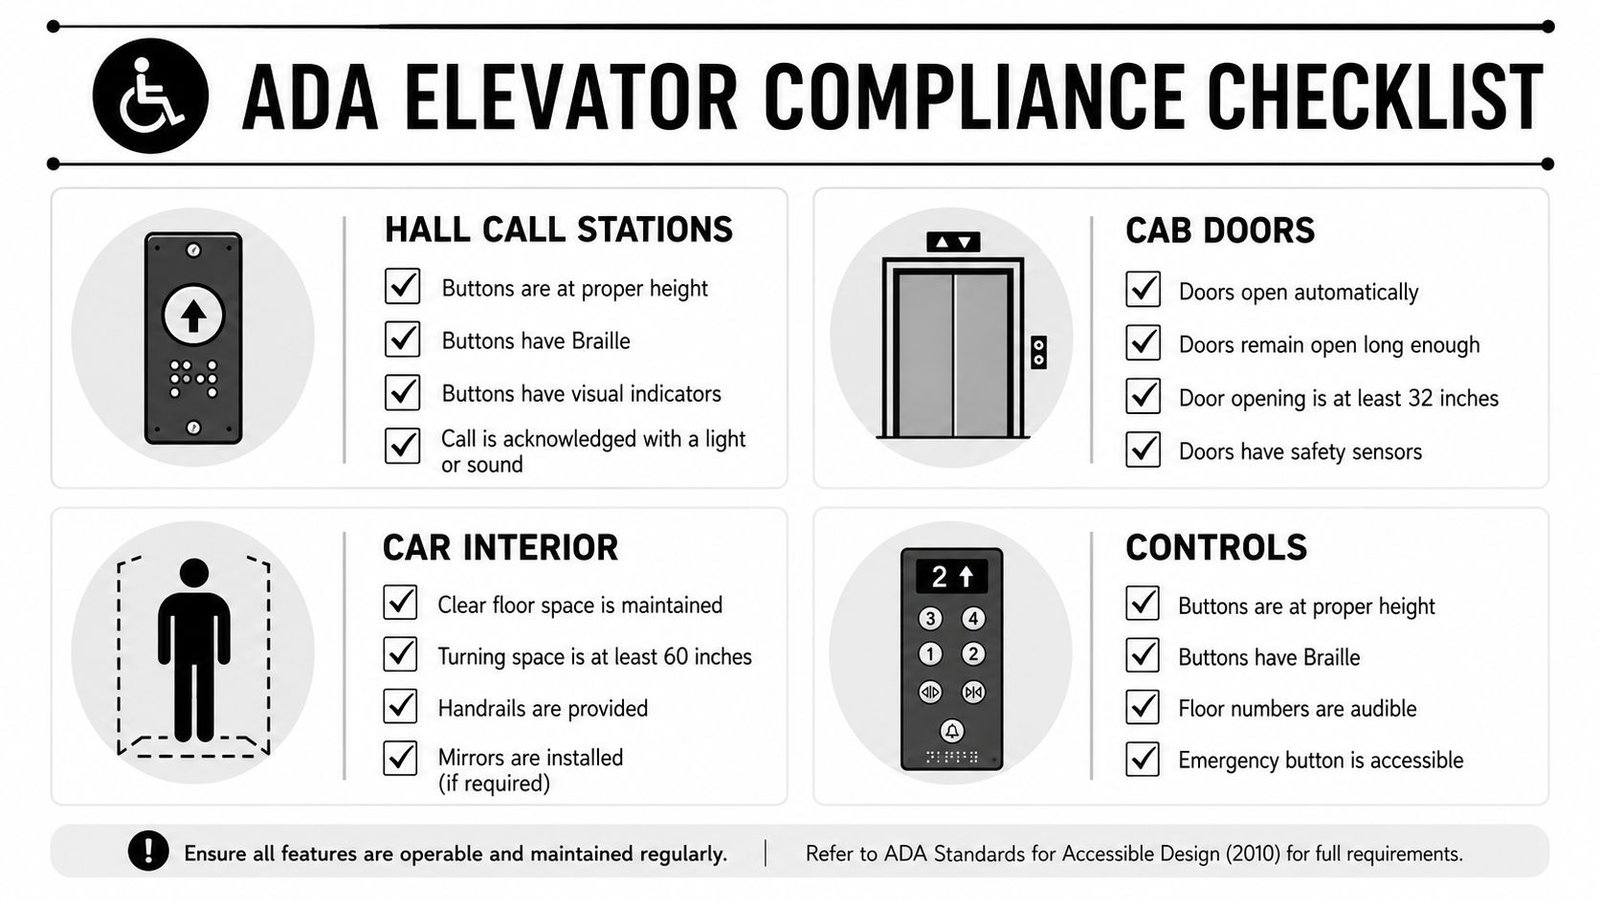
A good checklist doesn't replace a field inspection. It just keeps the owner from being surprised by something a contractor should have caught earlier.
Michigan Inspection, Permitting, and Correction Process
Michigan owners need to think about more than the ADA. The state process adds its own steps, and those steps are where a lot of good projects lose time. When a violation is suspected, the cleanest path is to document the issue, determine the scope, and get the permit route right before work starts.
What the state side usually looks like
The Michigan Bureau of Construction Codes and the Elevator Safety Board sit in the regulatory path for elevator work, especially when alterations are involved. Michigan also adopts ASME A17.3 for existing elevators, and that matters because older equipment often gets evaluated through the lens of the existing-installation code, not just the new-build rule set. The door lock monitoring compliance deadline is another item owners should not ignore, since it can become a correction point during modernization or inspection.
The usual sequence is familiar once you've done it a few times. You assess the problem, pull the permit if the work triggers one, coordinate the scope with the contractor, and then go through inspection and verification before final sign-off. If the inspector finds an item, it needs to be corrected quickly instead of carried forward as a “later” issue.
For owners trying to understand the testing side of that process, Crane Elevator's testing information page is a helpful reference when you're preparing documentation and planning the next step.
What to gather before the inspection
Bring the documents that prove the work was planned, not improvised. That usually means the modernization scope, the equipment cut sheets, the permit record, and any prior correction notices. If the work affected accessibility features, keep those notes close, because inspectors tend to ask how the finished cab compares to the approved scope.
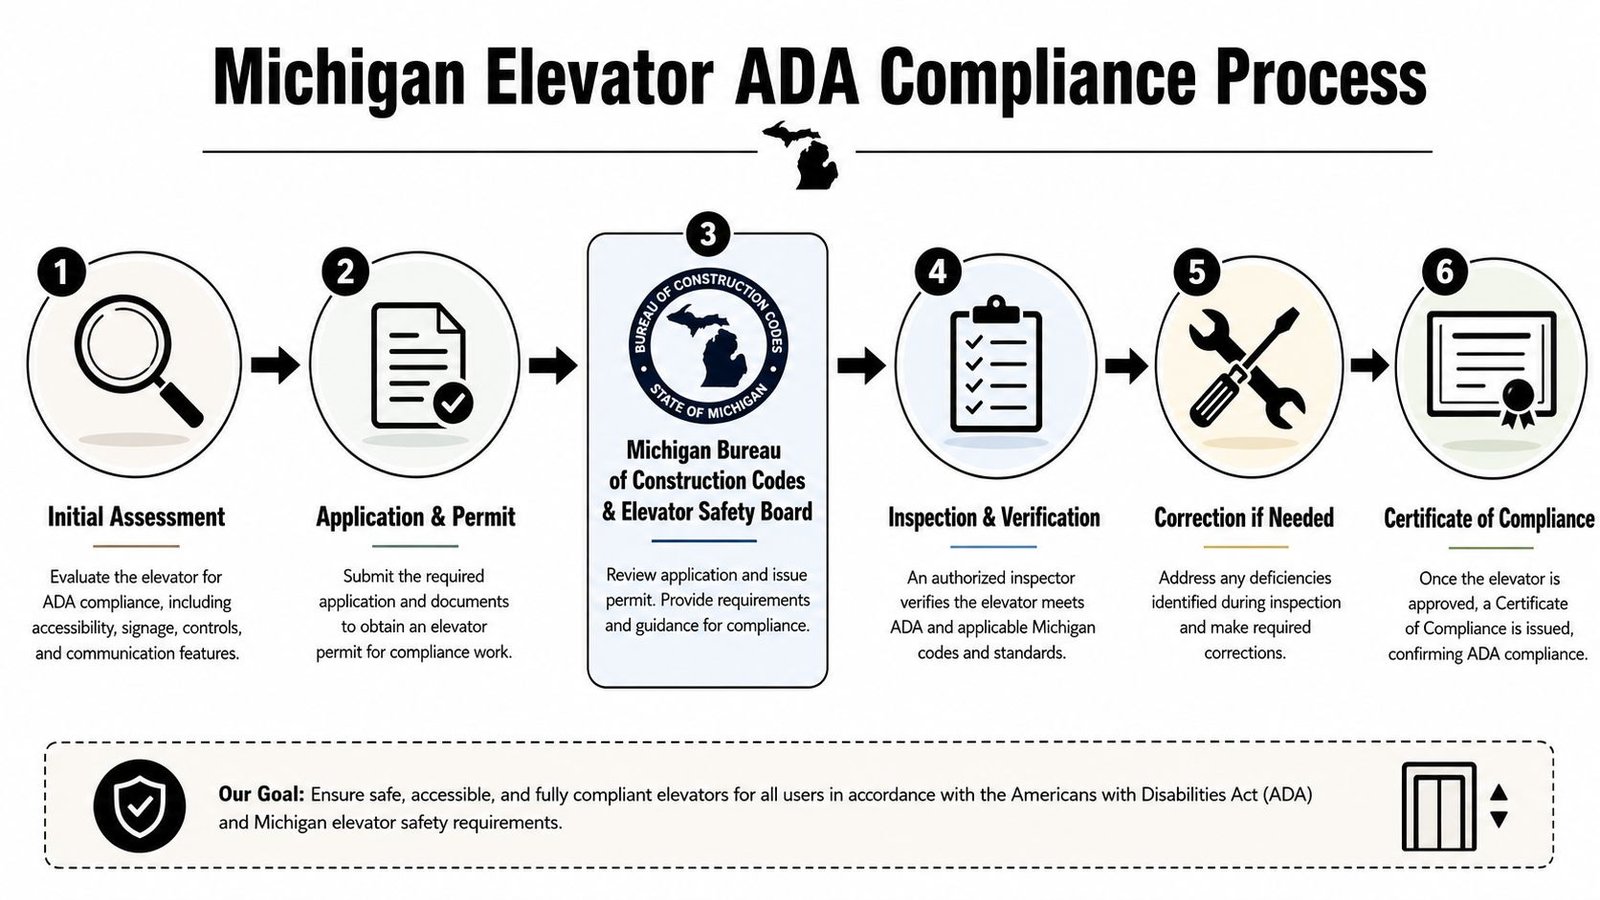
The best projects in Michigan are the ones where the owner, the elevator contractor, and the inspector all see the same paper trail. That reduces rework and keeps the correction cycle short.
Planning Compliance Beyond the Inspector's Visit
ADA compliance doesn't end when the inspector signs off. The elevator still has to work six months later, and the features that make it accessible have to stay operational through wear, repairs, and part replacements. That's where maintenance strategy and modernization planning start to overlap.
The easiest way to avoid repeat violations is to stop treating accessibility as a one-time punch list. A well-planned maintenance program keeps door timing, call stations, signals, and emergency communication from drifting out of spec. A modernization plan does the deeper work, especially when the controls, doors, or cab layout need to be rebuilt around current requirements.
Non-proprietary service matters here because it keeps the building from getting trapped in a single vendor's ecosystem. If the system can be serviced by qualified providers, the owner has more flexibility when parts age out or the next compliance review comes due. That matters in a market where long-term operating cost often matters more than the initial bid.
Best next move: get a documented second opinion before you lock in a modernization scope. A written code-compliance review of the cab and lobby stations is cheaper than redesigning the job after materials are ordered.
Crane Elevator Company handles preventative maintenance, code-required inspections, repairs, and non-proprietary modernizations across Lower Michigan, so the practical next step is to compare your current condition against what the elevator needs. If you're dealing with an accessibility question now, visit Crane Elevator Company and ask for a written review before the next permit or tenant deadline forces your hand.