
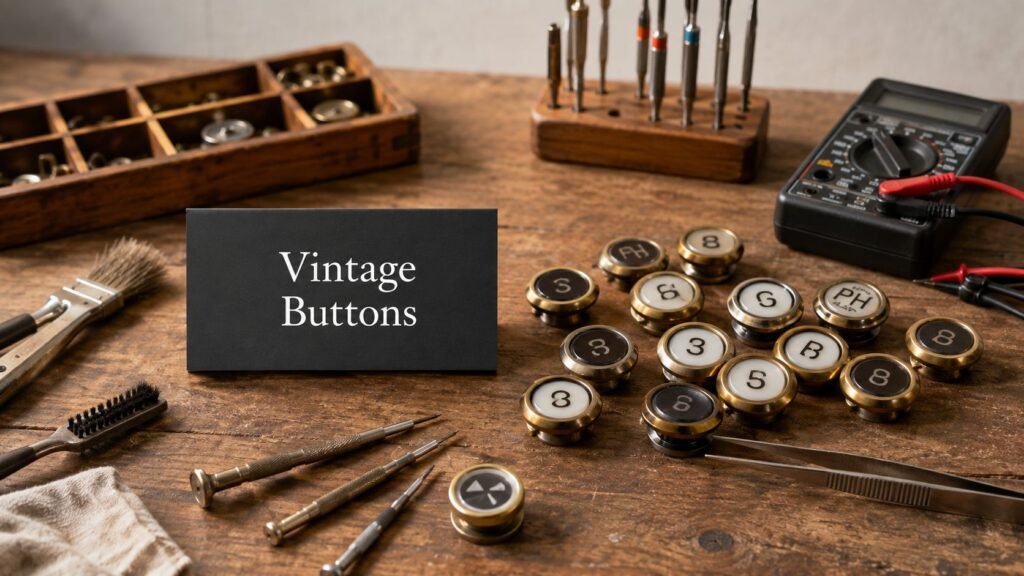
The call button worked last week. Now a tenant says it sticks, the lamp no longer shows a registration, and an inspection deadline is approaching. The faceplate still suits the lobby, so replacing it feels excessive, but keeping an unreliable control without checking its accessibility and safety implications is worse.
That's the practical tension with vintage elevator buttons. They're visible pieces of architectural history, but they're also switches, indicators, labels, and user interfaces connected to a regulated transportation system. A successful restoration preserves the parts worth saving without assuming that an attractive cap or polished brass shell makes the complete fixture acceptable.
When Vintage Buttons Become a Problem Worth Solving
A vintage button usually becomes an active project for one of four reasons. An inspector identifies a defect, a passenger reports a stuck control, a modernization expands beyond its original scope, or an accessibility deadline forces the owner to examine the entire car operating panel. The button may have been overlooked for years because the elevator still moved, but a nonfunctional input or unclear signal can turn a decorative detail into an uptime and compliance liability.
Start by separating the trigger from the proposed remedy. A failed lamp doesn't automatically require a new fixture. A failed switch doesn't automatically justify preserving every internal component. First record what the inspector, mechanic, or tenant observed. “Button is dark” points toward an indicator circuit or lamp issue. “Button doesn't register” requires electrical testing. “Label can't be read by touch” is a human-factors and accessibility issue, not a polishing problem.
A practical triage sequence
- Document the condition. Photograph the complete panel, each affected button, the labels, and any inspection notice. Note whether the problem occurs continuously or intermittently.
- Identify the function. A floor selection button, alarm control, door control, stop control, and hall call button don't carry identical responsibilities. Treat emergency and accessibility-related controls as higher-risk items.
- Check the surrounding system. Wiring, controller inputs, lamp circuits, terminal connections, and the button's mechanical return all matter. Replacing a cap won't correct a loose conductor or failing input module.
- Ask the authority having jurisdiction before fabrication. A custom overlay or replica faceplate can create a new approval issue if it changes tactile labeling, location, illumination, or operating force.
Owners often delay because the visible part looks simple. Behind that face may be a contact stack, lamp holder, legend plate, gasket, terminal arrangement, and mounting system that no longer matches current replacement parts. The core decision is therefore about risk, serviceability, downtime, and approval, with historic appearance included as one constraint.
Practical rule: Preserve the historic surface only after confirming that the control beneath it can be made reliable and usable.
Vintage controls also carry a useful historical record. The first push-button elevator controls were filed in April 1892 by Norton P. Otis and Rudolph C. Smith, although push-button systems didn't become broadly popular until the mid-1900s. Adoption accelerated after a 15,000-member New York City lift operators' strike pushed the industry toward more passenger-controlled systems, as documented in this history of elevator buttons. That shift explains why an old button isn't merely an ornament. It represents the move from manually operated lifts toward automated passenger control.
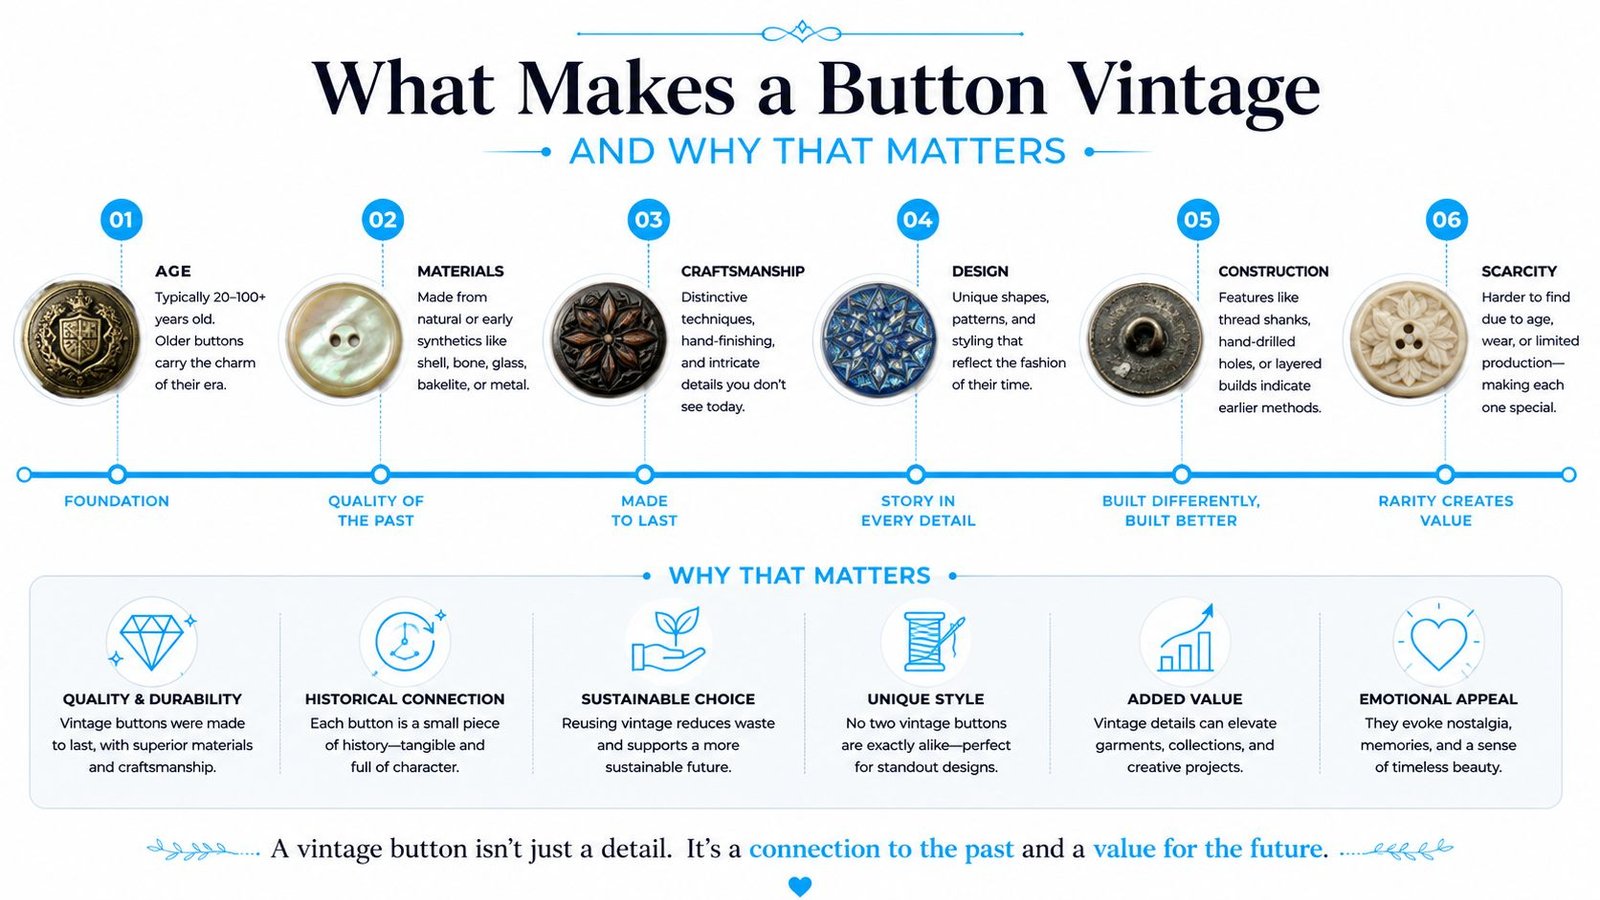
What Makes a Button Vintage and Why That Matters
“Vintage” describes appearance, but technicians need a narrower identification. The manufacturer, production era, button diameter, legend style, lamp arrangement, contact design, and mounting method determine whether a repair is straightforward or becomes a fabrication exercise.
Otis' button history provides a useful reference timeline. Otis used black buttons in the 1900s, introduced 16 mm buttons that remained in use until the mid-1960s, and later moved to larger 27 mm Lexan buttons that continued into the early 1980s before being discontinued around 1989 to 1990. Westinghouse introduced black buttons in the late 1950s, while Schaefer's first illuminated lift pushbutton reached the German market in 1964, according to this Westinghouse fixture reference.
Those milestones are decision tools. A small black button with a separate legend plate suggests a different mounting and contact strategy from a larger illuminated Lexan assembly. A mid-century illuminated dome may depend on a lamp holder and heat-tolerant insulating parts that have aged even when the cap still looks excellent. A later fixture may use a different switch arrangement, contact spacing, or controller interface. The exterior can look familiar while the internal replacement options are completely different.
What identification should establish
Before ordering parts, record:
- Manufacturer clues: Logos, casting marks, backplate geometry, and distinctive caps can narrow the fixture family.
- Physical dimensions: Measure the cap, barrel, mounting hole, legend opening, and rear clearance. Don't assume nominal size from appearance.
- Electrical arrangement: Trace the common, input, lamp, and return conductors. Photograph the terminal side before disconnecting anything.
- Mechanical condition: Check the return spring, plunger, collar, gasket, and insulating washers for brittleness or distortion.
- Controller relationship: Determine whether the button directly switches a circuit or sends a low-voltage input to a controller.
A restorer who skips identification can buy a visually similar button that won't fit the aperture, match the lamp circuit, or provide the right tactile action. The better sequence is identify first, test second, preserve third.
Four Realistic Paths From Old Fixture to Working Car
There isn't one correct restoration method. The right choice depends on whether the owner values original material, quick return to service, long-term parts support, or the least complicated approval path. Use the comparison below before removing a panel or commissioning custom parts.
Comparing the Four Restoration Paths
| Path | Cost Band | Downtime | Code Risk | Best Fit |
|---|---|---|---|---|
| Full restoration of original hardware | Higher and unpredictable when hidden damage appears | Longer, because every original component needs inspection | Highest if the original layout lacks current tactile or signaling features | Protected historic interiors where authenticity is a primary requirement |
| Original face with modernized internals | Moderate to high, depending on fabrication and interface work | Moderate, with testing needed after adaptation | Manageable when the new internals and labeling are reviewed as a complete system | Buildings that need historic appearance with better serviceability |
| Reproduction faceplates with current switches | Moderate and easier to schedule when parts are available | Shorter than full restoration | Moderate, because the replica still needs compliant labels, feedback, and placement | Owners who want a period appearance without relying on fragile original mechanisms |
| Full replacement with code-compliant new fixtures | Predictable relative to custom restoration | Often shortest when the replacement is a standard package | Lowest of these options, provided the complete installation is approved and tested | High-traffic buildings, urgent inspection work, and systems needing a broad modernization |
A full restoration is attractive when the original brass, lettering, and tactile character are irreplaceable. It's a poor fit when the switch bodies are cracked, insulation is failing, or no qualified shop can reproduce the internal parts. Historic appearance doesn't compensate for repeat callbacks.
A modernized interior behind the original faceplate often gives the best compromise, but only if the available depth and mounting geometry cooperate. Reproduction plates reduce dependence on obsolete mechanisms, though they can look wrong when lettering, illumination, or edge detail is poorly copied. Full replacement is less romantic, but it makes sense when passenger volume is high, the inspection date is close, or the existing panel has several unrelated defects.
Before choosing, compare the restoration scope with a professional elevator button replacement service. Ask for a written description of what will be retained, what will be replaced, how accessibility will be handled, and what testing is included at turnover.
Restoring a Vintage Button on the Bench
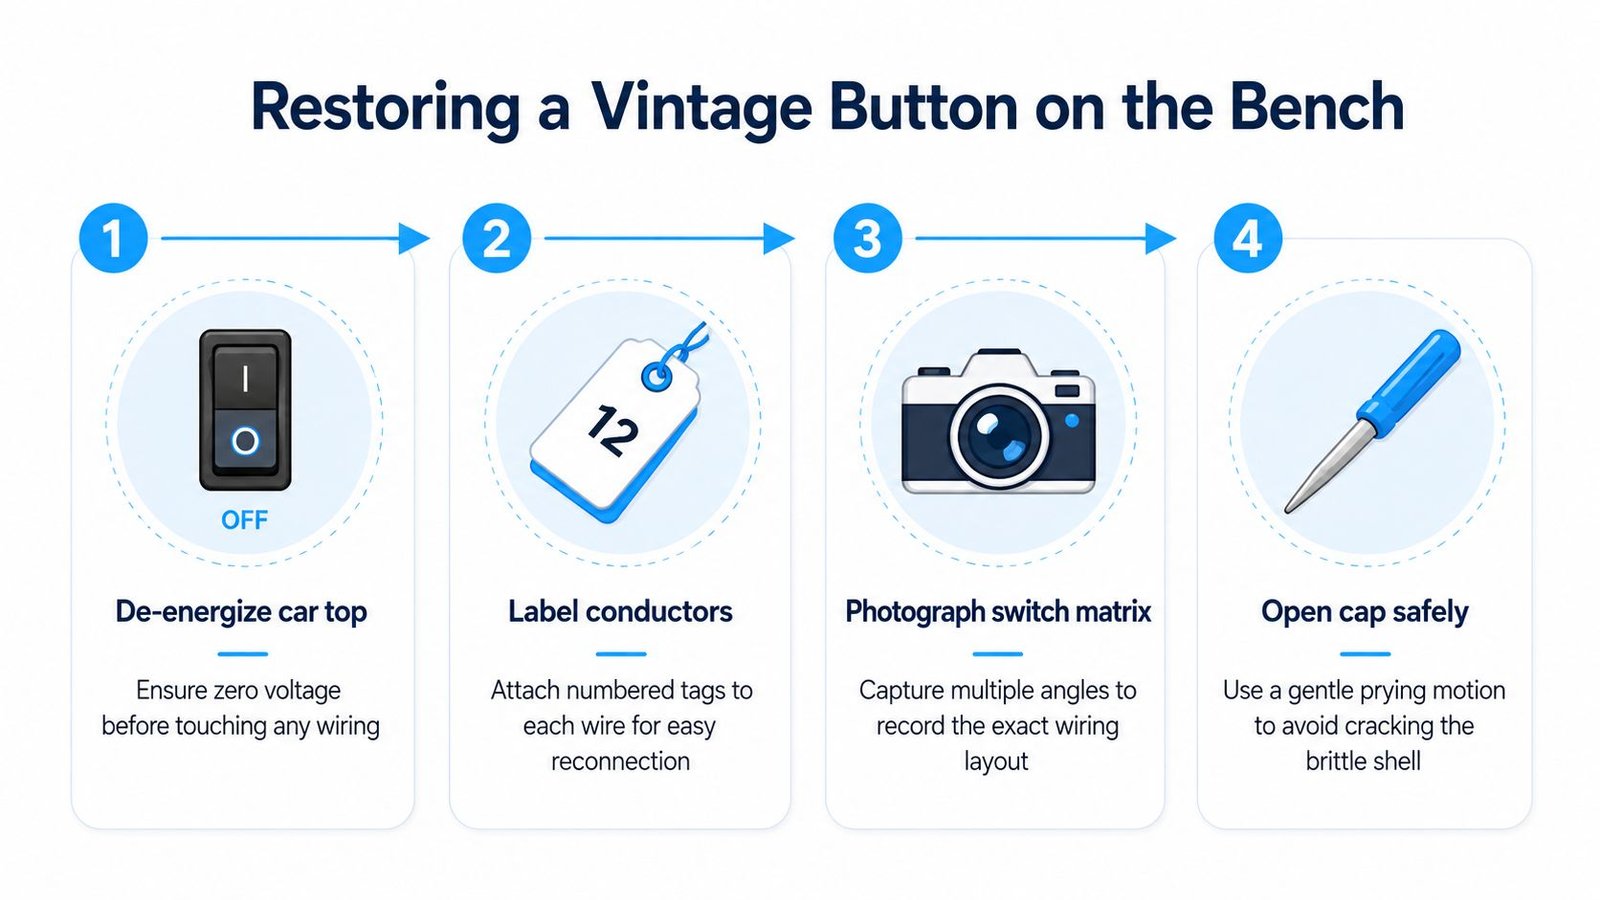
Bench work starts with zero energy, not with a screwdriver. De-energize the car top and verify the absence of voltage using the site's approved electrical safety procedure. The mechanic should then label every conductor before disconnecting it and photograph the switch matrix from multiple angles, including terminal positions, wire routing, spacers, and lamp connections.
Disassembly without creating damage
Remove the fixture in a way that supports the old shell. Aged Bakelite, phenolic insulation, and cast brass collars can crack when a restorer twists the cap or levers against the visible edge. Use a gentle, controlled prying motion with a suitable non-marring tool, and stop if the cap begins to flex instead of releasing.
Keep each part in order. The cap, legend plate, lens, retaining ring, gasket, plunger, spring, contact stack, insulating washers, and terminals may look interchangeable, but their sequence determines travel and electrical separation. Brittle insulating pieces should be replaced rather than reused simply because they survived removal.
Testing and cleaning
Test the microswitch with a multimeter while operating the button through its full travel. A contact resistance above 50 ohms signals that the switch needs replacement, according to the bench-restoration guidance used by restorers in this vintage pushbutton repair demonstration. Test both the open and closed states, and move the actuator repeatedly to catch an intermittent fault.
Clean each conductive interface, not just the visible face. DeoxIT can help remove oxidation from suitable electrical contact points, but it shouldn't be flooded into a switch housing. Spray lubricants often migrate into the mechanism and attract contamination. Polish caps with a non-abrasive compound, protect original lettering, and replace a hardened lens gasket before reassembly.
Check the tactile return force by hand. The button should return cleanly without binding, scraping, or requiring an awkward sideways push. Re-tighten terminals, but don't over-tighten set screws on cast brass collars. Excessive force can distort the collar or damage an already weakened thread.
A clean face with oxidized contacts is still a failed button. The contact stack deserves the same attention as the cap.
Reassemble in the photographed order, verify insulation, and test illumination and switching before the fixture returns to the car. For owners comparing repair with replacement, this elevator button repair resource provides a useful reference point, but field work should still be performed by qualified elevator personnel under the applicable site safety procedures.
Meeting Modern Code and Accessibility Requirements
Historic appearance doesn't exempt a control from current accessibility and elevator requirements. The inspector evaluates the usable interface, not the owner's intention. That means a restored button needs the right size, tactile information, placement, illumination, audible feedback, and operating behavior.
For U.S.-style controls, the emergency stop, alarm, door open, door close, main entry floor, and phone buttons must use tactile symbols and Braille conventions. The tactile-dot specification includes a 0.059 to 0.063 inch base diameter and 0.025 to 0.037 inch height, with dots arranged as an equilateral triangle, as summarized in this destination-oriented elevator accessibility guidance. These are not decorative raised marks. The installer needs to verify the actual geometry and location.
Code compliance checklist for vintage buttons
| Requirement | ASME A17.1 / ADA Spec | Vintage Retrofit Solution |
|---|---|---|
| Button size | 3/4 inch minimum diameter | Retain the historic face only if the active control meets the required size, or install a compliant replacement behind a matching panel |
| Tactile characters | Raised characters and Braille must identify applicable controls | Add a properly formed tactile overlay or adjacent legend, rather than relying on printed lettering |
| Braille location | Braille is placed 3/8 inch below the floor label | Machine or apply a replacement legend plate with verified spacing |
| Control height | Car controls are mounted at 48 inches | Rework the panel layout or add a compliant secondary station when the original arrangement cannot meet the height requirement |
| Activation feedback | The button should illuminate when pressed, produce an audible chime, and remain lit until the call is answered | Integrate a current indicator and audible signal circuit while testing behavior at the controller |
| Reading surface | Tactile information shouldn't sit where a user will accidentally activate the control | Place the tactile label adjacent to or above the active press surface when the fixture allows it |
The exact retrofit depends on the existing panel. Some owners retain the decorative plate and add a compliant illuminated ring or tactile overlay. Others install a separate handicap station beside the historic fixture, preserving the original visual field while giving passengers an accessible control set. Neither approach should be selected from appearance alone. The authority having jurisdiction and the elevator professional need to review the proposed placement.
Touchless concepts make the human-factors issue clearer. Users with low vision may need Braille, audible feedback, and a clear confirmation signal, while people with limited mobility need predictable activation and enough space to approach the control. A touchless elevator concept focused on Braille and audio feedback illustrates why removing a physical button doesn't remove the need for tactile and audible communication.
Accessibility check: If a passenger can't locate, press, identify, and confirm the control without relying solely on vision, the retrofit isn't finished.
For a broader planning reference, review these ADA requirements for elevators with the project team, then confirm the adopted code and local interpretation before fabrication.
Choosing the Right Path for Your Building
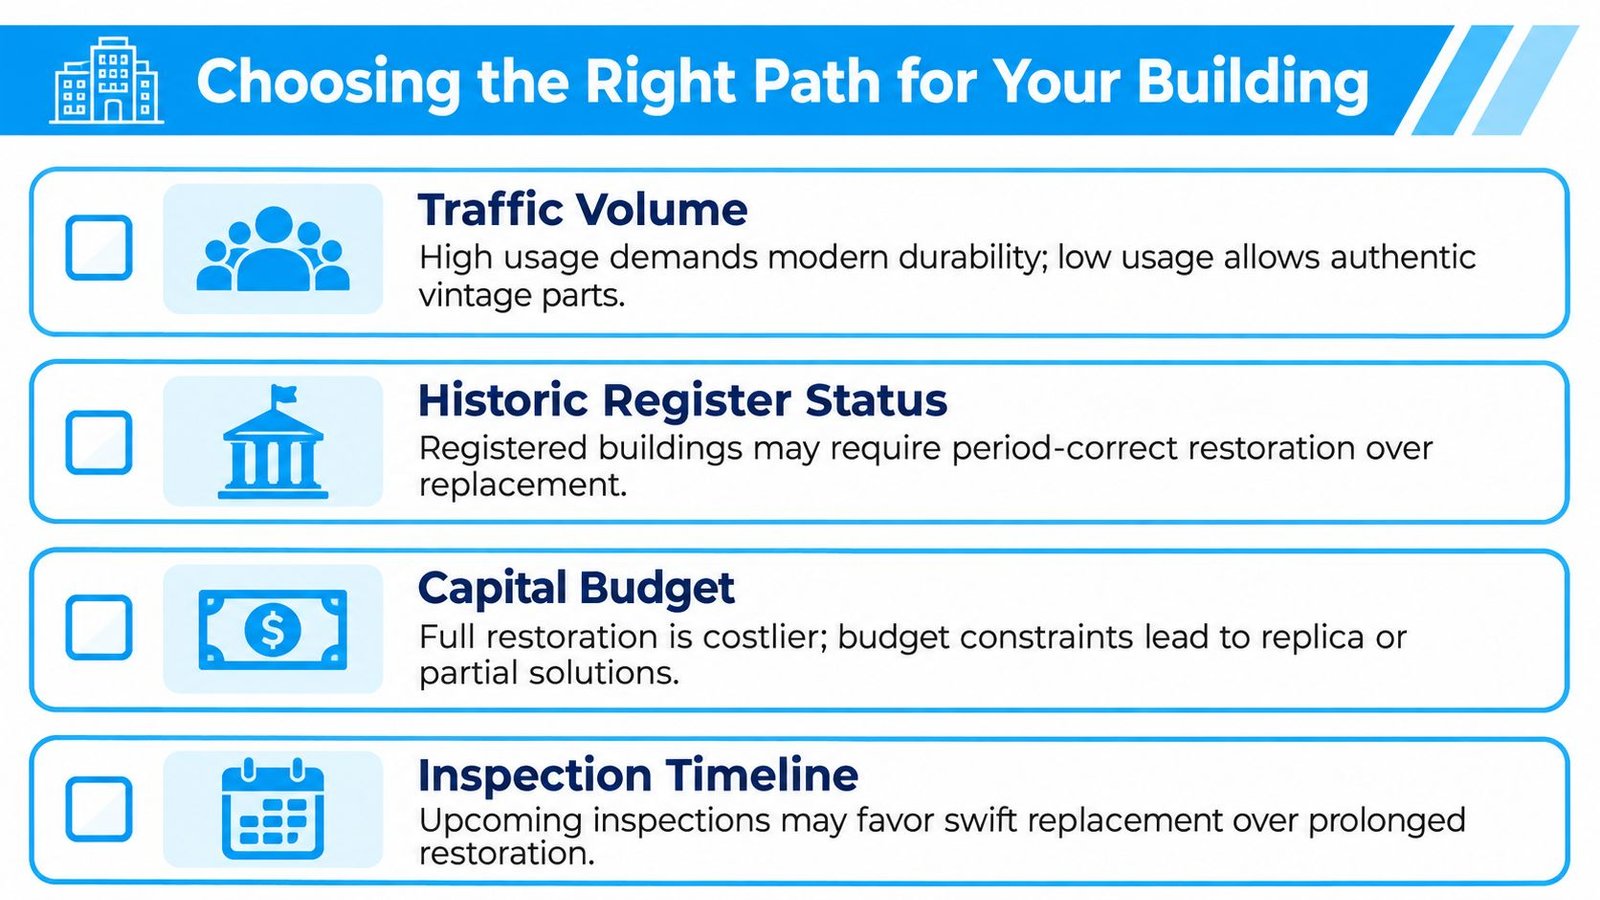
The best restoration decision begins with the building, not the button. A lightly used private lift can justify careful preservation of original material. A busy public car needs durable switching, clear feedback, and dependable service access. A registered historic interior may require a preservation review, while a conventional modernization project may favor a standard fixture that an available technician can support.
Use this order of operations:
- Start with the inspection and occupancy deadline. If the car has an active violation or a scheduled inspection, separate immediate corrective work from longer cosmetic restoration. A temporary repair may restore operation, but it shouldn't become an excuse to postpone the permanent compliant solution.
- Determine whether the existing mechanism is salvageable. Test the switch, inspect insulation and mounting parts, and check whether replacement internals can fit without damaging the faceplate.
- Price the complete interface. Include tactile labels, Braille, illumination, audible signals, gaskets, fabrication, controller integration, testing, permits, and future service. The cheapest button is not the cheapest project if it causes repeated removal.
- Choose the preservation level. Keep original hardware where it is sound and supportable. Use a modern internal assembly when the exterior matters but the mechanism doesn't. Replace the full fixture when reliability, accessibility, and schedule outweigh historic retention.
Four factors that change the answer
- Traffic volume: Frequent public use favors durable current switches and easy-to-source parts. Low usage may allow more original hardware, provided testing confirms reliability.
- Historic register status: A protected building may need a preservation consultant before the owner alters a visible panel. Period-correct materials and reversible work can matter as much as electrical function.
- Capital budget: A staged approach can preserve the faceplate now while planning a larger modernization, but only if the interim work is safe, approved, and maintainable.
- Inspection timeline: A close deadline often favors a standard replacement or a pre-engineered retrofit over an open-ended restoration shop process.
For Michigan and Ohio projects, assemble the fixture photographs, wiring documentation, inspection notices, proposed drawings, and product data before requesting bids. Vet contractors for experience with older controls and non-proprietary replacement parts, confirm who will coordinate permits and inspections, and ask how the final test results will be documented. Bring in a preservation consultant when the panel is architecturally significant or protected. Use a straight modernization contractor when the priority is reliable operation, a clear approval path, and long-term serviceability.
Crane Elevator Company helps owners evaluate and repair vintage elevator buttons, plan compliant fixture work, and complete broader non-proprietary elevator modernizations across Michigan and Ohio. If your building has an inspection deadline or a historic panel that needs a practical solution, visit Crane Elevator Company to request a professional assessment and discuss the right restoration path.