The most common advice about hydraulic elevator seal replacement is also the reason many repairs fail: find oil in the pit, order a packing kit, and swap the seal. That approach treats a visible symptom as a diagnosis. Oil may be coming from the packing gland, cylinder head, valve block, pressure piping, hose fittings, or an internal valve problem, and a new seal won’t correct a scored plunger, contaminated fluid, or a leaking control valve.
A sound repair starts with controlled diagnosis, safe isolation, and a decision about whether the jack assembly can accept a seal-only repair. It ends with pressure testing, operating checks, oil-loss documentation, and the permits or inspections required in the jurisdiction. For a facility manager, the key question is not only how to replace a seal. It’s whether the elevator’s entire hydraulic system is ready to return to service.
Diagnosing the True Source of Hydraulic Leaks
Oil in the pit tells you that fluid escaped. It doesn’t tell you where the failure began. A packing gland may be wet, but oil can run down from a fitting, hose, valve block, or cylinder-head connection and make the gland look guilty. Internal valve leakage can also produce drift or leveling problems without leaving the same external evidence as a worn packing.
Start by documenting the condition before anyone cleans it. Record where oil is present, how much fluid has been added, how much has been collected, and whether the car drifts, levels poorly, runs slowly, or produces unusual noise. Compare those observations with the elevator’s service history. Repeated oil additions point to an active loss, but the location of the collected oil still needs to be traced.
Follow the leak, don’t assume it
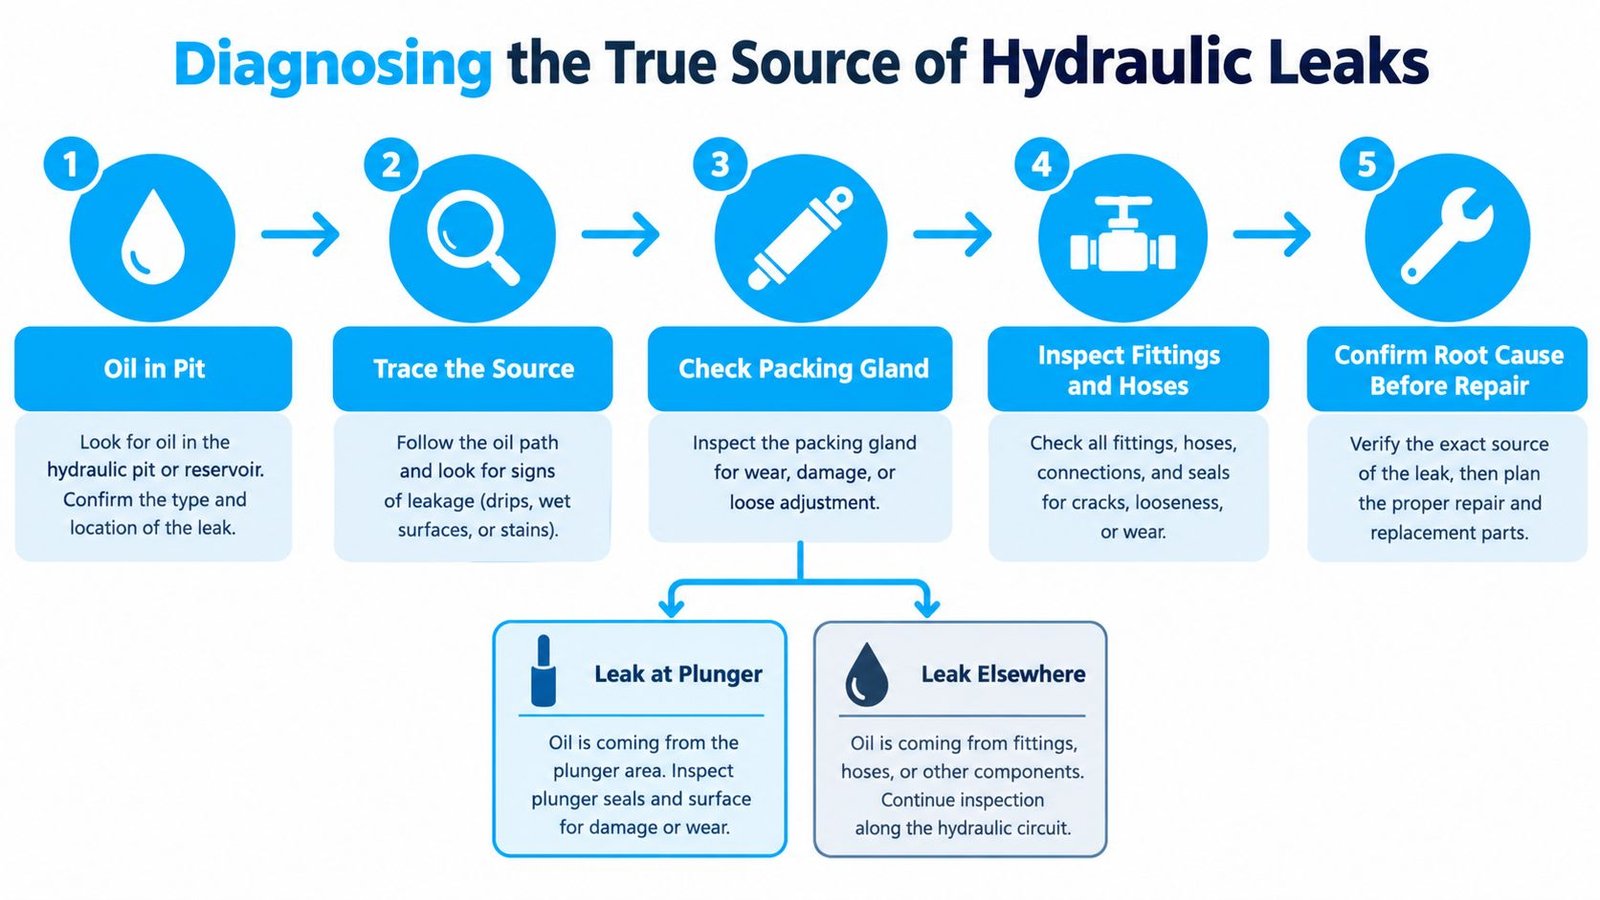
A practical diagnostic sequence looks like this:
- Clean and observe. Remove existing residue under controlled conditions, then identify where fresh oil first appears.
- Inspect the packing area. Check the plunger, wiper, gland, gasket surfaces, and nearby connections.
- Check external hydraulics. Examine pressure piping, hoses, fittings, the tank, valve block, and accessible seals.
- Measure operating symptoms. Document car drift, leveling changes, travel behavior, and oil usage.
- Isolate the cause. Test for valve leakage and confirm whether the cylinder and packing area are losing pressure or fluid.
The material and condition of the hydraulic fluid matter too. Contaminated oil can damage replacement components and create repeat problems even when the new packing is installed correctly. A facility manager reviewing fluid condition and service history can also consult this hydraulic elevator fluid resource when discussing oil condition with the service contractor.
Practical rule: A seal replacement is only a successful repair when the technician has identified the leak path and verified the condition of the surfaces that contact the new seal.
The post-repair standard is not just “no visible drip.” ASME A17.1-2019/CSA B44:19 requires the integrity of the entire hydraulic system to be verified at relief-valve pressure for at least 15 seconds after a packing, seal, or pressure-piping seal is replaced. The requirement is described in the ASME A17.1-2019/CSA B44-19 sample. That verification is why a low-cost seal-only repair can become false economy when the underlying fault is a damaged plunger, leaking valve, poor oil condition, or compromised piping.
Evaluating Jack Age and Cylinder Condition
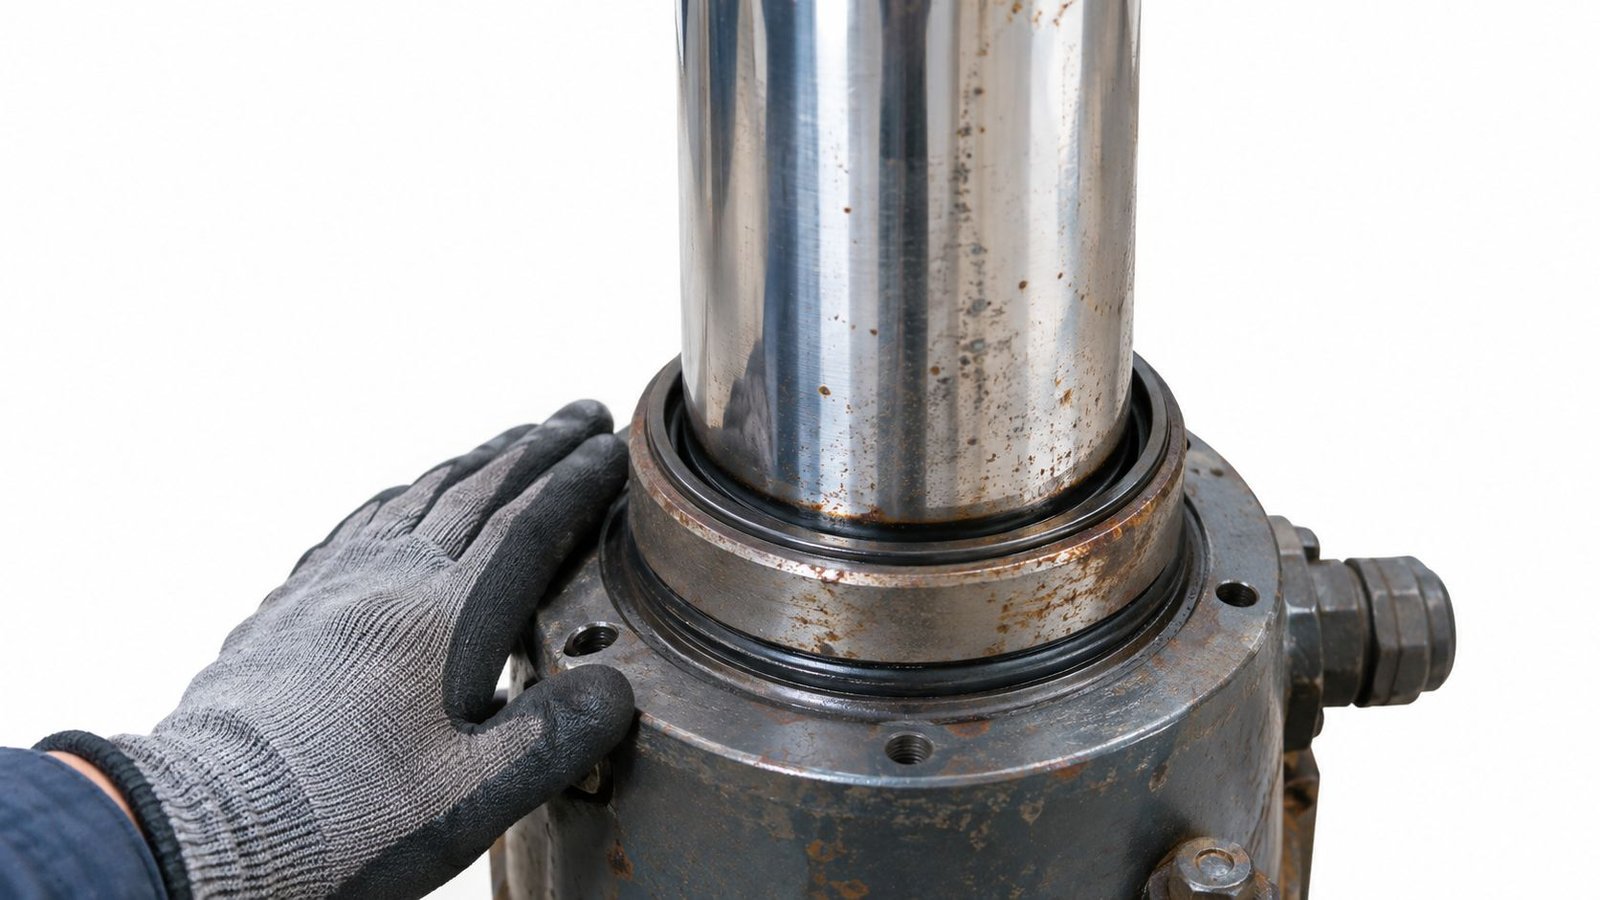
The age of a hydraulic elevator jack is a screening clue, not a repair decision. A seal runs against metal, so the technician must assess the plunger, cylinder, gland, and surrounding conditions before treating the job as a parts replacement. A scored, corroded, misaligned, or out-of-tolerance surface can destroy new packing quickly.
Before 1972, many hydraulic elevators used flat-bottom, in-ground jack cylinders with little or no corrosion protection. That construction could ultimately cause rupture and uncontrolled elevator descent, according to technical documentation on hydraulic jack units. Older facilities in Michigan may also have years of patch repairs in their service history. That history warrants a jack evaluation, particularly when oil-loss records show recurring leakage rather than one isolated failure.
Inspection should answer five practical questions:
- Is the plunger serviceable? Scratches, pits, rust, and scoring can cut replacement packing and reopen the leak.
- Is the gland sound? Check the bore, seat, bearing surfaces, wiper, gasket faces, and housing for wear or distortion.
- Has the in-ground cylinder resisted corrosion? Older construction may require more than a visual check around the exposed jack head.
- Do replacement components match the design? Dimensions, materials, strength requirements, and configuration must remain compatible.
- Does the evidence support a seal repair? A damaged rod or cylinder may justify jack replacement or modernization instead.
The packing gland is an assembly, not a single exposed ring. Its bearing, wiper, housing, and contact surfaces control how the seal handles travel. Corrosion, misalignment, or mechanical damage can turn a routine packing change into a larger outage. Oil-loss logs help define that scope: repeated losses after earlier repairs point toward a condition problem that a new seal alone will not correct.
Owners reviewing that choice can use this reference on hydraulic elevator jack replacement. Seal replacement makes sense when the rod, gland, cylinder, and fluid are suitable. If those parts will damage the new packing, postponing jack work only shifts the cost into another failure.
Executing Safe Lockout and Pressure Relief
A pump shutdown does not make a hydraulic elevator safe to open. The car can remain supported by trapped pressure, and a leaking valve or shifting component can release that stored energy without warning. Before anyone works near the jack head or beneath a raised car, install positive blocking or another engineered restraint suited to the equipment and task.
Start by placing the car in a controlled position. Close the hydraulic shutoff valve, disconnect and lock out the electrical supply, then operate the manual lowering valve. Continue until the pressure gauge reads 0 bar. Verify that the reading stays at zero and that pressure does not rebuild before opening the valve block or jack-head area.
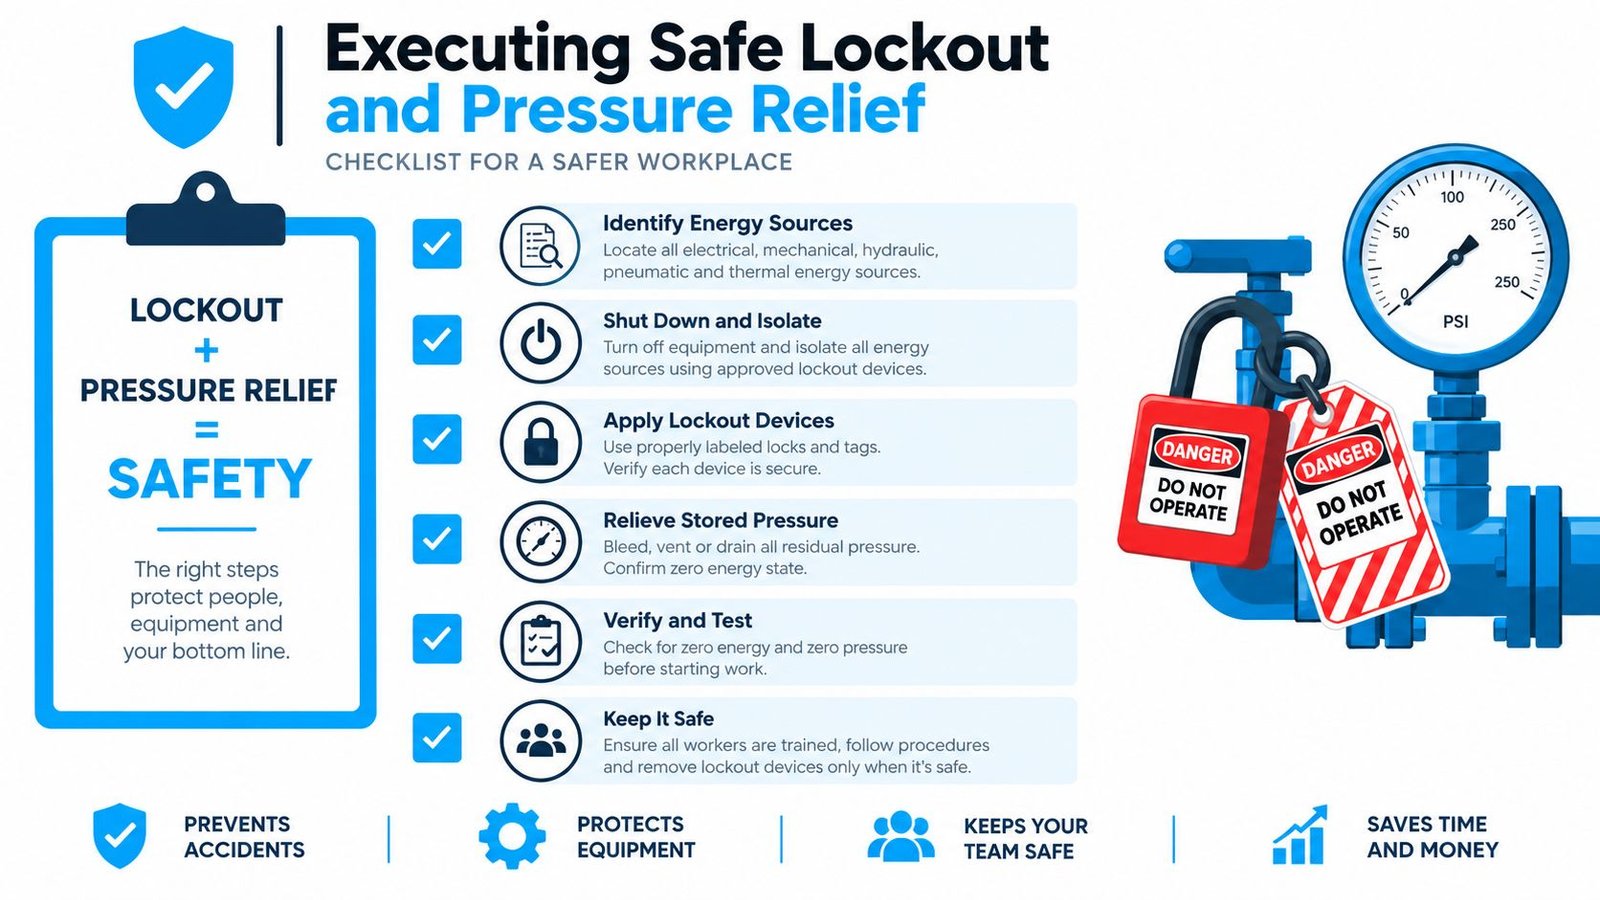
Zero gauge pressure removes one hazard, not every hazard. The car, plunger, and jack still require positive blocking or an engineered restraint. Independent elevator-industry safety guidance warns never to rely solely on hydraulic pressure to support a raised load, while hydraulic-jack safety requirements call for inspection based on service conditions and examination of repair or replacement parts. The OSHA hydraulic jack standard supports this basic safety principle.
Before disassembly, the mechanic in charge should confirm the following:
- The car position is controlled. Normal controls cannot start movement.
- Electrical energy is isolated. Disconnects are locked and tagged, and the absence of power is tested.
- Hydraulic energy is relieved. The shutoff is closed, manual lowering is completed, and the gauge remains at zero.
- The load is positively secured. Blocking or engineered securing is installed before work beneath or around the car.
- The work area is controlled. Access is restricted, oil is contained, and everyone understands the isolation boundaries.
A facility manager should require clear answers before authorizing the repair. The contractor must identify the blocking method, explain how pressure will be checked, and state how isolation will remain in place while the gland or jack-head area is open. If those controls are vague, the job is not ready to begin.
The following embedded material can support a hazard review with the maintenance team:
Removing and Installing the Packing Gland
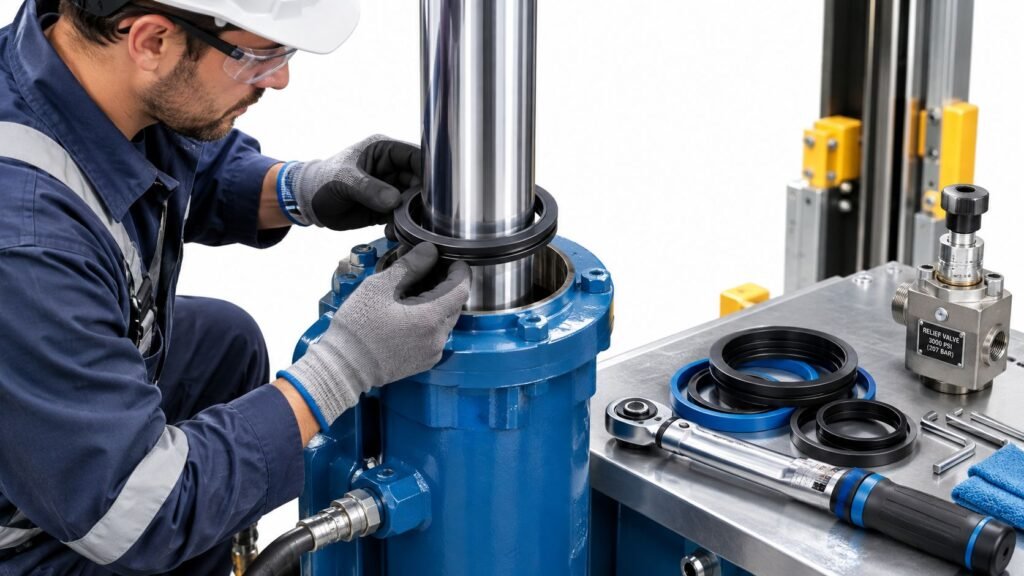
A packing-gland replacement is a diagnostic repair, not a simple parts swap. With the car secured and hydraulic pressure relieved, open the gland carefully and preserve evidence of the leak. Record the old seal’s orientation. Examine the plunger where it passed through the packing, looking for contamination, uneven wear, hardened material, scoring, corrosion, or signs that the gland ran out of alignment.
The assembly contains a pressure-balanced U-type seal, bearing, and wiper ring. These parts retain hydraulic fluid, guide plunger movement, and restrict contamination. The sealing-change technical document describes the gland as a multi-part assembly and specifies that the seal orientation must match the manufacturer’s groove direction.
A clean, undamaged contact surface determines whether the repair lasts. Remove residue from the bore, gland seat, plunger, and surrounding area without allowing dirt into the hydraulic system. Inspect the plunger’s running surface before fitting new components. A sharp edge or rough corrosion spot can cut the sealing lip during operation, causing another leak soon after installation.
Replacement parts must match the original material, strength, design, and dimensions. A kit that merely looks similar may have the wrong seal profile, bearing, wiper, gasket, groove direction, or gland configuration. Confirm compatibility with the cylinder and jack-head assembly before opening the package.
Install the components in a controlled sequence:
- Protect the sealing lips. Prevent cuts, twists, and contamination as each part enters the gland.
- Follow the groove direction. Fit the pressure-balanced U-type seal exactly as specified by the manufacturer.
- Seat every component. Check that the bearing, wiper, gasket, and seal remain correctly positioned and free from pinching.
- Clean before closing. Remove loose debris and old sealing material from the work area.
- Restore compatible fluid. Bring the hydraulic fluid to the proper level with clean, compatible fluid.
- Cycle only after inspection. Bleed or cycle the system as applicable, then examine the gland and plunger for fresh leakage.
A new seal cannot correct a damaged plunger, contaminated bore, or misassembled gland. If those conditions remain, the repair has not addressed the actual source of oil loss, and the cylinder may require further evaluation before the elevator returns to service.
Post-Repair Testing and Environmental Compliance
A replacement seal can look perfect and still leave the elevator unsafe to return to service. Acceptance depends on evidence: the cylinder holds pressure, the car travels and levels correctly, safety functions operate, and the repair area remains free of renewed leakage. During cycling, inspect the gland, plunger, pit, and surrounding equipment. Record any oil loss instead of relying on a visual check alone.
Test under the conditions required by the equipment, manufacturer, and jurisdiction. A full-load static test provides a practical check for pressure loss and leakage. Relief-valve and system-pressure testing must also be completed according to the applicable procedure. One regulator’s technical interpretation requires the relief valve to bypass full pump output before pressure exceeds 150% of working pressure, while the system must withstand that test pressure. That interpretation does not replace the governing code or manufacturer’s instructions, but it demonstrates why pressure verification belongs in the closeout record.

Treat oil as a documented material
Oil loss affects environmental records as well as maintenance costs. If fluid reaches an inaccessible pit, soil, or a collection system, the owner may need to show what was added, what was recovered, and how recovered material was handled. Colorado’s official hydraulic elevator oil log requires records of hydraulic fluid added and fluid emptied from leakage pans when portions of the cylinder or piping are concealed. Unaccounted losses trigger an oil-leakage test, as shown in the Colorado hydraulic elevator oil log.
Build the closeout file around measurable evidence:
- Fluid quantities. Record added and recovered oil instead of describing the leak as “minor.”
- Containment steps. Document the handling of leakage pans, absorbents, and containers.
- Disposal records. Retain contractor records for recovered or contaminated fluid.
- Test results. Preserve pressure, static-load, operational, and safety-test results.
- Follow-up observations. Confirm whether the gland stays dry and oil usage returns to normal.
California rules also require oil-level monitoring and may require removal from service when oil loss cannot be accounted for and its cause remains uncorrected. ASME provisions address collection limits and system verification after seal work. Repeatedly adding oil can conceal cylinder damage, prolong the environmental problem, and leave the elevator outside required operating conditions. Record the loss, identify its source, and resolve the cause before closing the repair.
Navigating Permits and Professional Service Coverage
Hydraulic elevator seal replacement is regulated repair work, not a routine adjustment. Virginia guidance effective January 18, 2025 requires permits for elevator repairs, replacements, and alterations under the Virginia Construction Code and ASME A17.1-2019. It specifically identifies hydraulic-cylinder packing or seal replacement as work requiring a permit and testing. The Virginia elevator repair guidance also treats related jack, plunger, cylinder, tank, and anti-creep-leveling-device work as alterations under applicable ASME provisions.
Michigan uses its own licensing and enforcement process. Michigan’s elevator permit guidance requires installation, alteration, maintenance, repair, servicing, adjusting, or testing of an elevating device to be performed by a licensed elevator journeyperson, according to the Michigan elevator permit information. Most commercial power elevators also require maintenance at least once every 90 days, with written records kept on site, under the Michigan maintenance rule. Because Michigan permit rules tie repair work to code compliance, review the elevator code requirements that apply before scheduling seal replacement.
Crane coordinates licensed journeypersons, permit filing, hydraulic packing and jack work, and the code-required testing that closes out a seal replacement. Its service area includes Detroit, Lansing, Ann Arbor, Grand Rapids, Flint, Kalamazoo, Toledo, Perrysburg, Novi, Dearborn, Ypsilanti, Holland, Battle Creek, and surrounding Michigan and Ohio communities.
For facility managers, one qualified contractor can connect leak diagnosis, hidden cylinder findings, repair scope, testing records, permits, and maintenance history. That continuity helps prevent a seal-only repair from overlooking damage that changes the job.
Crane Elevator Company provides hydraulic packing and jack replacement, cylinder resealing, preventive maintenance, emergency repairs, code-required testing, and elevator service across Michigan and Ohio. If an elevator is losing oil or showing drift, arrange a professional diagnosis through Crane Elevator Company before scheduling the repair.