The call usually starts the same way. A tenant says the elevator button for their floor doesn't light up, another says the lobby call button sticks, and someone else complains that the car skipped their floor request entirely. By the time the message reaches the property manager, it sounds like a small nuisance. In practice, it rarely stays small.
Button problems sit right at the point where users judge the entire elevator. People don't see the controller, the door operator, or the safety circuit. They see the button panel. If the buttons flicker, feel loose, respond late, or fail outright, tenants assume the whole system is unreliable.
That matters for more than convenience. A failed or poorly replaced button can create accessibility issues, trigger repeat service calls, and force owners into expensive part decisions they didn't plan for. Many building owners also run straight into another frustration at this stage. They discover that the original part is overpriced, backordered, or tied to a proprietary setup that limits who can service it.
A smarter elevator button replacement strategy doesn't just restore operation. It protects serviceability, controls long-term cost, and keeps the panel compliant and usable for everyone in the building.
More Than a Nuisance Why Elevator Buttons Matter
Monday morning starts, tenants are lining up in the lobby, and the up call button only works if someone presses it twice. The elevator still runs, but the building already has a problem. People judge reliability at the button panel, not in the machine room.
That matters because a button failure affects more than convenience. It slows traffic flow, creates avoidable complaints, and puts attention on whether the property is being maintained properly. In healthcare, schools, senior housing, and public buildings, a bad button also raises accessibility concerns fast.
What owners usually miss
Owners often approve a button swap as if it were a simple one-part repair. Sometimes it is. Often, the failed button is the point where a larger cost issue shows up.
The underlying problem is not always the switch alone. It can be poor fit from an earlier replacement, worn panel openings, unstable illumination, contamination behind the faceplate, or a proprietary fixture that forces the owner back to the same expensive source every time a part fails. I see this regularly. A single dead button turns into a series of service calls because the first replacement decision was based on short-term availability, not long-term serviceability.
That is why part selection matters as much as installation quality.
Many building owners get trapped by OEM-only button assemblies that cost more, take longer to source, and limit who can service the panel. In the right application, a non-proprietary replacement can solve the immediate failure and reduce future labor and material costs. It also gives the owner more purchasing flexibility instead of tying every small repair to a brand-locked part channel.
A good replacement strategy supports the same goals as a solid elevator preventative maintenance program. Fewer repeat calls, better parts availability, and less unplanned downtime.
Why this affects asset value
A responsive, properly fitted button panel tells tenants and inspectors the building is being looked after. A loose, dim, or inconsistent button tells them the opposite.
That shows up in a few places:
- Operating cost: Repeated one-button repairs usually cost more over time than choosing a compatible, durable replacement path early.
- Accessibility risk: Missing Braille, weak illumination, poor alignment, or unreliable activation can create compliance problems.
- Vendor flexibility: Non-proprietary components usually give owners more options for service and pricing.
- Tenant confidence: People remember the elevator that does not answer their call the first time.
Button replacement stays small only when the owner addresses it early, chooses parts carefully, and avoids getting locked into expensive replacement cycles.
Common Causes of Elevator Button Failure
A tenant presses the lobby call button three times, gets no response, and presses harder. By the time that complaint reaches the owner, the issue may be more than one bad button. It may be wear in the switch, contamination behind the faceplate, a loose mounting hole, or a panel that has started failing as a group.
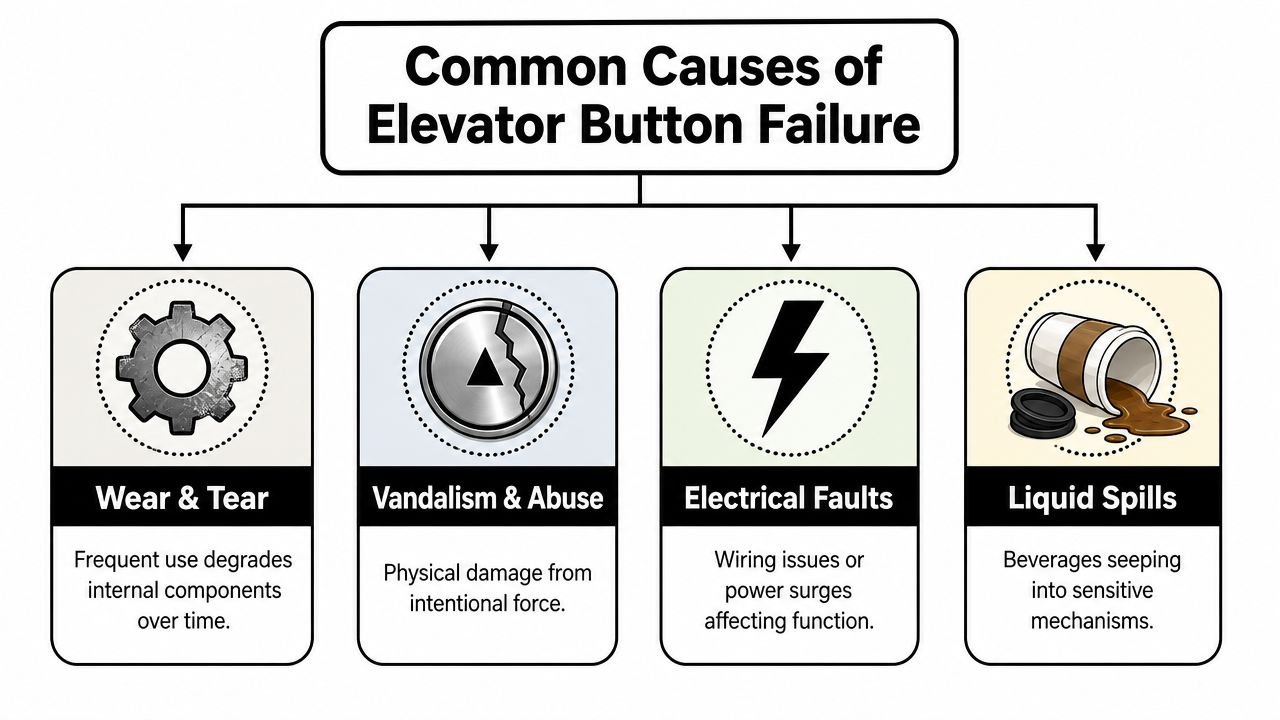
The four failure patterns that show up most
Wear and tear causes more button failures than anything else I see in service. In a busy office, medical building, or apartment property, the same floors get hammered all day. Contacts wear, springs lose tension, lamps dim, and the button starts to feel soft or inconsistent before it stops registering calls.
Electrical faults are close behind. The button may still travel normally, but the signal path is unstable. Owners usually notice this as intermittent floor selection, delayed response, flickering illumination, or a call that only registers on the second or third press.
Vandalism and abuse damage both the button and the panel around it. Keys, sharp objects, heavy impact, and repeated force on a stuck button can crack the lens, bend the retaining hardware, or enlarge the mounting opening. That last part matters because a replacement button will not stay tight in a damaged panel without metalwork or panel repair.
Liquid and contamination create slow failures that get misdiagnosed all the time. Cleaning solution, drink spills, dust, and grime work their way into the assembly and interfere with movement or conductivity. I see this often in public buildings where panels are cleaned frequently but oversprayed.
One failed button versus a pattern of failure
The money decision is diagnosing the scope correctly.
One dead button can be a straightforward repair. Several dim, loose, sticking, or intermittent buttons in the same fixture usually point to a broader problem with the button set, wiring connections, or panel condition. At that stage, replacing one button at a time often drives up labor, extends downtime, and leaves the owner paying for repeated callbacks.
That is why a good elevator preventative maintenance program matters. Repeat button failures usually come from a pattern. Dirt entering the panel, weak mounting, poor connector fit, or aging components across the whole station.
In practice, once multiple buttons in the same COP or hall station start failing within a short period, I advise owners to compare the cost of repeated spot repairs against a planned replacement approach. That comparison is even more important when the original buttons are proprietary and every small failure forces the building back into an expensive OEM parts channel. A compatible non-proprietary replacement, when it meets the job requirements, often shortens lead times and gives the owner better control over future service costs.
A single failed button is usually a repair call. A cluster of failed buttons is usually a purchasing decision.
What wastes money
Owners spend more than they need to when the repair starts with a part order instead of a diagnosis.
- Buying by appearance alone: Two buttons may look the same and still have different voltage, contact type, illumination, or connector layout.
- Replacing only the failed face: A new button does not correct a loose panel cutout, damaged backing hardware, or contamination inside the fixture.
- Using low-detail online listings: If the seller does not show mounting dimensions, electrical specs, and terminal details, the part is a gamble.
- Ignoring repeat complaints: If users report the same floor button more than once, the first repair did not solve the root cause.
- Staying locked into brand-only parts without checking options: OEM assemblies can make sense in some applications, but in many cases they raise cost and delay the repair without improving the outcome.
Good button replacement starts with the failure mode, the panel condition, and the long-term parts strategy. That is how owners avoid paying premium prices for the same problem twice.
How to Identify the Correct Replacement Buttons
A tenant presses the lobby call button three times, nothing happens, and the complaint reaches management before lunch. The visible problem is a dead button. The expensive problem starts when someone orders a replacement by photo match, then finds out a week later that the part does not fit the fixture, does not talk to the controller, or forces the building back into a brand-only supply channel.
Correct button identification starts at the panel, not in a catalog. The goal is to confirm what the elevator needs electrically, mechanically, and from a code standpoint, then decide whether an OEM part is actually necessary. In many jobs, it is not.
What needs to match before a part gets ordered
Start with the application. A car operating panel button and a hall station button can look similar and still be built for different functions, different terminal layouts, and different illumination behavior. Mixing those up creates delays, callbacks, and sometimes intermittent operation that is harder to diagnose than a complete failure.
Then verify the electrical details from the existing assembly or the job records. Confirm voltage, contact arrangement, lamp or LED type, connector style, and how the button interfaces with the rest of the fixture. On older equipment, I also want to see how the wires were landed and whether any field modifications were made during prior repairs. Those small changes matter because the replacement has to match the actual installation, not just the original submittal.
Mechanical fit is next. Measure the panel cutout, check mounting depth behind the faceplate, and inspect the retaining hardware. Elevator buttons are commonly found in several standard cutout sizes in the field, but no one should order from memory when a quick measurement settles it. A button that is even slightly wrong can sit loose, rotate in the hole, bind against the faceplate, or stress the terminals every time it is pressed.
The parts decision that affects future service costs
This is also the point where owners should ask whether the building is being pushed toward a proprietary assembly without a good reason.
Some OEM button packages make sense. If the fixture is highly specialized, tied to a branded electronics package, or part of a certified modernization scope, staying with the original manufacturer may be the cleanest path. But many standard button failures do not require that level of lock-in. A properly matched non-proprietary replacement often gives the same function, acceptable appearance, and code-compliant operation with better availability and lower long-term cost.
That choice affects more than this repair call. It affects the next one too. If the replacement can be sourced by multiple qualified suppliers, the owner has better pricing power, shorter lead times, and fewer situations where a small button failure turns into a premium-priced assembly order.
Questions that prevent the wrong order
Before approving a replacement, confirm these points:
- What is the exact button function? Car call, hall call, door open, alarm, and firefighter service buttons are not interchangeable.
- What electrical characteristics does the existing button use? Verify voltage, contact type, illumination method, and terminal or connector configuration.
- What are the fixture dimensions? Measure the cutout, face diameter or square profile, and available depth behind the panel.
- Does the replacement preserve code-required features? Braille, tactile markings, illumination, and button location still have to meet the job requirements. Owners dealing with accessibility concerns should review ADA elevator compliance requirements before approving substitute hardware.
- Is the part proprietary or non-proprietary? Ask whether other qualified elevator contractors will be able to source and service the same button later.
- Does the panel itself need repair? A new button will not solve a distorted faceplate, damaged mounting bracket, or contamination inside the fixture.
What usually works best
The best replacement is the one that fits the existing fixture correctly, performs reliably with the installed equipment, and does not trap the building in an expensive parts pipeline unless that trade-off is justified. In a lot of properties, that means a non-proprietary button chosen with care, not a generic shortcut and not an automatic OEM order.
Owners save money when the part is identified by function, measurements, and wiring details first. That is how you avoid paying for the wrong button, the second service call, and the same sourcing problem again next year.
The Professional Replacement Process Step by Step
A failed hall or cab button can look minor until it creates a second service call, tenant complaints, or a car taken out of service because the new part was installed fast and checked poorly. Good replacement work protects the elevator, the panel, and the owner's maintenance budget. It also gives the owner a chance to avoid getting pushed back into expensive brand-locked parts when a properly matched non-proprietary button will do the job safely.
What happens before the old button comes out
The job starts with securing the elevator and isolating power. That protects the technician and prevents damage to the fixture, the wiring, or the controller input.
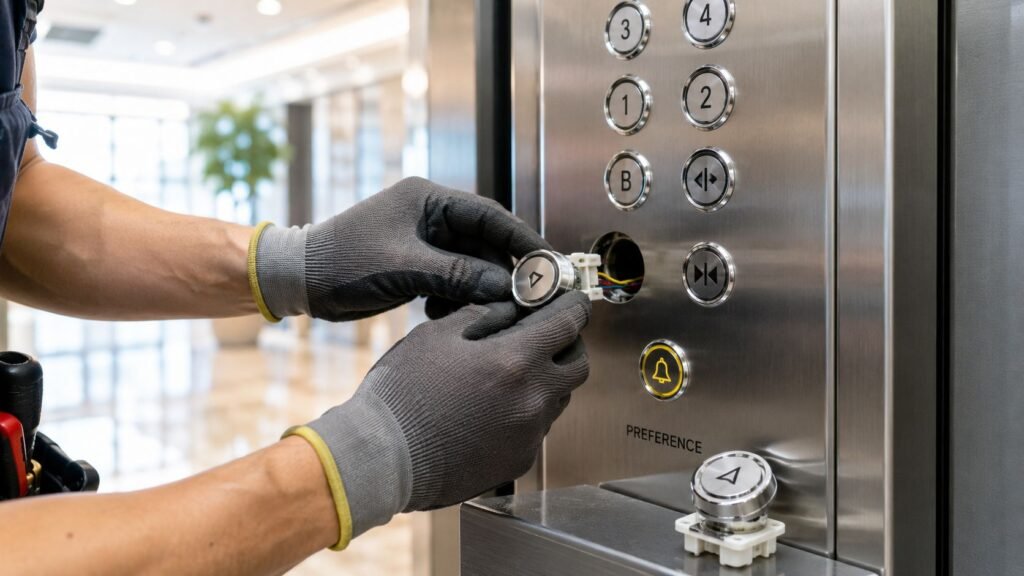
Then the panel is opened carefully. Stainless faceplates scratch easily, older mounts can be brittle, and loose button bases can shift while the assembly is being removed. A careful mechanic stabilizes the fixture, documents the wiring and connector position, and checks the surrounding hardware before disconnecting anything. Guidance from Fuji also notes the same basics: power off first, stabilize a loose base during removal, clean contamination from the opening, and test operation after installation to confirm stable signal transmission to the control unit (Fuji elevator button repair and replacement guide).
What a careful install includes
A proper replacement is more than swapping a cap and snapping a new unit into place. The mounting cavity has to be clean, the terminals have to be secure, and the button has to sit square in the faceplate so it does not bind or wear early. On ADA-sensitive jobs, tactile markings, Braille, and illumination also need to remain correct after the repair.
This is also where part strategy affects cost. If the existing OEM button is proprietary, owners often face longer lead times and higher replacement pricing for a small component. In many buildings, a qualified non-proprietary replacement can cut part cost, reduce future sourcing headaches, and keep service options open to more than one contractor. That only works if the substitute is matched correctly and installed by a mechanic who understands the control interface and fixture constraints.
A solid process usually includes:
- Secure the elevator and isolate power so the car or opening is not put back into use during the repair.
- Open the panel without damaging the fixture and support loose hardware during removal.
- Record the existing wiring, orientation, and illumination setup before the old button is disconnected.
- Clean the opening and inspect the mounting surface so the new button seats flush and stays stable.
- Install the replacement without stressing terminals, connectors, or the PCB if the assembly uses one.
- Confirm button travel, illumination, alignment, and tactile features before the panel is closed.
The step owners should insist on
Testing under operation is the point where the work is proven. A button that lights but does not send a clean signal is not fixed. A button that registers once and fails intermittently is not fixed either.
The final check should confirm consistent actuation, correct lamp response, proper call registration, and stable performance after the panel is reassembled. If the button replacement is part of a larger fixture problem, or if repeated button failures suggest the panel should be updated instead of patched again, it makes sense to review elevator modernization services for aging fixtures and controls.
A button is not replaced when it is installed. It is replaced when it passes testing in service conditions.
That last step saves money. Catching a loose terminal or poor fit before the mechanic leaves is cheaper than paying for another dispatch, another panel opening, and more tenant disruption a week later.
Beyond Repair Upgrading to Modern Buttons
A building can spend years replacing failed buttons one at a time and still end up with the same service calls, the same tenant complaints, and the same parts problem. That pattern usually points to a bigger decision. Keep buying into an aging, brand-locked fixture line, or switch to a button solution that more qualified elevator companies can source and service.
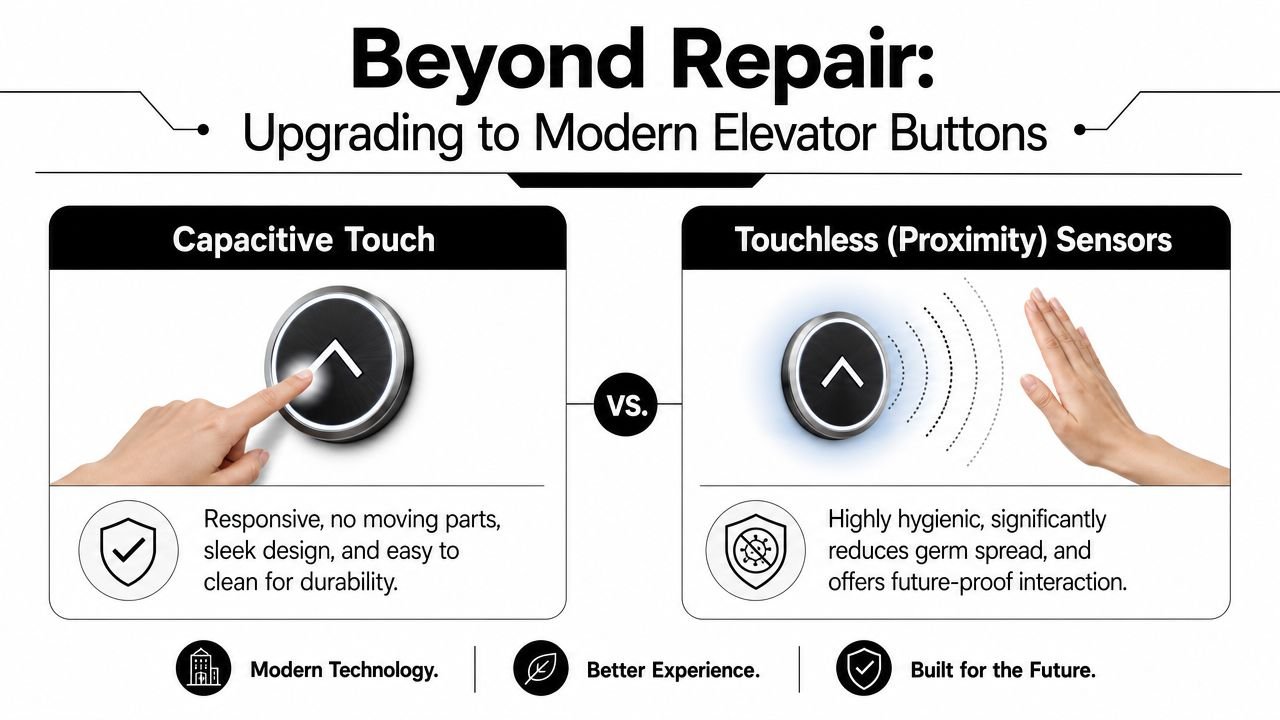
Mechanical versus modern
Owners often assume the safest choice is to order the exact OEM button again. Sometimes that is the right call, especially if the panel is in good condition and the part is readily available. But in many older buildings, proprietary buttons create a cost trap. Lead times stretch, pricing stays high, and future service options narrow because the building depends on one part family.
Modern replacements can break that cycle if they are selected correctly.
| Option | Strength | Limitation |
|---|---|---|
| Mechanical push buttons | Familiar operation, easier to match in many older panels | Moving parts wear, and some OEM versions are expensive or hard to source |
| Capacitive touch buttons | No mechanical travel, clean appearance, fewer physical wear points | Must be matched to controller inputs, voltage, and fixture design |
| Touchless or proximity buttons | Limits contact wear and can improve public-use experience | Needs careful specification so activation distance and user expectations are appropriate |
The primary upgrade is not the face of the button. It is the service model behind it. A well-chosen non-proprietary replacement can lower part cost, shorten downtime, and keep the building from being tied to a single manufacturer for routine fixture work.
Where each option makes sense
Mechanical buttons still fit some jobs. If an older cab panel is in decent shape and the owner wants the least disruptive repair, a direct mechanical replacement may be the practical answer.
Capacitive buttons make sense when repeated physical wear is the main issue and the owner wants a cleaner fixture without constant button cap failures. They are often a good fit in mid-cycle upgrades where the panel stays but the operating components need to improve.
Touchless buttons are usually a better choice in heavy-use buildings, healthcare settings, or properties that want a visible fixture update. They can work well, but only if the contractor verifies how the button will interface with the existing equipment and how riders will operate it.
If multiple fixtures are aging at the same time, a broader elevator modernization services plan for panels, fixtures, and controls often costs less over time than repeated spot repairs with hard-to-source OEM parts.
What owners should watch for
The cheapest button on paper can become the most expensive decision in service. If the replacement is proprietary, every future failure may bring the same pricing pressure and the same sourcing delay. If the replacement is non-proprietary but poorly matched, the building can end up with nuisance callbacks, misfires, lamp issues, or code compliance problems.
Good upgrade work starts with compatibility and serviceability. The contractor should confirm signal type, operating voltage, mounting dimensions, illumination requirements, ADA features, and whether the new button family can be supported by more than one qualified provider.
That is the long-term value. Buy a button system that works with the elevator and works for the owner.
Your Elevator Button Replacement Decision Checklist
Owners usually get pushed toward a part decision too quickly. Someone says the button is bad, a quote arrives, and the pressure is to approve it so the complaints stop. That's exactly when costly mistakes happen.
The better approach is to slow the decision down just enough to ask the right questions.
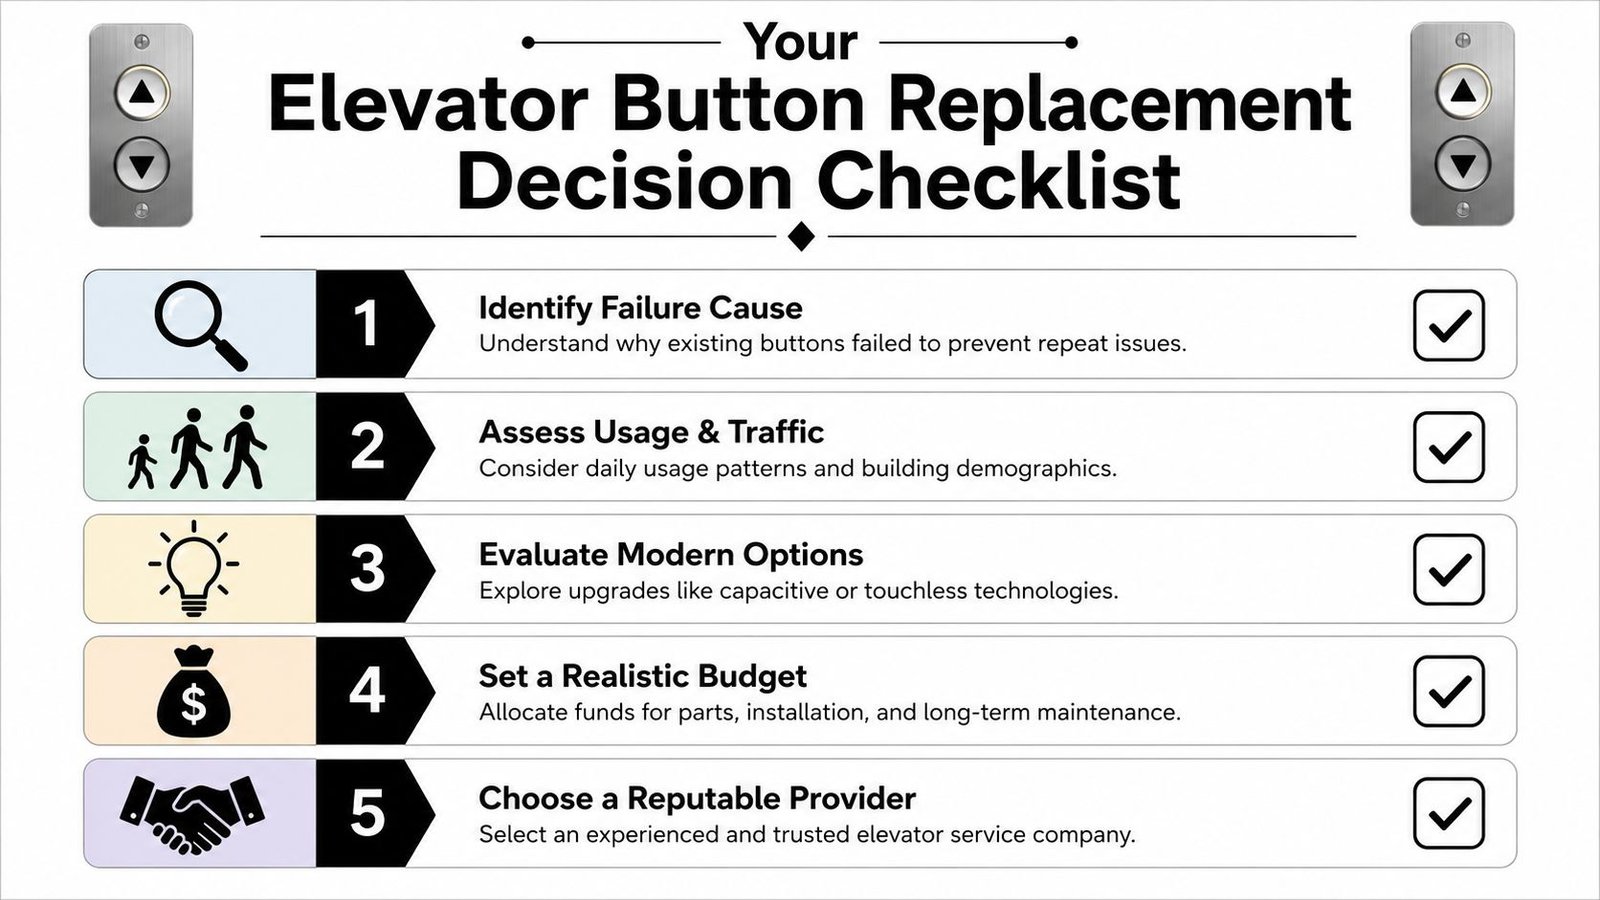
Five checks before you approve the work
- Define the true scope: Ask whether the issue is one failed button, multiple failing buttons, or a deteriorating COP or HOP condition. A quote for one button may look cheap and still be the wrong repair.
- Ask what part family is being proposed: Is the replacement proprietary, or is it a non-proprietary option that other qualified providers can service later?
- Request compatibility confirmation: The contractor should verify voltage, signal type, wiring arrangement, mounting size, and function type before ordering.
- Review accessibility details: Braille, illumination, alignment, and button location aren't cosmetic. They affect code compliance and usability.
- Compare future serviceability, not just today's invoice: A slightly different part choice can determine whether your building has sourcing options later or gets locked into one expensive path.
Why non-proprietary matters so much
This is the part many owners wish they had understood earlier. A brand-locked button can turn a simple replacement into a sourcing problem, a lead-time problem, and a budgeting problem at the same time.
That frustration shows up clearly in owner conversations. A Reddit discussion on button replacement highlights frequent complaints about “crazy expensive” replacements, confusion about Amazon parts, and the lack of clear guidance on affordable non-proprietary buttons that work across different elevator makes. That lines up with what many property managers and HOAs are dealing with in the field.
If a part can only be bought through one narrow channel, the owner doesn't control the repair anymore.
Questions worth putting in writing
When requesting quotes, ask for written answers to these:
| Question | Why it matters |
|---|---|
| Is this replacement proprietary or non-proprietary? | Determines future vendor flexibility |
| Can another qualified elevator company service this part later? | Protects against lock-in |
| Are lead times known before approval? | Avoids surprise downtime |
| Is this a like-for-like replacement or part of a broader panel recommendation? | Helps compare options fairly |
| What happens if neighboring buttons fail soon after? | Exposes whether the quote solves the real problem |
The best buying decision isn't always the lowest quote. It's the quote that restores operation, preserves compliance, and keeps the building from being trapped by the next button failure.
How Crane Elevator Company Solves Button Issues
Michigan owners need more than someone who can swap a button. They need a contractor who can tell the difference between an isolated failure, a panel problem, and a sourcing mistake that will keep costing money.
Crane Elevator Company approaches button issues with the broader system in mind. That matters because elevator button replacement touches maintenance strategy, accessibility, modernization planning, and long-term serviceability. A contractor working only at the surface level may restore one button and leave the owner with the same structural problem.
Crane's model is especially relevant for buildings trying to avoid proprietary lock-in. The company specializes in non-proprietary modernizations for all makes and models, which gives owners more flexibility than a brand-locked replacement path. That's a practical advantage, not a marketing phrase. It means future service doesn't have to depend on one narrow parts pipeline.
Crane also serves the kind of mixed equipment base common across Lower Michigan. Older freight units, newer passenger elevators, residential elevators, wheelchair lifts, and dumbwaiters all create different replacement conditions. The right contractor needs to understand both the panel details and the financial implications of the part choice.
For a look at the company and its service focus, this video gives helpful context.
The practical value is straightforward. Owners get repair and modernization guidance that focuses on uptime, code compliance, and avoiding recurring spend on the wrong hardware. For properties that need responsive field support, Crane also operates 24/7/365 across Lower Michigan and works on all makes and models, with preventative maintenance, repairs, inspections, and modernization under one roof.
If you're dealing with flickering, unresponsive, outdated, or overpriced elevator buttons, Crane Elevator Company can help you sort out whether you need a simple replacement, a smarter non-proprietary part option, or a full panel modernization strategy. Their team serves Lower Michigan with hands-on experience, transparent quoting, and service plans built to reduce repeat breakdowns instead of patching the same issue again.