
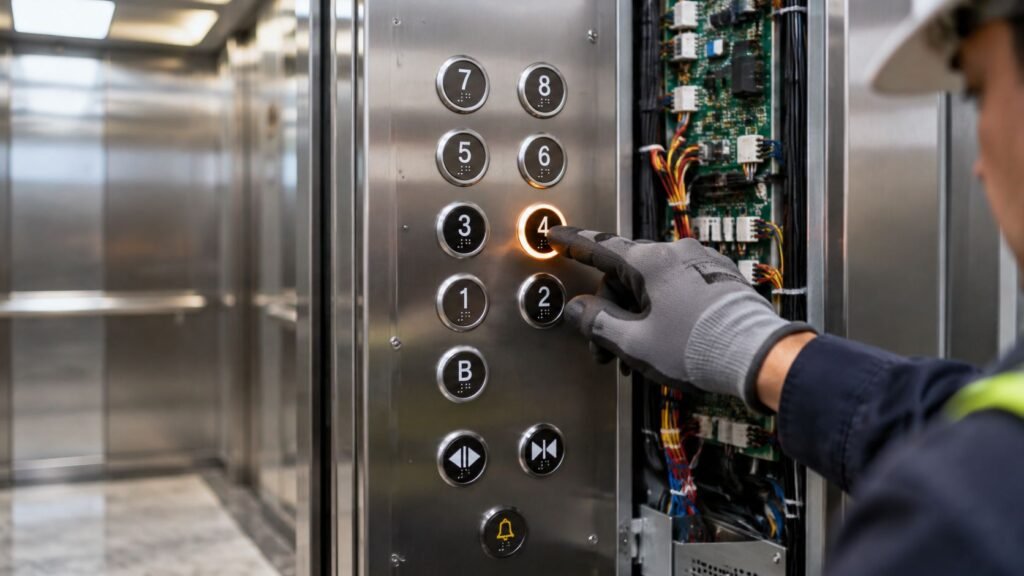
A tenant presses the third-floor button. Nothing lights. She presses harder, the car sits with the doors open, and your phone rings before you've finished your coffee.
That's usually where elevator button repair starts for a building owner. It looks small. Sometimes it is. Sometimes that dark button means a worn contact, a failed input board, or a panel that no longer meets accessibility rules. I would get the diagnosis right before approving the cheapest part, because a button that works electrically but fails on force, labeling, or emergency calling gets pulled out and done again.
What Elevator Button Repair Costs in 2026
Say a lobby call button in a small medical office stops lighting. You need a number for approval, not a lecture. Start here. In 2026, Elevator One published a typical individual elevator-button replacement cost of $100 to $500 per button.
For a bigger job, Elevator One reported fixture replacement, including buttons and indicators, typically costs $500 to $2,000 per unit. Treat both as starting ranges, not quotes for your car.
| Repair scope | Typical cost (2026) | What it covers |
|---|---|---|
| Single car or hall button replacement | $100 to $500 per button | Button or contact, connector check, functional test |
| Fixture replacement with buttons and indicators | $500 to $2,000 per unit | Faceplate, buttons, indicator lamps, wiring to the fixture |
| Input board or controller interface repair | Priced after diagnostics as board part plus labor | Board or interface part, controller diagnostics, retest of all calls |
| Full panel modernization | Quoted per car after survey as panel, interface, and labor | Non-proprietary panel, accessible legend, cab interface updates |
What moves you within the range
Count matters first. One failed hall button is a different ticket from six worn buttons sharing one fixture, meaning the whole mounted unit that holds buttons, lamps, and faceplate together. If the faceplate is obsolete, you're not buying a button anymore. You're buying a fixture.
Electronics matter next. A new button won't fix a dead input board, the circuit board that receives button signals, or a controller interface that drops them. Buildings serving more floors also have more inputs to test after the swap, and that testing time is real labor.
Practical rule: If a quote lists only a part price, ask what proves the repair works. Testing is not padding. It's the job.
Read any quote for four line items. The button or contact. The wiring check. A functional test of every affected input. And whether the legend, the label plate with floor numbers and symbols, gets replaced. If the legend isn't mentioned and yours is worn, you're probably looking at a second visit.
Anatomy of an Elevator Button Panel
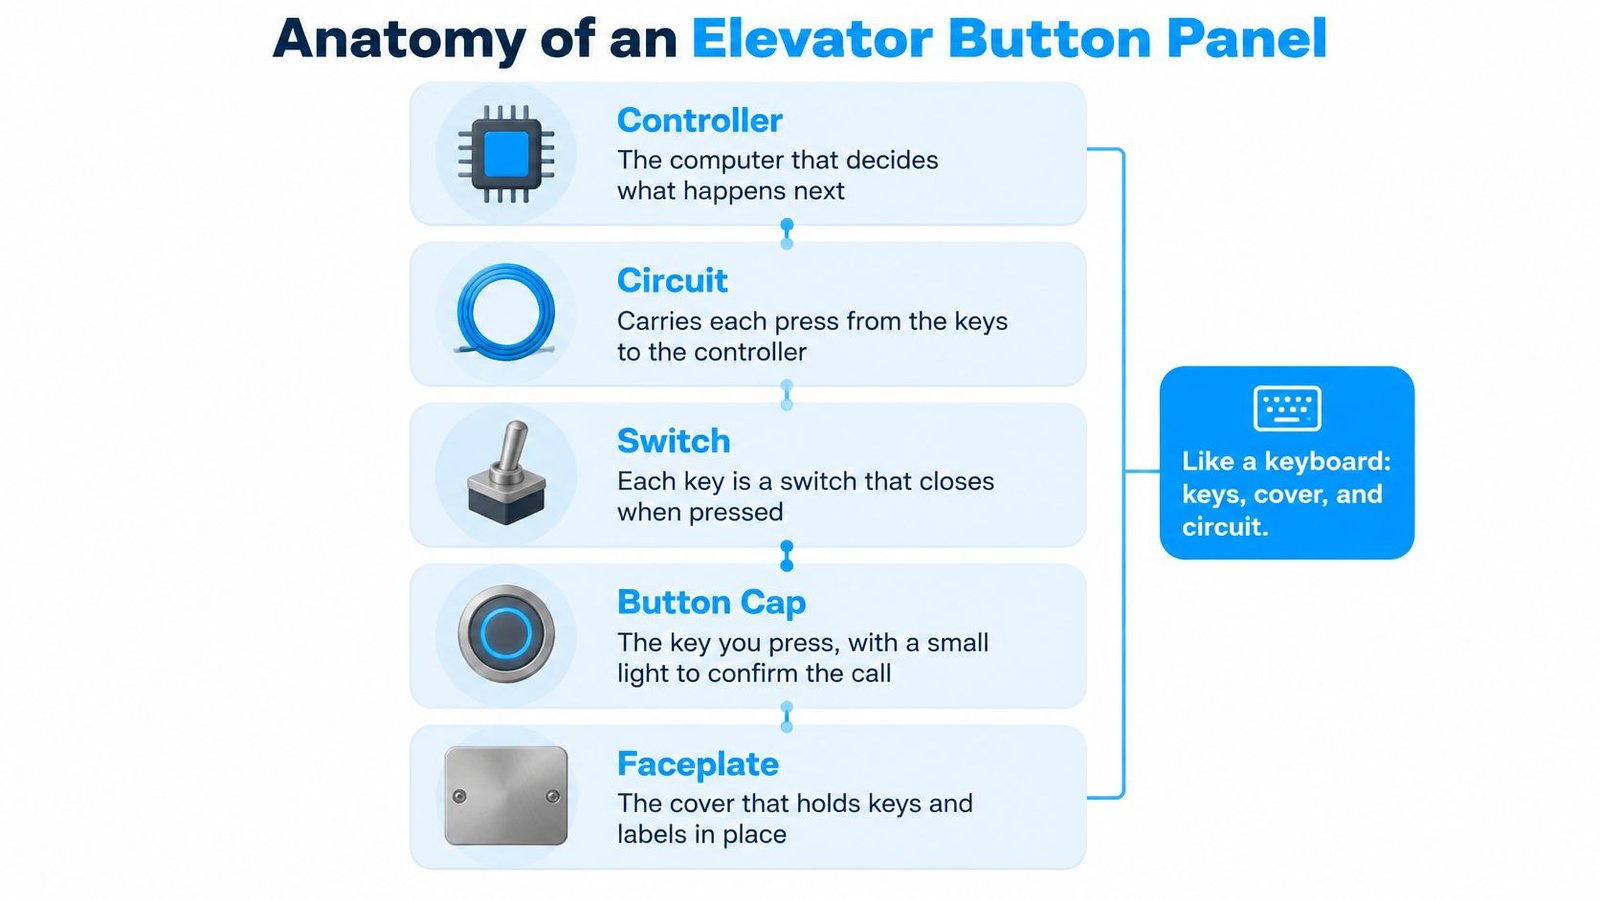
Think of the panel like a keyboard. Each key is a switch. The faceplate is the cover. Underneath, a circuit carries each press to the controller, the computer that decides whether the car moves, stays, or opens its doors.
Follow one press from your finger inward, and diagnosis gets much easier.
The layers your finger touches first
The bezel is the frame around each button, and the faceplate is the metal cover that holds everything in place. Together they carry the legend, including floor numbers, symbols, and tactile characters passengers read by touch. A bent bezel can bind a button that is otherwise fine.
The actuator, or button cap, is the part you push. It should travel smoothly, register the press, and spring back fully. A cracked or collapsed cap feels mushy or needs a hard push.
The layers that carry the signal
Behind the cap sits the contact, the switch element that closes an electrical circuit when pressed. The lamp or LED, meaning a small light inside or beside the button, confirms the call registered. Contacts wear out. Lamps fail on their own. That's why a dark button doesn't always mean a dead button.
From there, the wiring harness or input board carries the signal out of the fixture. The controller accepts the call, ignores it, or acts on it based on what the car is doing. Hall lanterns and floor indicators share this same signaling system, so one wiring fault can dim several things at once.
These aren't cosmetic parts. A New York State elevator specification summarized in federal facility guidance states that car and hall push buttons, fixture contacts, key switches, locks, lamps, sockets, and indicators must be maintained and repaired as needed. A defective button can affect floor selection, door reopening, alarm or emergency functions, fire-service operation, or accessibility.
The symptom usually points to the layer. Cracked cap, swap the button. Good button, no signal at the controller, look at wiring or the board. Good signal, no response, stop buying buttons and diagnose the controller.
Car, Hall, Vandal-Resistant and ADA Panels Compared
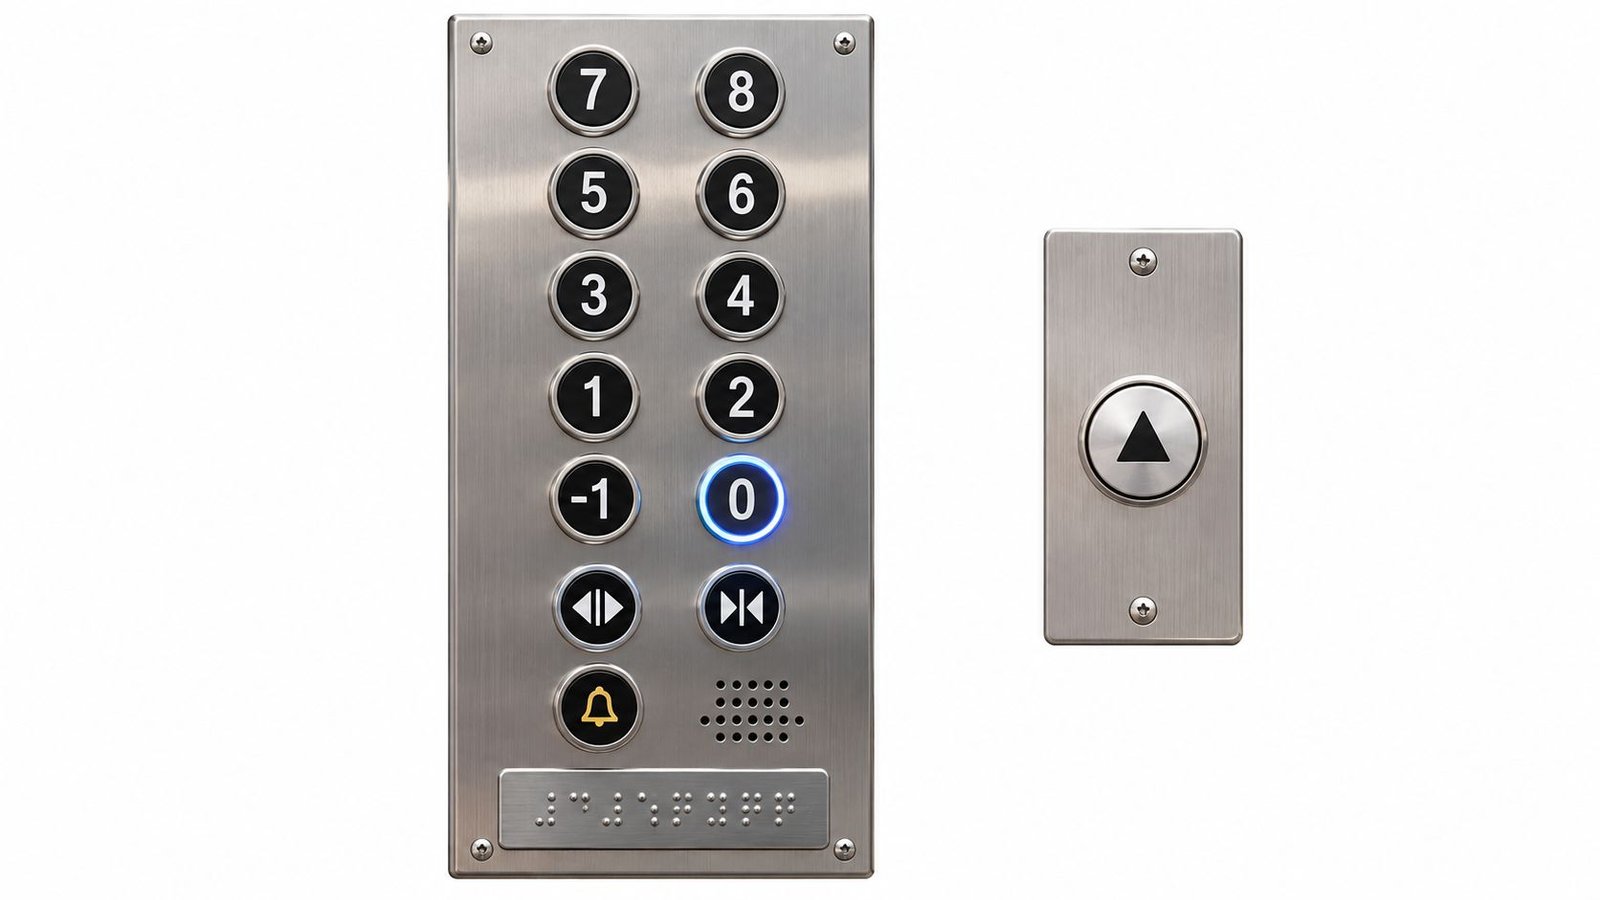
A car panel is the cockpit. It's inside the cab, and the passenger runs the trip from there. A hall station is the doorbell. It sits at each landing and only asks the car to come.
That difference changes what a repair has to preserve. Our elevator push buttons guide covers the common configurations if you want to compare yours before calling.
| Panel type | Where installed | Defining features | Repair must preserve |
|---|---|---|---|
| Car operating panel (COP) | Inside the cab | Floor buttons, door open and close, alarm, sometimes emergency phone | Floor layout, lamps, alarm and phone function |
| Hall call station | Each landing | Up and down calls, lantern or indicator | Call registration, indicator visibility, weather sealing where exposed |
| Vandal-resistant panel | Schools, transit, municipal buildings | Tamper-resistant fasteners, sealed or metal faceplate, sturdier actuators | Original vandal-resistant specification |
| ADA-compliant panel | Any public car | Raised or flush buttons, tactile characters, Braille, minimum button size | Tactile legend position, button size, mounting height |
Vandal-resistant panels punish shortcuts
These panels exist because someone already pried, kicked, or burned the originals. They use tamper-resistant fasteners, screws that need special bits, plus metal faceplates and heavier actuators. Replace one button with a standard residential-grade part and you've created the weakest point on the panel. The damage will find it.
Match the specification you already have. If the original fixture was sealed against moisture or dust, the replacement needs that seal too, especially in parking structures and school stairwell landings.
ADA panels punish copycat repairs
An ADA-compliant panel follows the Americans with Disabilities Act rules for button size, position, tactile characters, and Braille. Copying an old layout sounds safe, but the old layout may predate current requirements or may have been wrong for years. A like-for-like swap can faithfully reproduce a violation.
To identify what you have, check four things. The faceplate style and finish. The legend type, engraved, applied, or illuminated. The fixture shape and mounting. And the controller records, which usually name the fixture family. Photograph all four before anyone orders parts.
Accessibility Rules Every Button Repair Must Meet
A button that registers electrically can still fail the repair. If it needs too much force, sits recessed in the plate, or lost its tactile labels, a passenger who is blind or has limited hand strength can't use your elevator independently. Our summary of ADA requirements for elevators gives the wider context, but the checks below are what a technician should run before returning the car to service.
The U.S. Access Board guide on operable parts states that elevator buttons must be raised or flush, not recessed, usable with one hand without tight grasping, pinching, or wrist twisting, with maximum activation force of 5 lbf (22.2 N) and a smallest dimension of at least 3/4 in (19 mm).
| Requirement | Limit or rule | How to verify after repair |
|---|---|---|
| Button activation force | 5 lbf (22.2 N) maximum | Measure with a force gauge |
| Smallest button dimension | 3/4 in (19 mm) minimum | Measure the button face |
| Button mounting | Raised or flush, not recessed | Visual and touch check |
| One-hand operation | No tight grasping, pinching or wrist twisting | Operate the button one-handed |
| Tactile characters and Braille | Raised characters, Braille immediately left of the button | Compare the new legend with the original layout |
| Emergency-call button | Tactile phone symbol and the word HELP | Confirm labeling and feel |
| Emergency reach range | 15 to 48 in above the floor for phone and YES/NO buttons | Measure reach height at each operable part |
Three ways a working button still fails
First, force. A replacement actuator with a stiffer return spring can push activation force past the limit. The button works for the technician testing it with a firm thumb. It fails for a passenger using a knuckle or the side of a hand.
Second, position. The U.S. Access Board ADA guidance requires raised characters and Braille positioned immediately to the left of the applicable button. A new faceplate with characters above the button, or on the right, looks tidy and reads wrong by touch.
Third, the emergency button. The U.S. Access Board chapter on elevators and platform lifts supports identification with a tactile phone symbol and the word "HELP", plus a two-way means of communication. A panel that drops that labeling can pass a bench test and still fail a trapped passenger.
A functioning button does not equal an accessible emergency system. The feedback around the button decides whether help actually arrives.
Verify communication, not just the press. Confirm two-way speech, visual or audible confirmation that the call went through, and backup power. Then measure force with a gauge, confirm full return after release, check mounting height and legend alignment, and write down every defect you found, fixed or not.
Troubleshooting Common Button Faults
Don't replace hardware first. Confirm whether the call reaches the controller. If a button lights and the car ignores it, your problem usually lives in the controller or door circuit, and a new button changes nothing.
That one check splits the work into two piles. Fixture problems you fix at the panel. System problems you escalate before spending on parts.
| Symptom | Likely cause | First check or fix |
|---|---|---|
| Dead button with no light | Loose connector, failed contact, failed input board | Inspect connector, test contact with a meter, check board signal |
| Lamp dark but button registers | Failed LED or bulb, damaged socket | Replace lamp and check socket seating |
| Works only with a hard press | Collapsed actuator or worn tactile mechanism | Replace actuator or button |
| Sticks or stays lit | Contaminated switch, stuck button, shorted wiring | Clean or replace button, check wiring for shorts |
| Lit call the car ignores | Controller or door circuit fault, not the button | Escalate to controller diagnosis |
| Worn or missing Braille or tactile label | Wear, or a replacement that does not match the original | Replace the legend with a compliant one |
| Emergency phone silent | Phone or communication path fault | Test two-way communication with the doors closed |
Reading the table like a technician
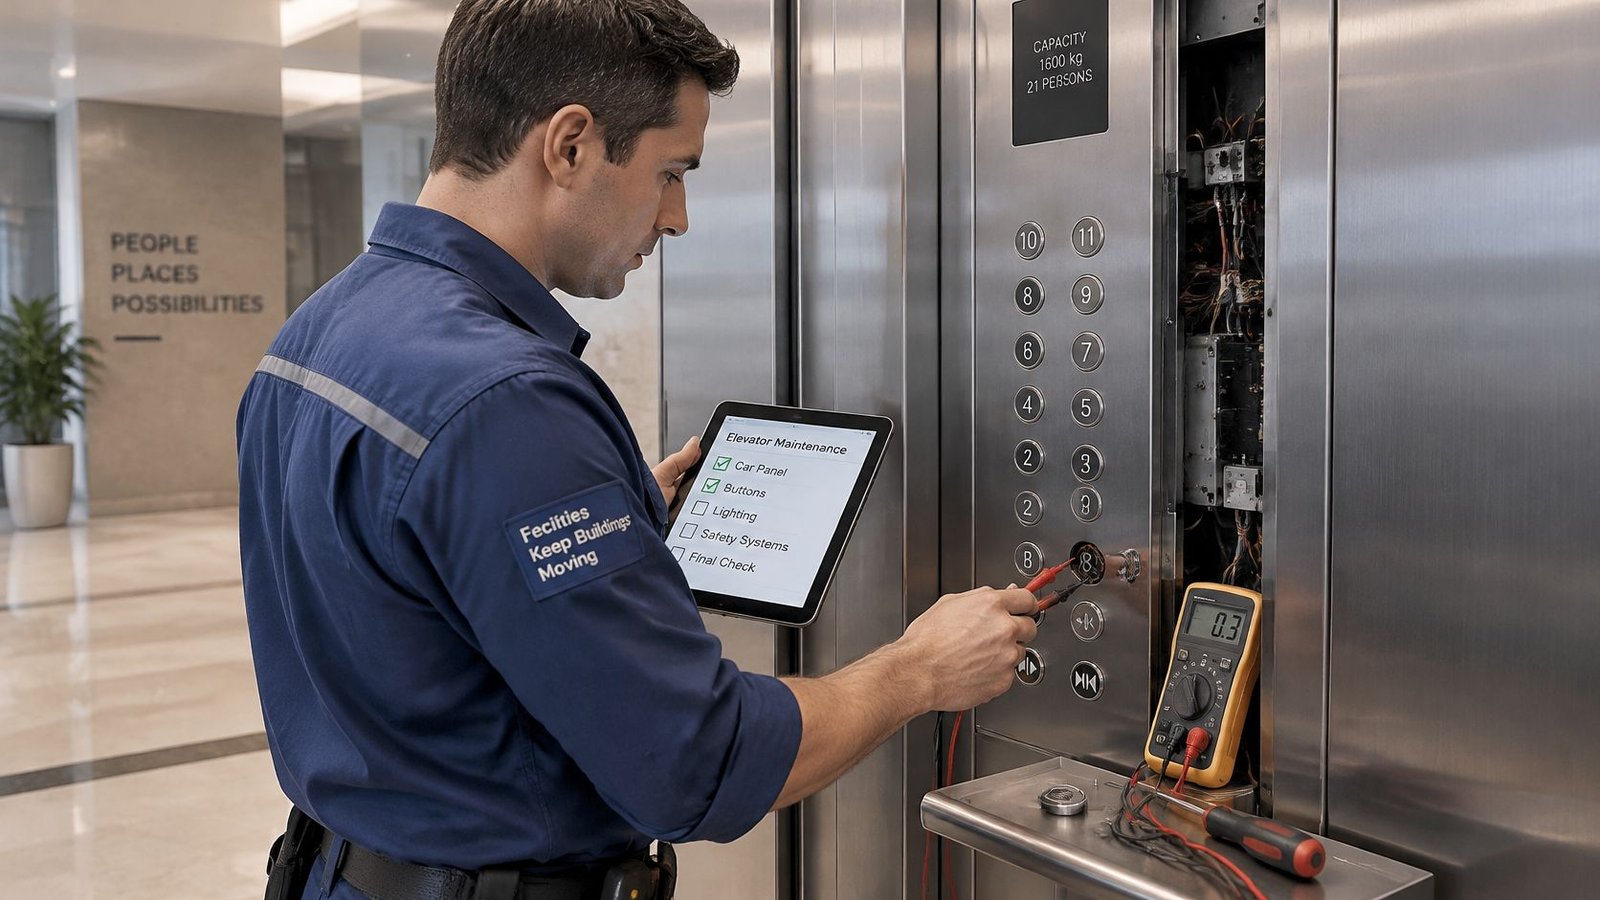
Start with a meter, a handheld tester that checks whether a contact opens and closes cleanly. A contact that tests good at the fixture but shows no signal at the board points to the connector or harness between them. Reseating a loose connector fixes more dead buttons than owners expect.
A hard press is mechanical until proven otherwise. Dirt, a collapsed actuator, or a bezel bent by impact all raise the force needed. Cleaning helps a contaminated switch. It won't restore a worn tactile mechanism, so don't pay for repeat cleanings on a button that's physically spent.
The intermittent fault
Intermittent failures carry information. A button that quits in cold weather or after the car runs for a while suggests a loose connector opening with temperature change, or a cracked board trace, meaning a hairline break in the copper path on a circuit board, opening under vibration. Note when it fails, not just that it fails. That timing saves diagnostic hours.
Log the floor, the time, and what the car was doing. Pattern beats memory.
Quick fixes include lamps, sockets, connectors, single actuators, and legends. Board faults, ignored calls, and silent emergency phones need controller or communication diagnosis. I would not authorize a fixture replacement until someone tells you which pile your fault sits in.
How to Replace a Button and Verify the Repair
Replacement itself is the short part. Verification and records take longer, and they're what separate a repair from a guess. This sequence is how the work should run on a car or hall fixture.
The visual below condenses the sequence into six stages.
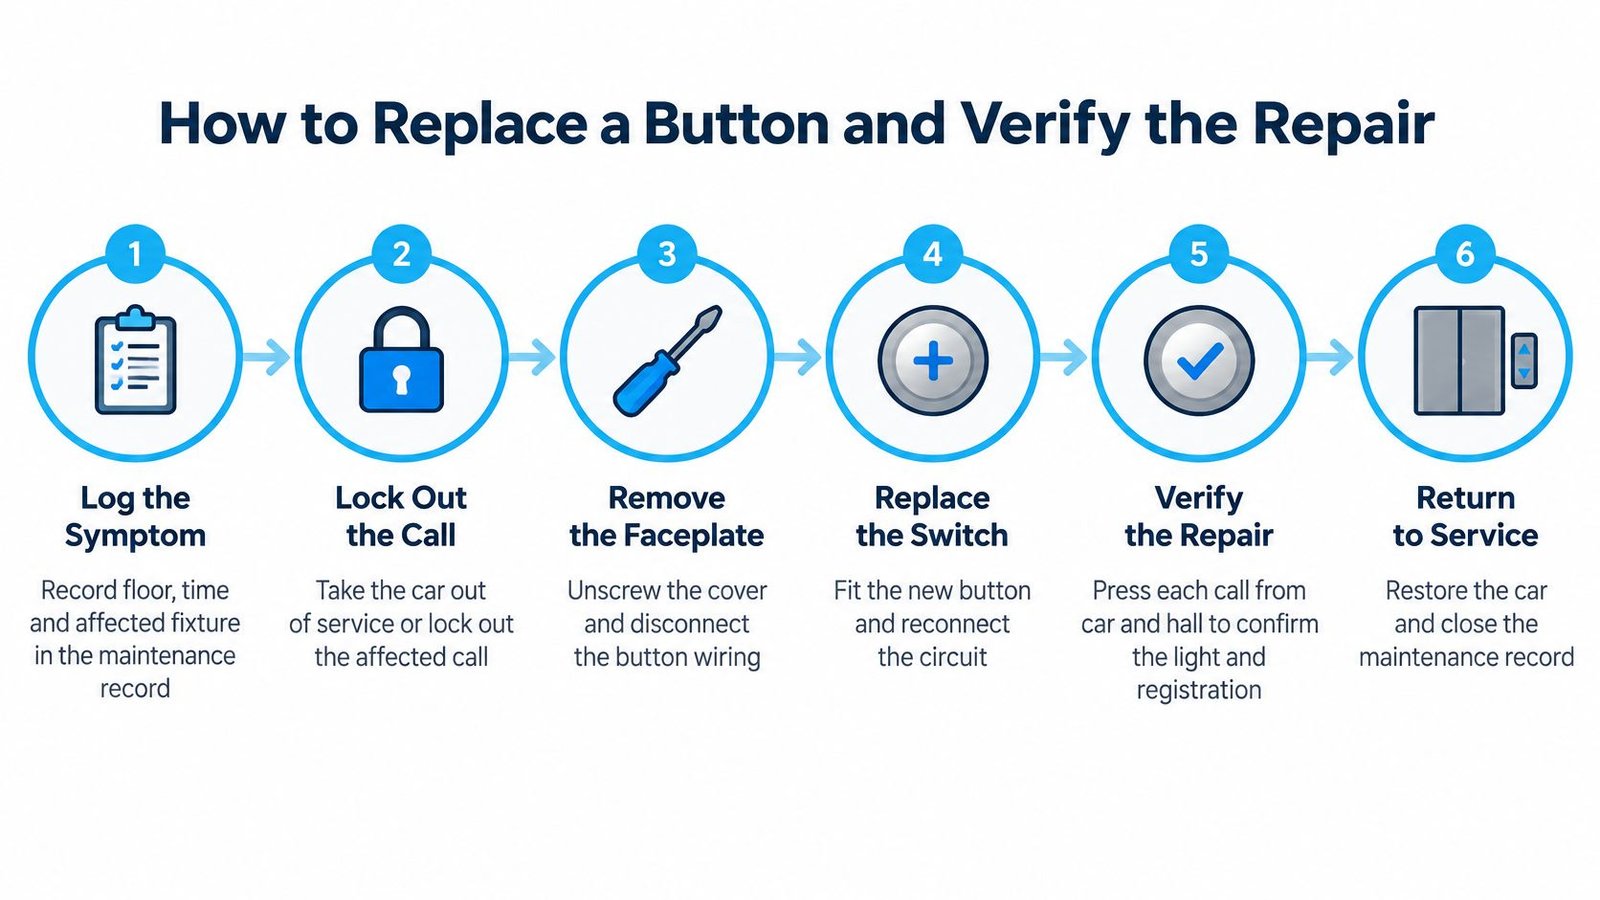
- Log the symptom: Record floor, time, fixture, and exactly what the passenger reported, because the pattern matters later.
- Take the car out of service: Or lock out the affected call following the controller procedure, so nobody restarts the car mid-repair.
- Remove the faceplate and photograph the wiring: Do this before disconnecting anything, because memory rewires panels wrong.
- Test the contact with a meter: Confirm the fault lives in the button before replacing it.
- Install the matching part: Same tactile legend, same vandal-resistant specification, same lamp type.
- Check position and alignment: Confirm mounting height, raised or flush fit, and legend placement against the original layout.
- Measure activation force: Use a force gauge and confirm the button returns fully after every release.
- Test every input: Run each call at the controller and the car panel, then test the emergency phone with doors closed.
- Return to service and record it: Log parts used, tests passed, and the date the unit went back into service.
Watch the basic replacement sequence before your next service visit so the steps above are easier to follow on site.
Why the paperwork is part of the repair
Wisconsin's Department of Safety and Professional Services explains in its maintenance records FAQ that ASME A17.1, Section 8.6.1.4, requires maintenance records documenting dates and descriptions of tasks, examinations, tests, adjustments, repairs, replacements, trouble calls, and corrective action. That guidance also indicates records are generally retained for the most recent five years.
That log does practical work for you. Three button failures on one fixture in a year is a fixture problem. Three ignored calls across floors is a controller problem. Without records, every visit starts from zero and you pay for the same diagnosis repeatedly.
Timing connects to inspections too. Michigan's elevator rules require passenger, freight, material lifts, and many other categories to be inspected at least once every 12 months. Ohio's elevator code requires at least one test every five years to be a full-load safety test under ASME A17.1. Button defects found between inspections shouldn't wait for the next one in Detroit, Toledo, or anywhere else.
Choosing Between Repair and Panel Replacement
Repair the single button when the fault is isolated, the rest of the panel works, the legend and tactile labels still comply, parts are available, and the controller shows no related faults. That's a clean, defensible fix. Our notes on vintage elevator buttons help if your panel is old enough that parts matching is the hard part.
Replace the fixture or panel when several buttons fail, the faceplate no longer matches the required accessible layout, parts are obsolete, or repeat trouble calls show a pattern. Modernize when the controller, door equipment, or cab interior are aging alongside the panel. All of our modernizations use non-proprietary control systems, meaning any qualified provider can service them later, so you're not locked to one company.
Run the arithmetic before deciding. Five individual swaps inside a short period can meet or exceed one fixture replacement, and you still own an old faceplate afterward. Your trouble-call log tells you which side of that line you're on.
This is regulated work, not handyman territory. Michigan's elevator permit information states that installation, alteration, maintenance, repair, servicing, adjusting, testing, and inspection on an elevating device must be performed by a licensed elevator journeyperson. Michigan also incorporates ASME A17.1 for elevators and escalators and ASME A18.1 for platform lifts and stairway chairlifts. We offer a second opinion on an existing problem at no extra charge, including a visit and a solution plan, at 1-734-726-4247.
If a panel fails any accessibility check, it gets corrected or replaced. It does not go back into service as is.
Crane Elevator Service Across Michigan and Ohio
A failed elevator button can be a small fixture problem or a sign of wider panel trouble. Crane Elevator Company is a family-owned elevator contractor with over 25 years of experience, serving Michigan and Ohio, including Detroit, Lansing, Ann Arbor, Flint, Kalamazoo, Birmingham, Toledo and Perrysburg. The company also serves surrounding communities.
Crane specializes in maintenance, repair and modernization for passenger, service, freight and residential elevators, wheelchair and material lifts, and dumbwaiters. Its services include preventive maintenance, state testing and inspections, major and minor repairs, violation corrections, and full modernization for all makes and models.
The standards behind the work
ASME describes A17.1/CSA B44 as a safety code covering elevator design, installation, operation, inspection, testing, maintenance, alteration and repair, along with related conveyances. Elevator testing helps ensure compliance with applicable codes. Crane's maintenance includes COP and PI bulb replacements, so these fixture items can be addressed during scheduled service.
Crane modernizations use non-proprietary control systems, which means any qualified service provider can maintain them later. For a building owner, this keeps future service options open rather than tying the equipment to one contractor.
What to send us first
For an ongoing elevator problem, Crane offers a second opinion at no extra charge, including a visit and a solution plan. Call 1-734-726-4247 or use the company website to request service. Share the details that help clarify whether the issue is limited to one button or involves the fixture or panel:
- Symptom log: Note the floor, time and what the button did or did not do.
- Fixture photo: Photograph the faceplate, labels and visible damage straight on, in good light.
- Last inspection report: Include it so open items are clear before the panel is examined.
A button that is dark, sticks, or works only under pressure needs diagnosis before replacement. The cheapest swap can become the costly choice if it damages tactile labeling, fails accessibility requirements or leaves an emergency-phone issue unresolved. The repair should address the cause and verify the button's operation, labeling and emergency communication before the elevator returns to service. Visit Crane Elevator Company to request service or a no-charge second opinion.