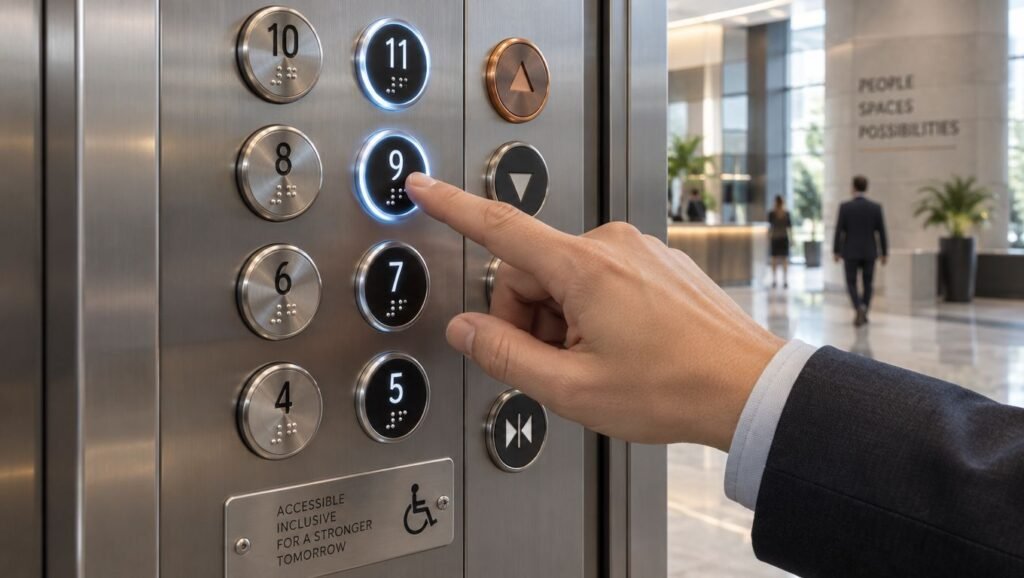
A tenant reports that the fifth-floor button feels sticky. Another passenger says the indicator light flickers. By the time you inspect the car operating panel, the symbol has faded, the raised label is difficult to read, and cleaning staff have been using a disinfectant strong enough to dull the surrounding finish. The elevator still runs, but the push button has become a maintenance problem, an accessibility concern, and possibly an early warning of a larger fixture failure.
Elevator push buttons look simple because most of their engineering is hidden behind the panel. The faceplate, actuator, switch, wiring, illumination, tactile markings, and controller interface all have to work together in a demanding environment. In Michigan facilities, particularly hospitals, schools, municipal buildings, industrial sites, and busy residential properties, the right replacement isn’t just the cheapest button that fits the opening. It must tolerate cleaning, impact, moisture, repeated use, and inspection requirements without losing the features passengers rely on.
The Evolution of Elevator Push Buttons
A faded or unresponsive button often feels like a modern nuisance, but the basic passenger interface has a surprisingly long history. The first complaint usually sounds ordinary: a resident presses the lobby button several times, a visitor can’t tell whether the call registered, or a staff member uses a key because the actuator no longer responds cleanly. Behind that small failure is a design lineage that began before most riders would associate elevators with automatic control.
Boston engineer John H. Clark filed a patent in 1886 for an electric elevator controlled by two electric push buttons. By April 1892, Norton P. Otis and Rudolph C. Smith had filed another patent covering push-button control on electric elevators. A historical review identifies 1886 to 1895 as the initial development phase for electric push-button control systems, showing that the interface arrived decades before fully automatic elevator operation became normal. (Elevator World’s history of push-button control)
From operator control to passenger input
Early passengers did not select a floor and wait for a computer to handle the trip. Human operators controlled many elevators, managing starts, stops, door operation, and floor selection. Push buttons therefore had to prove themselves as a reliable bridge between a passenger’s request and the elevator’s control system before they could replace staffed operation.
Historical accounts indicate that push buttons were introduced in 1892, but they didn’t become broadly popular immediately. One account connects wider adoption with a strike involving 15,000 New York City lift operators, while another industry history notes that around 1950 most elevators had moved away from human operators. By 1962, fully automatic control had become standard, marking a major shift from staffed elevator operation to passenger-directed travel. (Buckley Elevator’s history of elevator buttons)
Practical observation: A passenger button is the visible part of a control conversation. A clean press must become a valid signal, reach the controller, trigger the correct response, and provide feedback to the person who made the request.
That history matters during modernization decisions. A button isn’t merely decorative hardware attached to stainless steel. It’s the user-facing point of a system that includes signal logic, door sequencing, safety monitoring, position information, and illumination. When a facility manager chooses a replacement based only on appearance, the panel may look refreshed while the interaction becomes less reliable or less accessible.
The next time a tenant reports a “bad button,” treat the report as useful operational information. A sticky actuator may point to chemical residue, a worn mechanism, a damaged lens, or a problem in the wiring behind the car operating panel. The interface has evolved considerably, but its job remains the same, translating a passenger’s intent into a dependable elevator command.
Anatomy and Activation Mechanisms
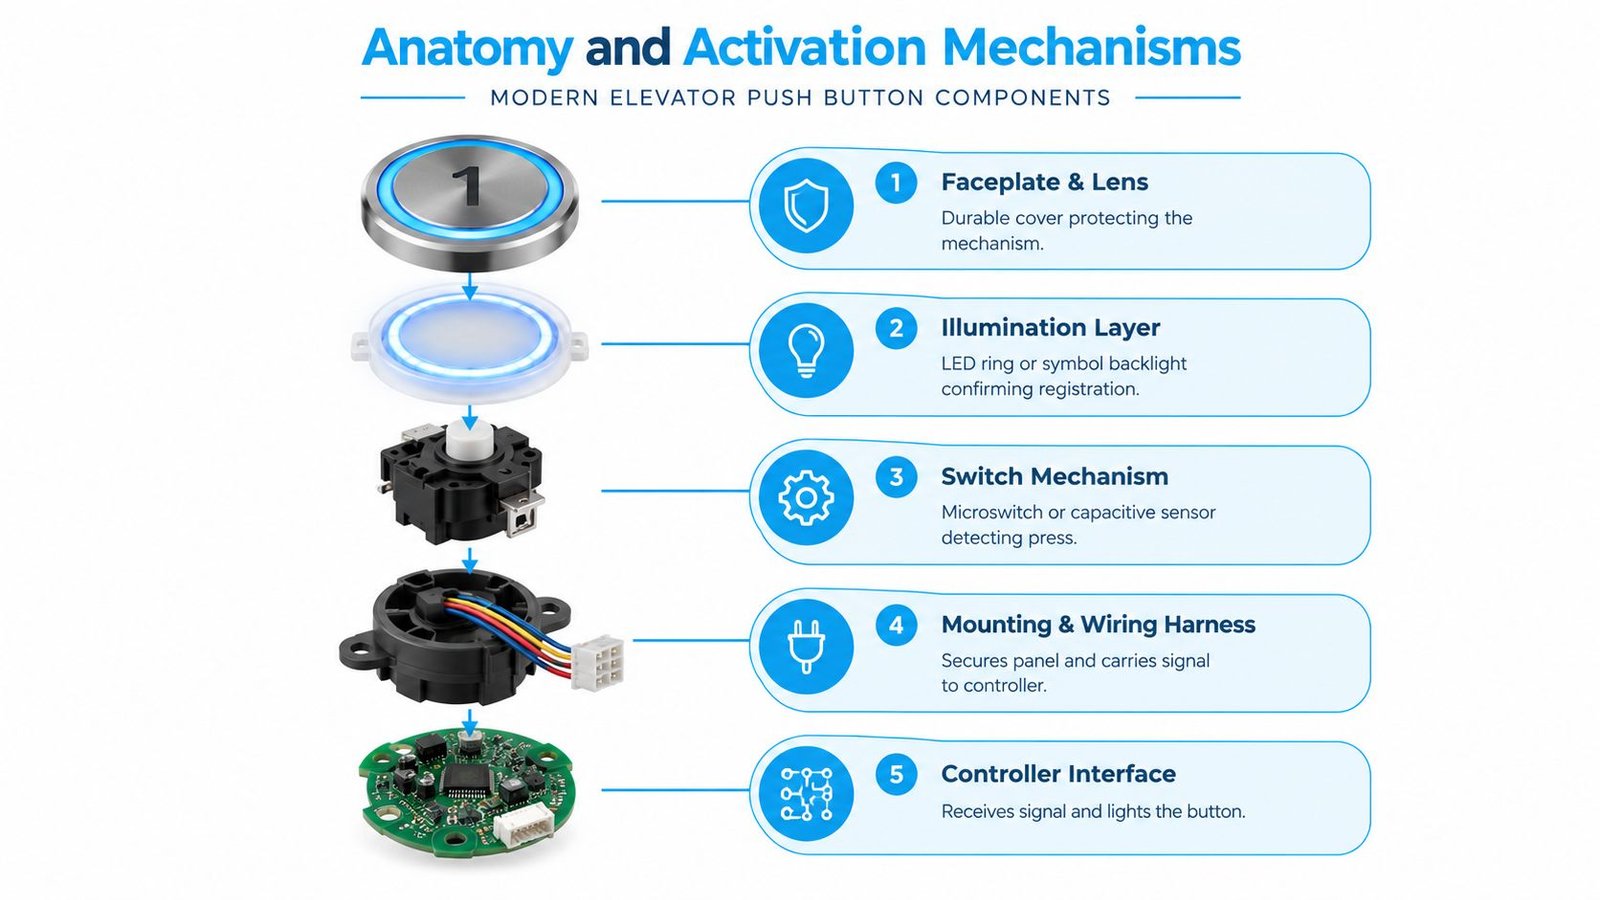
A modern elevator push button assembly is a small layered system. The visible cap or lens protects the active mechanism, an illumination circuit confirms registration, and a wiring harness carries the signal toward the elevator controller. The correct repair depends on knowing which layer has failed.
The parts behind the faceplate
A traditional mechanical button works much like a doorbell. Your finger moves the actuator, the actuator closes a switch, and the switch sends an electrical signal through the harness. You can often feel the travel and hear a click, which gives both the passenger and the technician useful feedback. Mechanical designs are familiar, serviceable, and generally straightforward to replace when the button and connector are compatible.
The outer lens and faceplate take the physical abuse. They must resist fingernails, keys, carts, cleaning cloths, and occasional impact while preserving the number, symbol, contrast, and tactile label. The mounting hardware keeps the button aligned with the panel, and the connector determines whether a replacement is a simple component change or part of a broader rewiring job.
Illumination is a separate concern. An LED ring, symbol, or locator light may show that the controller accepted a call, but a dark lamp doesn’t always mean the switch failed. A technician needs to distinguish a failed LED, a loose connector, a damaged conductor, a board issue, or a control signal problem.
Choosing the activation method
Solid-state and piezoelectric buttons are closer to a smartphone screen than a doorbell. They detect a change in pressure or electrical characteristics rather than relying on the same type of moving contact found in a conventional microswitch. With fewer moving parts, these designs can offer a clean front surface and useful resistance to wear, but they introduce electronics and compatibility considerations that matter during retrofit work.
Touchless infrared controls detect a hand or another object near the sensor rather than requiring contact. They can address hygiene concerns in some settings, but they aren’t automatically more accessible or more reliable. Sensor placement, false activations, cleaning residue, lighting conditions, vandal resistance, tactile identification, and compatibility with the existing panel all require review.
A contactless interface can remove a touch point, but it can’t remove the obligation to provide a clear, usable, code-compliant passenger control.
Ask the service provider to identify the existing activation technology, connector type, illumination method, panel cutout, and controller interface before approving a replacement. A snap-in mechanical button may solve a local failure. A piezoelectric or touchless upgrade may require a compatible interface board, new mounting arrangement, or panel modification. That distinction affects downtime, parts availability, inspection acceptance, and the total cost of the work.
Navigating ADA and Michigan Code Requirements
A button can fit the existing panel and still fail the passenger test. If it takes too much force, sits behind the faceplate, loses its tactile marking, or makes a floor number hard to find, the replacement creates an accessibility problem even when the installation looks clean.
The U.S. Access Board states that push-activated controls should require no more than 5 lbf of force, and elevator control buttons cannot be recessed. ADA elevator guidance also calls for raised or flush buttons, a smallest dimension of at least 3/4 inch, and tactile labeling. The guidance uses the raised-dot “5” key as an example and defines a dot-height range for tactile identification. See the U.S. Access Board guidance on operable parts for the applicable provisions.
Cleaning practices can create a second compliance problem. Repeated disinfectant use may soften a coating, cloud a lens, wear down raised characters, or leave residue around Braille dots. A fixture that passes inspection when installed can become harder to identify and operate if the finish is not compatible with the facility’s cleaning products.
A practical compliance check
Start with the button’s physical presentation. The actuator should be raised or flush, and its surface should let a passenger locate and press it without precise finger placement. Recessing can shield a switch from impact, but it does not make an inaccessible interaction acceptable.
Check the labels next. Floor numbers and other required controls need tactile identification that remains readable through routine cleaning and wear. Contrast supports passengers with low vision. Button size, spacing, and placement affect people with limited reach or dexterity. Before approving any fixture change, confirm the applicable standard against the full requirements summarized in our guide to ADA requirements for elevators.
Use this procurement sequence:
-
Confirm the applicable standard. Ask the elevator contractor and the authority having jurisdiction which code edition and accessibility provisions apply to the building and proposed alteration. A component marketed as “ADA compliant” has not necessarily been evaluated as part of your complete installation.
-
Measure the existing arrangement. Record the button diameter, panel opening, spacing, label location, faceplate thickness, connector arrangement, and illumination style. A replacement that looks similar in a photograph may change clearances or the relationship between the button and its tactile label.
-
Verify activation force and geometry. Obtain technical documentation for the proposed button, then have the installed control checked in its final condition. Alignment, over-tightening, contamination, and a new lens can make a mechanism harder to operate than it was on a workbench.
-
Inspect tactile markings after cleaning. Test the finish with the products and methods used by the facility. Confirm that staff can disinfect the surface without removing contrast, rounding raised features, or leaving a film that obscures Braille. Aggressive cleaning can shorten the useful life of the fixture and create repeat service work.
-
Document the retrofit. Keep the product information, installation record, test results, cleaning guidance, and inspection comments with the elevator file. This record helps resolve questions when ownership changes or another contractor services the equipment.
Why inexpensive substitutions create risk
Online replacement parts can look attractive when a facility needs a quick fix, but compliance and compatibility rarely show in a product photograph. A button may have the wrong force, an unsuitable connector, a recessed profile, weak tactile labeling, or a coating that reacts badly to disinfectant. The low purchase price can be outweighed by a failed inspection, another service visit, panel damage, or removal and reinstallation.
Michigan owners should involve a qualified elevator professional before changing the car operating panel. The contractor can coordinate fixture work with the elevator’s control and safety systems, determine whether the alteration requires additional review, and verify the finished passenger interface instead of treating the button as an isolated trim part.
Material Durability in High-Traffic Environments
Cleaning protocols expose a hidden conflict in elevator fixture selection. A surface needs to tolerate disinfectant, moisture, abrasion, and impact, but it also has to retain tactile labels, visual contrast, and dependable movement. The material that looks most hygienic on installation day may not be the material that remains usable after repeated wiping.
Industry documentation describes lift fixtures with IP54 push buttons, reduced gaps around the actuator, metallic or stainless-steel faceplates, and screw-less fixing intended to limit ingress and tampering. EN 81-71 Category 2 vandal-resistant buttons are positioned for demanding public environments. Copper push-button retrofits have also been marketed for infection-control use in healthcare, education, and transit, including designs with no wiring changes and IP54 protection. (Elevator World’s overview of elevator signal fixtures)
Material comparison
| Material | Best Use Case | Cleaning Durability | Vandal Resistance |
|---|---|---|---|
| Stainless steel | Public, industrial, municipal, and high-contact installations | Generally strong against routine wiping, but the grade, finish, seams, and cleaner compatibility still matter | Strong when the actuator, fasteners, and mounting are designed as a complete assembly |
| Polycarbonate | Cost-sensitive interiors and installations where a molded lens or colored surface is useful | Can cloud, scratch, or degrade when exposed to unsuitable chemicals or aggressive cleaning over time | Moderate, depending on thickness, mounting, and whether people can pry or strike the lens |
| Copper | Facilities prioritizing a material-based infection-control approach or a retrofit with minimal wiring changes | Requires confirmation that the surface and markings tolerate the site's disinfectant and cleaning process | Varies by construction, with surface appearance and tactile details requiring inspection |
Stainless steel is usually the dependable choice for abuse, but it isn’t automatically accessible. A polished surface can create glare, and a poorly designed overlay can reduce contrast or make tactile numbers hard to distinguish. The actuator, marking, illumination, and faceplate have to be specified together.
Polycarbonate offers design flexibility and can be practical for protected indoor settings. Its weakness appears when staff use a cleaner that attacks the material or when repeated abrasion creates a cloudy, scratched surface. Once the lens becomes difficult to read, a facility may face both an appearance complaint and an accessibility concern.
Copper can be useful where the owner wants a retrofit associated with infection-control goals, particularly when the proposed assembly can use existing wiring. It still needs a cleaning compatibility review. Copper isn’t a substitute for routine cleaning, good hand hygiene, appropriate ventilation, or a complete accessibility assessment.
Cleaning is part of the specification
Buyer guidance for elevator buttons emphasizes resistance to frequent cleaning, abrasion, moisture, and repeated impact while preserving tactile labels, contrast, and Braille legibility. It also warns that aggressive cleaners can degrade coatings and surfaces over time. (Elevator push-button material and maintenance guidance)
Before procurement, give the fixture manufacturer the actual cleaning product, dilution instructions, dwell time, wiping method, and frequency used by the facility. “Hospital grade” doesn’t describe a single chemical exposure. Two products with similar disinfection purposes can affect coatings, plastics, adhesives, and printed markings differently.
Procurement rule: Approve the button and the cleaning method as one system. A durable actuator with a fragile label is still a short-lived installation.
Diagnosing Common Failure Modes
A dead elevator push button isn’t necessarily a dead button. The visible actuator is only one possible failure point, and replacing it without testing can leave the actual defect untouched. Start by recording what the passenger experiences, then compare that symptom with the indicator light, adjacent controls, and elevator response.
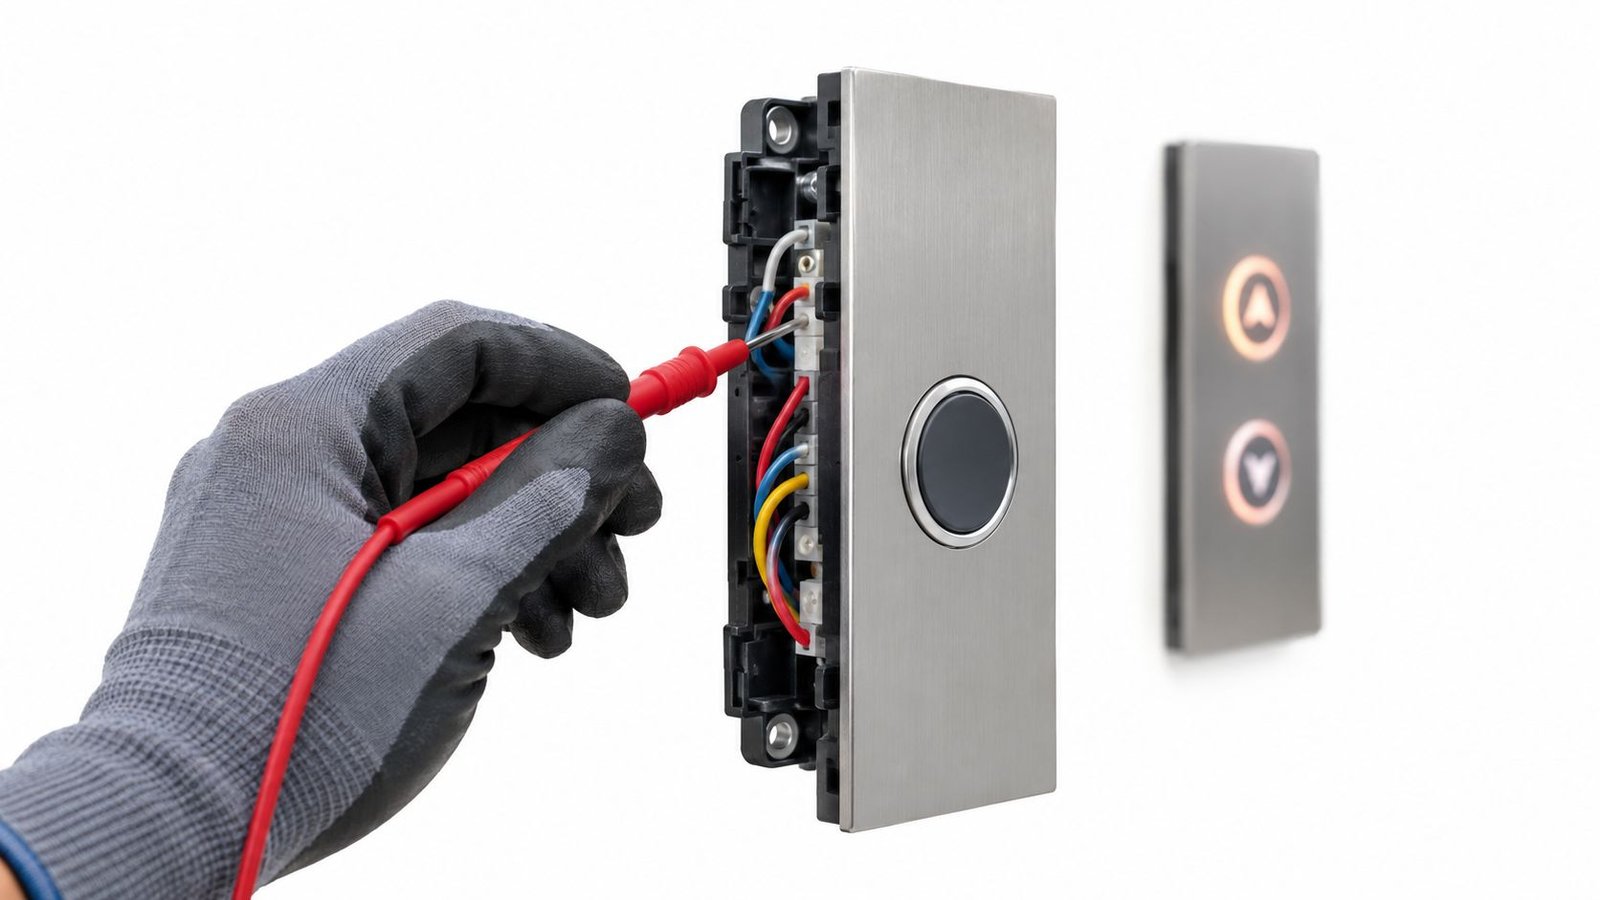
A mechanical microswitch may wear, stick, or lose a consistent contact. A lens can crack or become misaligned, preventing the actuator from moving far enough. An LED can fail while the button still sends a valid command, or the illumination circuit can lose power while the switch remains operational.
The wiring harness deserves equal attention. Loose terminals, corrosion, pinched conductors, and damaged connectors can interrupt the signal between the button and the controller. Moisture or cleaning fluid that reaches an opening around the actuator can create intermittent symptoms that are difficult to reproduce during a brief visit.
Separate a local fault from a system fault
Use the symptom pattern as a starting point, not as a final diagnosis:
- One button fails while neighboring buttons operate normally. Suspect the actuator, switch, lens alignment, LED, connector, or local wiring first.
- Several buttons in one area fail together. Check a shared harness, connector, circuit board, or power supply rather than replacing each button independently.
- The button lights but the elevator doesn’t respond correctly. The input may be reaching the system while a controller, dispatch, door-lock monitoring, or related logic issue prevents the expected movement.
- The button works intermittently after cleaning. Look for residue, moisture intrusion, a failing contact, or a connector that moves with panel pressure.
- Multiple controls and car functions behave strangely. Treat the problem as potentially systemic and keep the elevator under qualified service supervision until the cause is established.
A service request should include the floor or function involved, whether the indicator illuminates, whether the problem is constant or intermittent, what cleaning occurred before the failure, and whether other buttons or doors are affected. That information helps the technician bring the likely replacement parts and test equipment rather than treating the visit as a blind swap.
A qualified provider can test continuity, voltage, connector condition, input response, and related control functions. Facility staff shouldn’t open an energized elevator panel or bypass a control circuit. For a targeted component assessment, use a service such as elevator button repair and provide the symptom record before the visit.
A button replacement may restore the passenger interface, but a door-lock monitoring fault or controller input problem requires a different repair path. The technician must confirm the complete sequence, from physical activation through controller recognition and the expected elevator response.
The following video provides a visual reference for electrical repair work. It should supplement, not replace, a site-specific diagnosis by a qualified elevator professional.
Retrofit Options and Michigan Service Coverage
A worn car operating panel doesn’t always require a complete cab replacement. A properly planned retrofit can replace faded lenses, damaged actuators, failed illumination, and obsolete control components while retaining serviceable parts of the existing panel. The important distinction is between a cosmetic button swap and a coordinated interface modernization.
Non-proprietary equipment can help an owner avoid unnecessary dependence on a single manufacturer for future service. That doesn’t mean every universal-looking button will work. The replacement still needs the correct electrical characteristics, panel fit, tactile treatment, illumination, environmental protection, and compatibility with the elevator controller.
Match the retrofit to the building
A hospital may prioritize cleanable surfaces, sealed construction, tactile legibility, and rapid restoration after a failure. A school or municipal building may need stronger resistance to impact and tampering. An industrial facility may need a fixture that handles dust, moisture, gloves, and rougher use. A residential building may place more emphasis on appearance, quiet operation, and preserving an older panel’s character.
Good retrofit planning starts with a condition survey. Record the panel dimensions, existing button technology, wiring arrangement, faceplate condition, accessibility features, cleaning products, and recurring failure history. If the panel has multiple mismatched repairs, replacing only the visibly failed button may create inconsistent force, color, illumination, or tactile presentation across the car.
For Michigan owners, regional response also affects the practical value of a modernization plan. Elevator service needs don’t stop at the largest metros. Facilities in Traverse City, Kalamazoo, Flint, Saginaw, Muskegon, Battle Creek, East Lansing, Chelsea, Brighton, Holland, Grand Haven, Howell, Jackson, Rockford, Saugatuck, South Haven, and St. Johns may all need routine maintenance, emergency response, inspections, repairs, or modernization support. Service territories in the state already include these communities and the surrounding areas. (Michigan elevator service coverage examples)
What a complete service relationship should include
A practical contractor relationship covers more than a replacement cap. It should support preventative maintenance, repairs, code-required inspections, testing, emergency response, and full non-proprietary modernization for the building’s vertical transportation equipment. That may include passenger and freight elevators, residential elevators, wheelchair lifts, material lifts, and dumbwaiters.
The Michigan contractor serving Detroit, Lansing, Ann Arbor, Grand Rapids, and surrounding areas operates as a family-owned company with over 25 years of hands-on experience. Its stated service offering includes full clean-downs of machine rooms, pits, and car tops, COP and PI bulb replacement, door-lock monitoring, hydraulic packing, jack, cable, tank, power unit, motor, sheave, and machine replacement, safety tests, emergency phones, fire service, generator testing, and violation corrections.
Its maintenance program includes a “No Show, No Pay” policy, while field operations are available 24/7/365 for emergency needs. Free second opinions, competitive quotes, a price-beat guarantee, and commercial elevator and modernization financing can help owners compare repair and replacement paths without treating the first failed button as an isolated purchase.
The right approach is proactive, not because every button needs immediate replacement, but because the panel provides early evidence about use, cleaning, impact, and aging. Document recurring failures, verify the proposed interface against accessibility requirements, and modernize the components that create avoidable downtime before a small fixture issue becomes a passenger complaint or inspection problem.
Creating a Proactive Maintenance Checklist
A useful button inspection is short, repeatable, and documented. Assign responsibility to the building team for visible checks, then use a qualified elevator contractor for electrical testing, adjustments, code evaluation, and repairs behind the panel.
Routine checks for the facility team
- Inspect the surface: Look for cracked lenses, faded symbols, loose faceplates, damaged tactile labels, and residue around the actuator.
- Test the response: Press each button normally and confirm a clean action, immediate illumination where provided, and the expected elevator response.
- Check the lighting: Look for dark segments, uneven LED rings, flickering indicators, or illumination that no longer matches neighboring controls.
- Clean carefully: Use the approved product and method for the installed material. Don’t flood the panel, scrape tactile markings, or substitute a stronger chemical because a surface looks dirty.
- Record changes: Note the button location, symptom, cleaning product, date, and whether the problem is intermittent. A pattern is more useful than an isolated complaint.
- Escalate unsafe conditions: Remove the elevator from normal use or contact the service provider when a control is loose, exposed, electrically suspect, or associated with abnormal door or travel behavior.
For older panels, include a tactile and contrast review in the maintenance record. A button can remain electrically functional while its raised marking, Braille, or visual contrast becomes difficult to use. For illumination work, coordinate the replacement with a provider that handles the complete fixture and can verify the indicator after installation, such as elevator button light replacement.
Schedule professional preventative maintenance before the panel develops a cluster of failures. Ask the technician to review the button mechanism, connectors, harness, panel mounting, illumination circuit, cleaning damage, accessibility features, and related controller inputs. This approach gives the owner a defensible record of what was checked and helps prioritize a targeted retrofit instead of repeated emergency substitutions.
A Michigan facility can get help with elevator push-button repairs, button lighting, preventative maintenance, inspections, emergency service, and non-proprietary modernization for many types of vertical transportation. Visit Crane Elevator Company to request a service assessment and discuss the right compliant, durable path for your building.